DEPRECATED - Configuring the Jetson TX2
This instructions displays how to setup the NVIDIA Jetson TX2. The usage of the NVIDIA Jetson TX2 is no longer supported therefore this setup is deprecated.
- Equipment Used:
Pit/Host laptop/computer running Ubuntu 16.04 or 18.04
Fully built F1TENTH vehicle
External monitor/display
HDMI cable
Keyboard
Mouse
Approximate Time Investment: 1-2 hours
Overview
The TX2 is essentially a supercomputer on a module. We attach it to the Orbitty Carrier board so that we can access the TX2’s peripheral. In order to configure the Jetson TX2, we need to install a few software on the Pit/Host laptop first and then use them to flash the TX2.
Jetson Nano
Jetson AGX Xavier
Jetson TX2 (what we use)
Jetxon TX1
JetPack versions:
JetPack 4.3 - OS L4T (Linux4Tegra) 32.3.1 (works w/ Ubuntu Melodic 18.04) (what we use)
JetPack 3.2 - OS L4T 28.3.1 (Works w/ Ubuntu Xenial 16.04)
JetPack 2.4 - OS L4T 24.2.3 (old version OK for TX1)
We will refer to the TX2 as TX2 or Jetson interchangeably.
1. Install NVIDIA SDK Manager on Pit/Host Computer
We first need to install NVIDIA SDK Manager. It provides an end-to-end development environment setup solution for NVIDIA’s DRIVE and Jetson SDKs for both host machine and target devices.
Go to nvidia.com and create a user account for yourself
Download NVIDIA SDK Manager for “All Jetson Developer Kits” and run SDKM. Installation help can be found here.
On host computer, extract and launch SDK Manager.
2. Installing JetPack on Pit/Host Computer
- Install JetPack 4.3 (L4T 32.3.1) on Pit/Host computer with NVIDIA SDK Manager.
In Hardware Configuration: select Host Machine and in for Target Hardware, select Jetson TX2.
If your window does not display all information, press Tab to scroll down, or use a bigger monitor.
Follow instructions in SDKM,
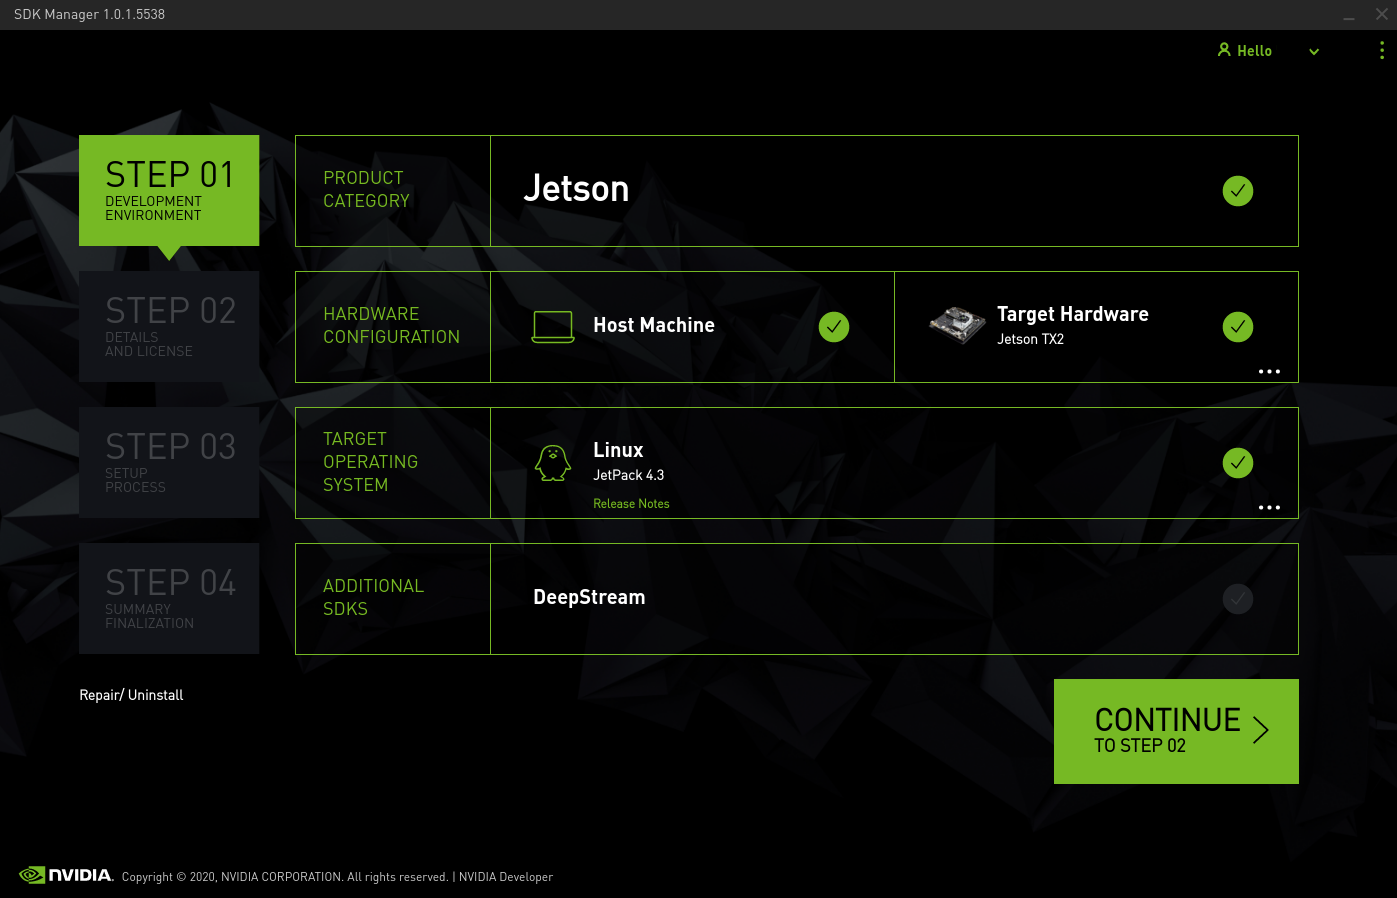
NVIDIA SDK Manager.
If running into errors, close and relaunch SDKM, then choose repair/uninstall under the STEP 4 button.
3. Installing Orbitty BSP on Pit/Host Computer
Download and install BSP for Orbitty Carrier board on Pit/Host computer. Choose the Jetson TX2/TX2 4GB/TX2i module.
On Board Support Packages tab, select TX2 L4T r32.3.1 – Jetpack 4.3. This should be the first Board Support Packages.
Extract the .tgz file and find readme.txt in the folder; read the instructions and go through steps 1-4.
Make sure the sdk manager is installed under
$home/nvidia/nvidia_sdkCopy the
CTI-L4T-TX2-32.3.1-V001.tgzinto$home/nvidia/nvidia_sdk/JetPack.3_Linux_GA_P3310/Linux_for_Tegra/Extract the BSP by double clicking it or by running commands in Terminal under the correct directory
tar -xzf CTI-L4T-TX2-32.3.1-V001.tgz
cd ..
In the Terminal, under
$home/nvidia/nvidia_sdk/JetPack.3_Linux_GA_P3310/, runsudo ./install.sh
4. Connecting the TX2
4 things need to be connected to the Orbitty Carrier Board.
A display via the HDMI port (P2)
A keyboard and mouse connected to the USB ports on the USB hub (P7) connected to the Orbitty
The Pit laptop via a micro USB (P8)
Power (green 12V terminal block)
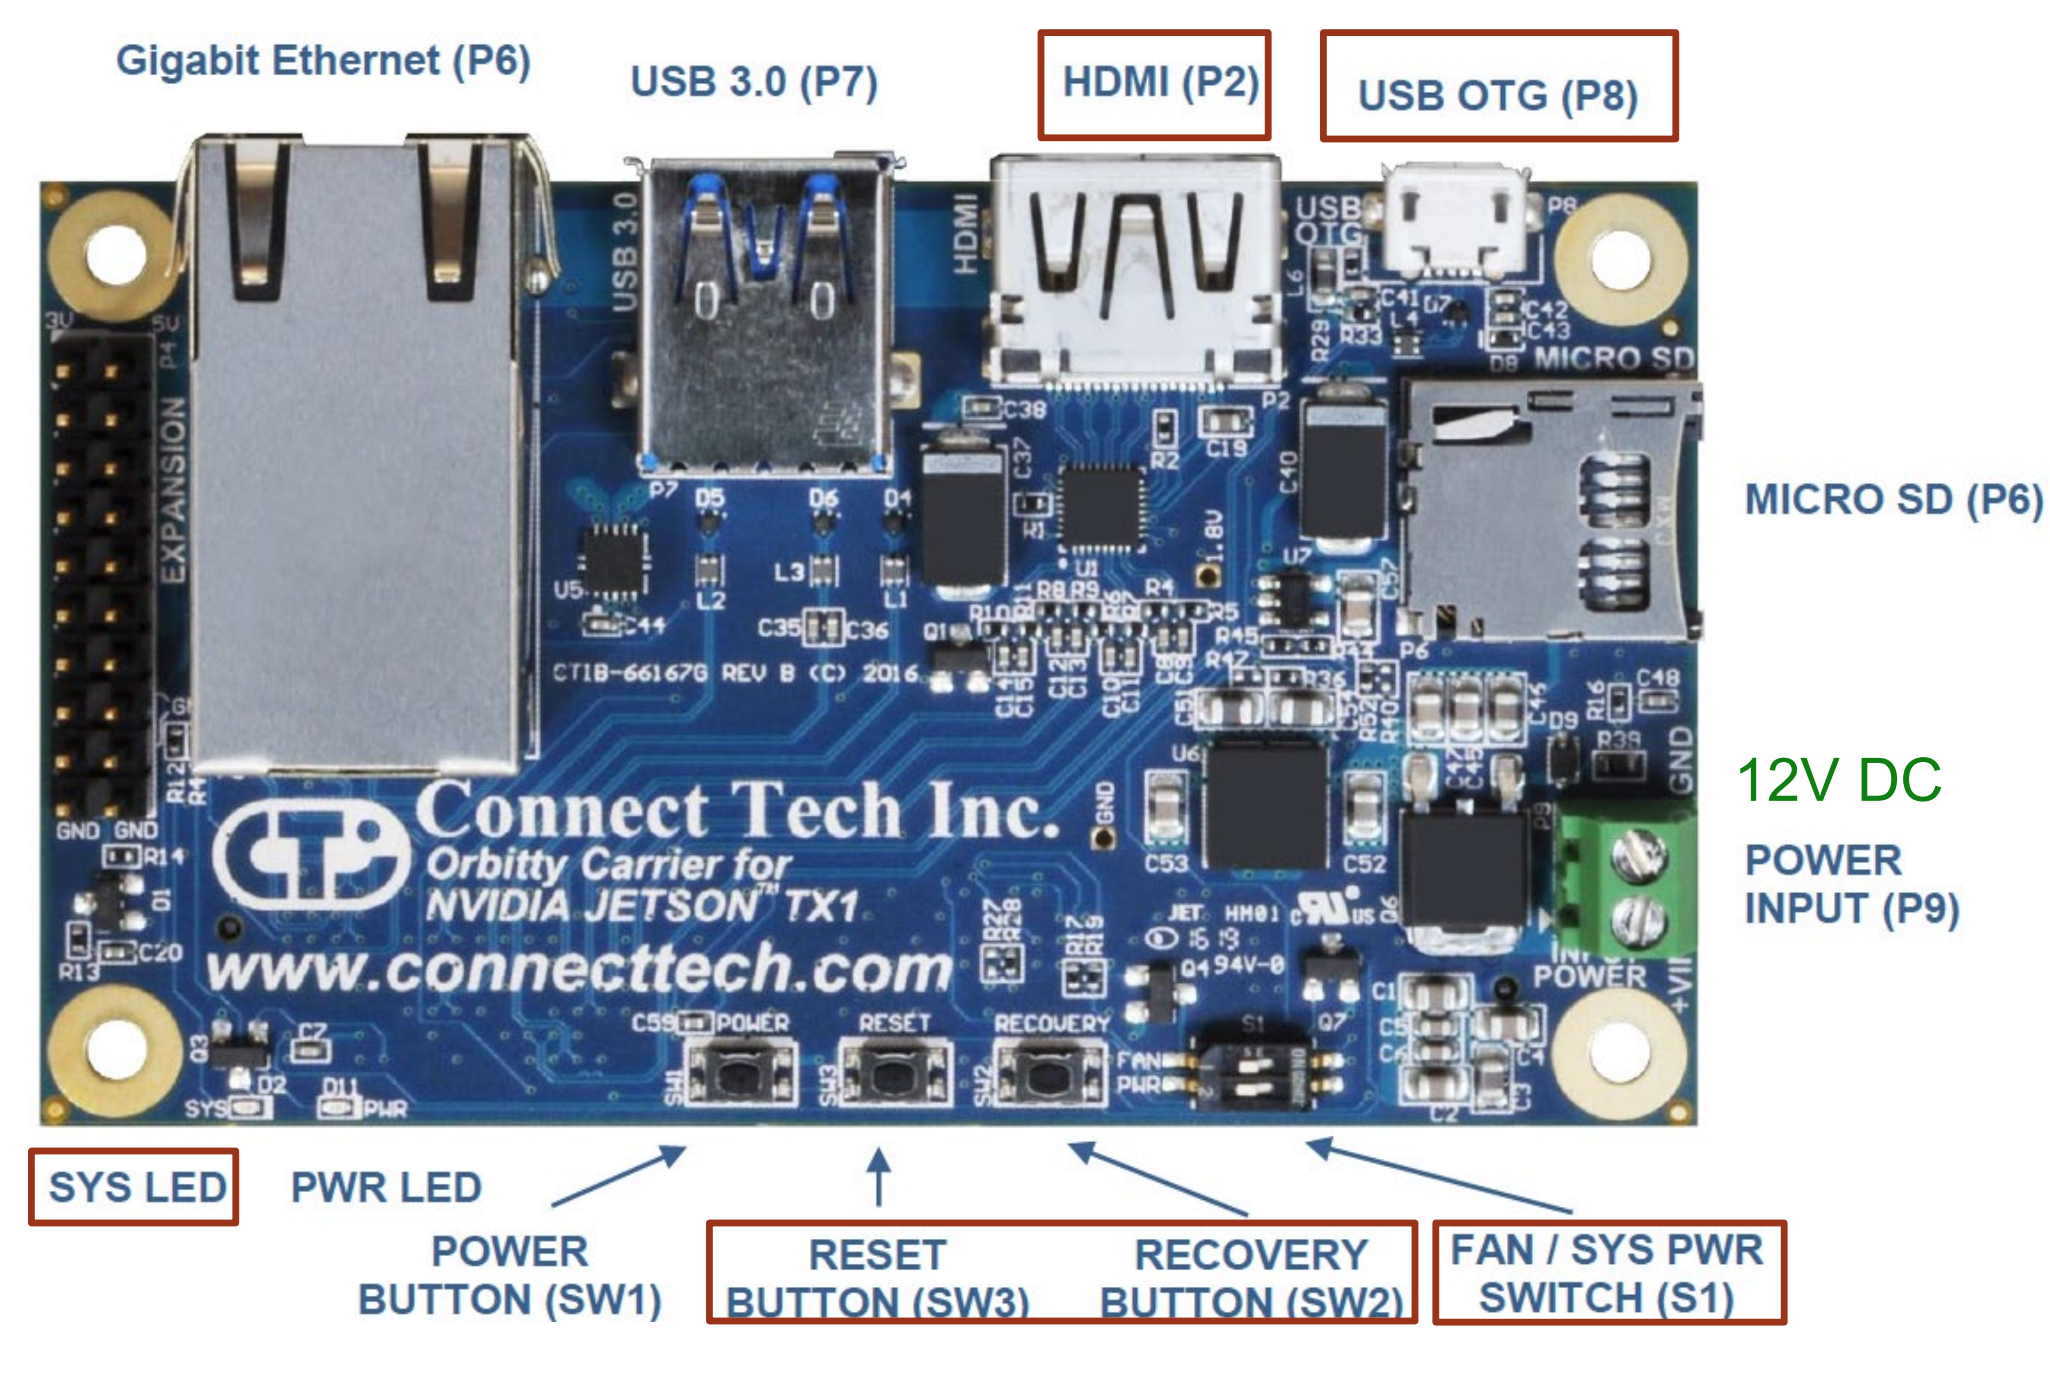
Layout of Orbitty Carrier Board.
Turn the SYS PWR switch S1 to the left.
Plug in the battery in.
Turn the powerboard on.
The monitor shall display some text in a terminal window.
Note that the display and keyboard are separate from the Pit/Host computer. You essentially have two separate computers set up side by side at this point: the TX2 and the Pit/Host computer.
5. Flashing the TX2 with the Orbitty Carrier
Watch the first two minutes of this.
Put the Orbitty board and Jetson in to RECOVERY mode.
Press and hold the RECOVERY key, then press the RESET button, the SYS LED shall be off;
Release the RESET button, wait 2 seconds and release the RECOVERY button. The monitor shall display nothing now. The Jetson and Orbitty are in RECOVERY mode.
Check if the TX2 shows up in USB devices on the Pit computer by opening a terminal and typing
lsusb.
On the Pit/Host computer manually flash the boards by typing the following into the terminal
$sudo ./flash.sh cti/tx2/orbitty mmcblk0p1
It will take about 10 minutes to finish flashing. When completed, the terminal should display:
The target t186ref has been flashed successfully.
Reset the board to boot from internal eMMC.
Note: CTI assisted flash does not work. (i.e.
$sudo ./cti-flash.sh(error messageflash.sh requires root privilegeif no sudo), then choose 3 (Orbitty) in Menu 1 and 1 or 3 in Menu 2. error message sayingfailed flashing t186ref
3. Turn the SYS PWR switch (S1) to the right. Press the PWR button on Orbitty. The monitor on Orbitty shall display CTI-L4T welcome screen.
6. Working on the TX2
This is where you will need to use the keyboard and mouse connected to the USB hub on the vehicle.
Follow instructions on screen to finish setting up CTI-L4T on Jetson.
Install ROS like you did in the previous section, Pit/Host Setup.
If you are tired of entering all those commands again, then download the installation script installROS.sh and adapt it for the new ROS version. Similarly, you may modify
setupCatkinWorkspace.shfor the new Ubuntu+ROS versions.
Now you should have the TX2 up and running and ready to use!