In the third part we’re going to assemble the upper level chassis and mount the important components. The complete process for the third hardware part can be watched in this video tutorial too.
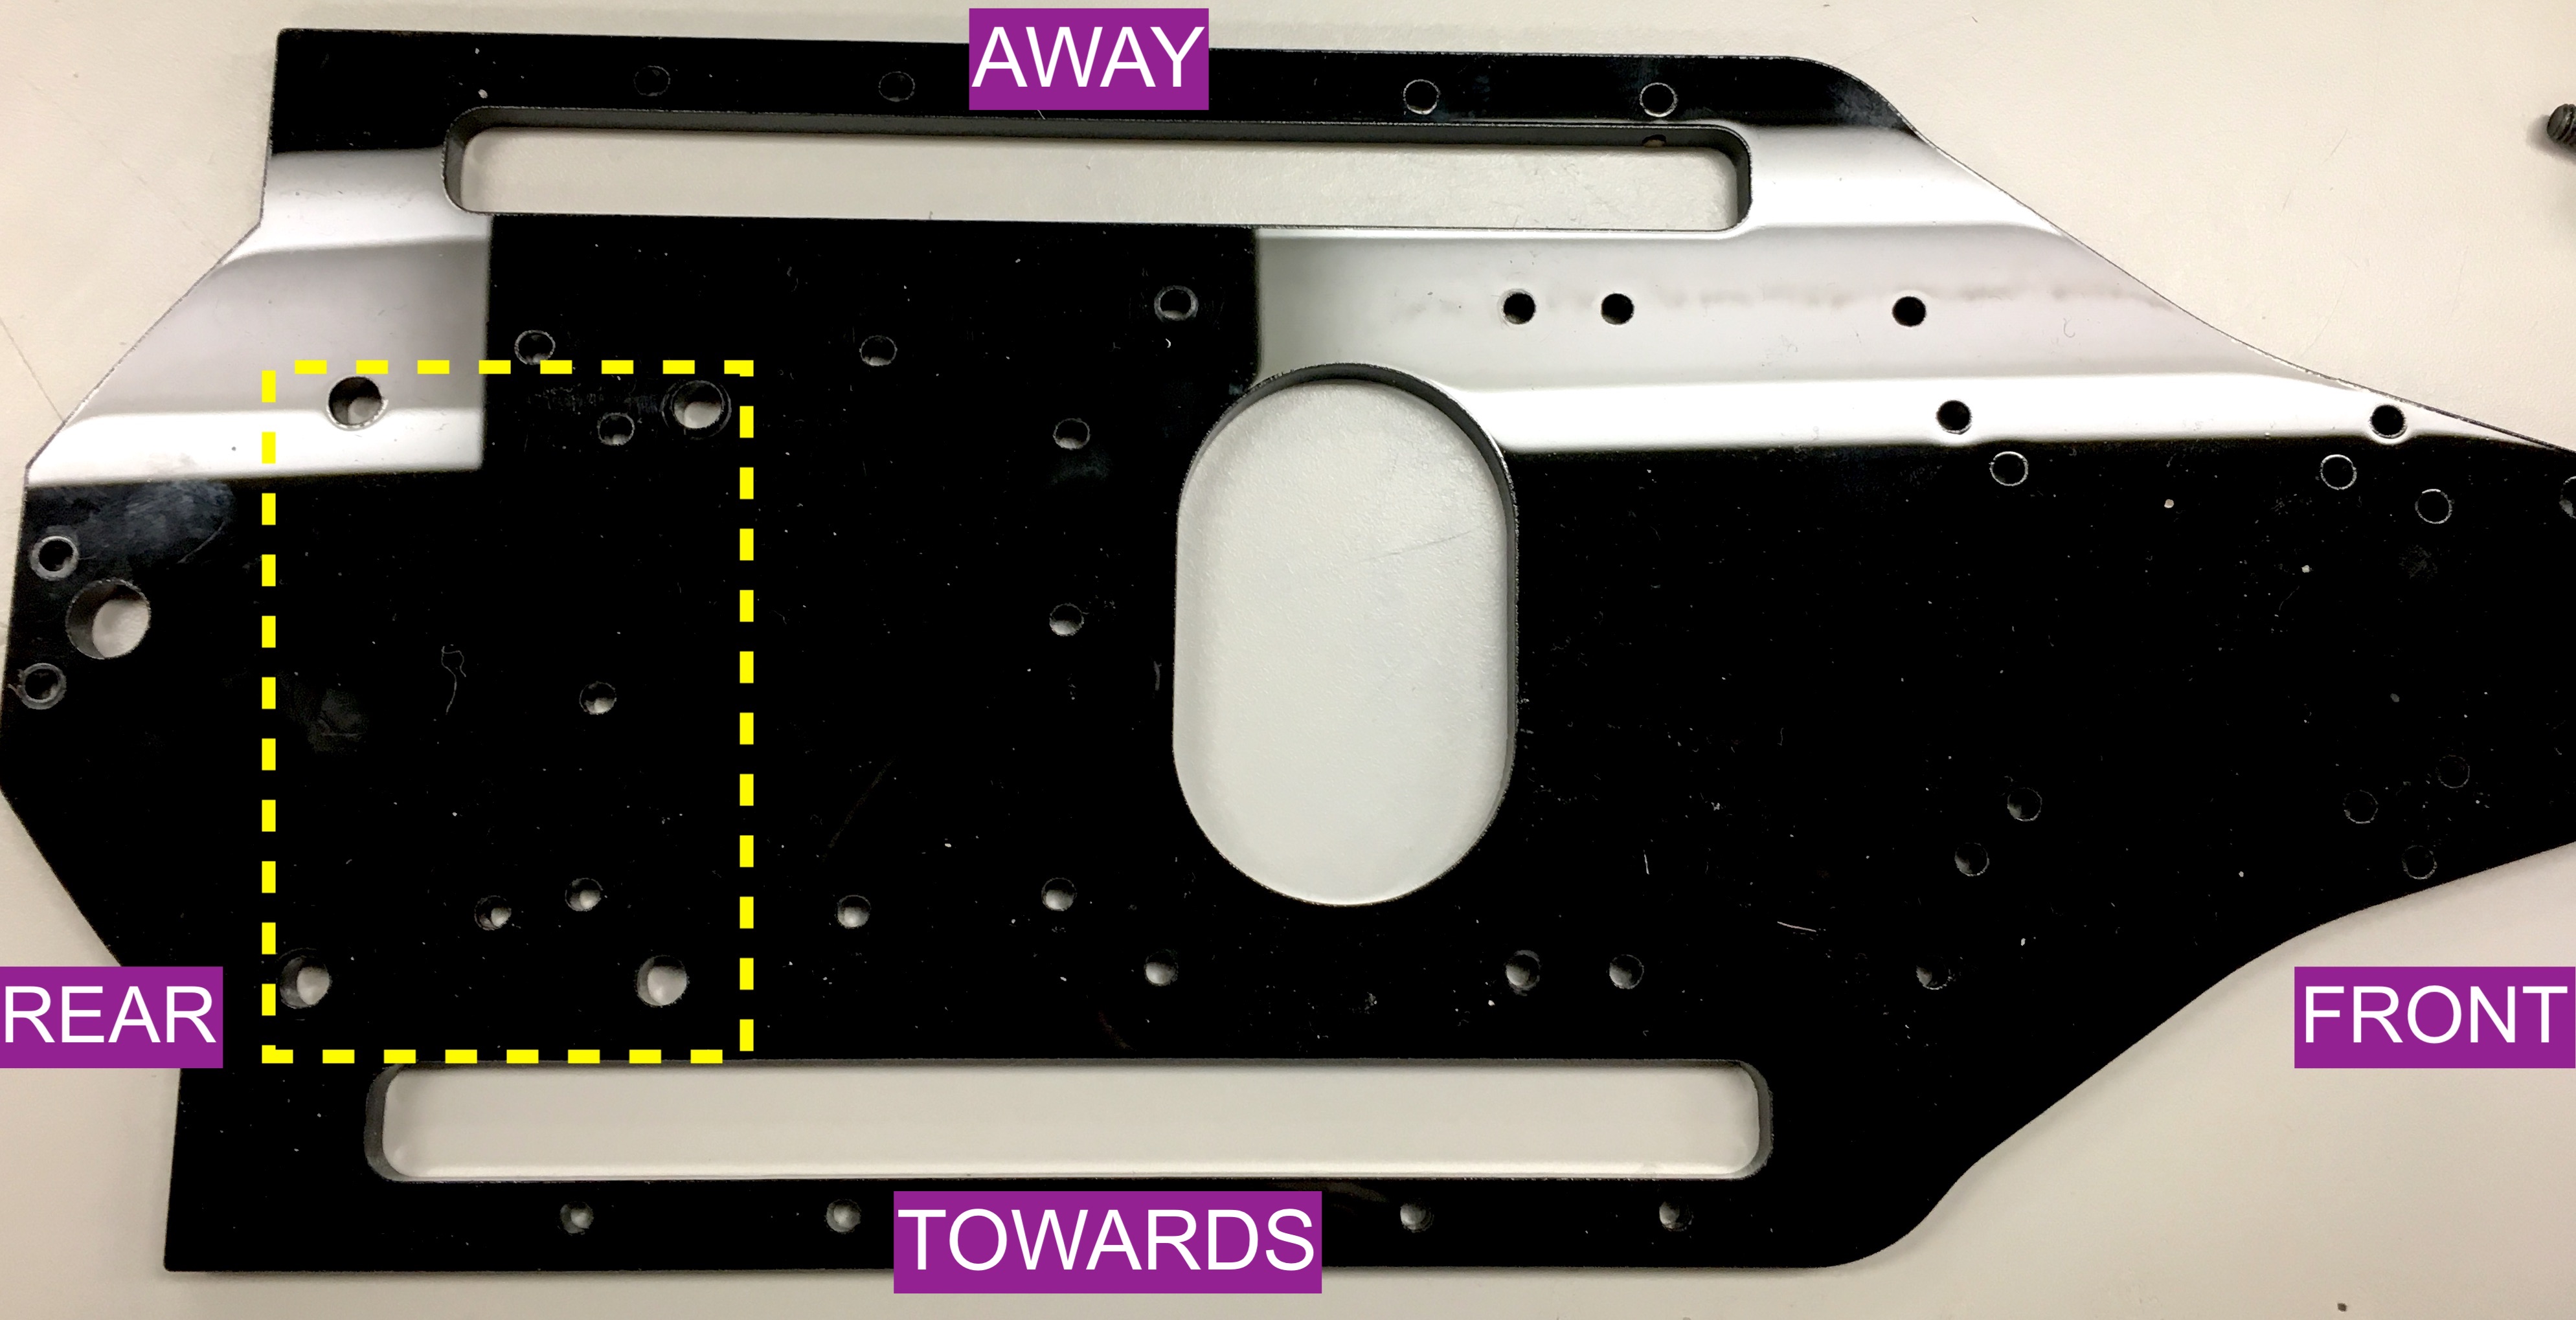
Place the Platform Deck so it’s facing you like this. The Platform Deck is the laser cut piece.
To make things easier to follow, we define Front, Rear, Away, and Towards like above.
Important
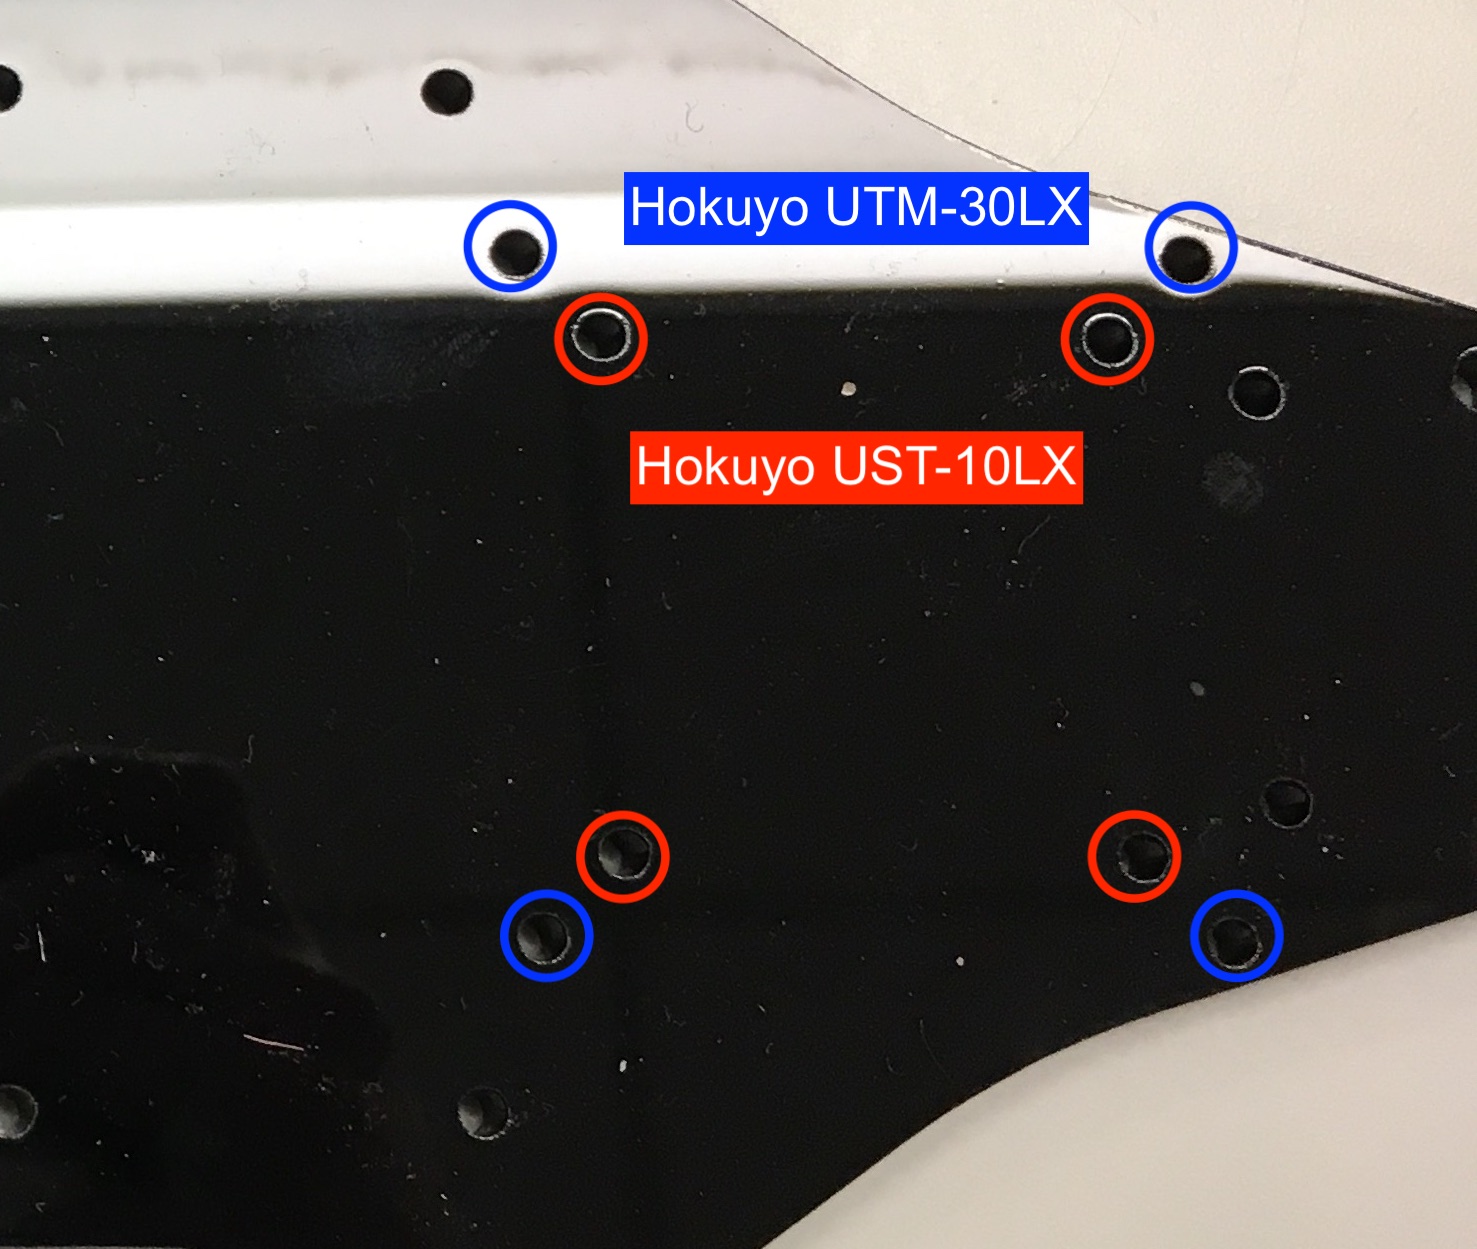
This piece is not symmetric. Notice in the figure above that the big M5 VESC mounting holes marked in yellow are not centered. The holes need to be skewed TOWARDS to you.
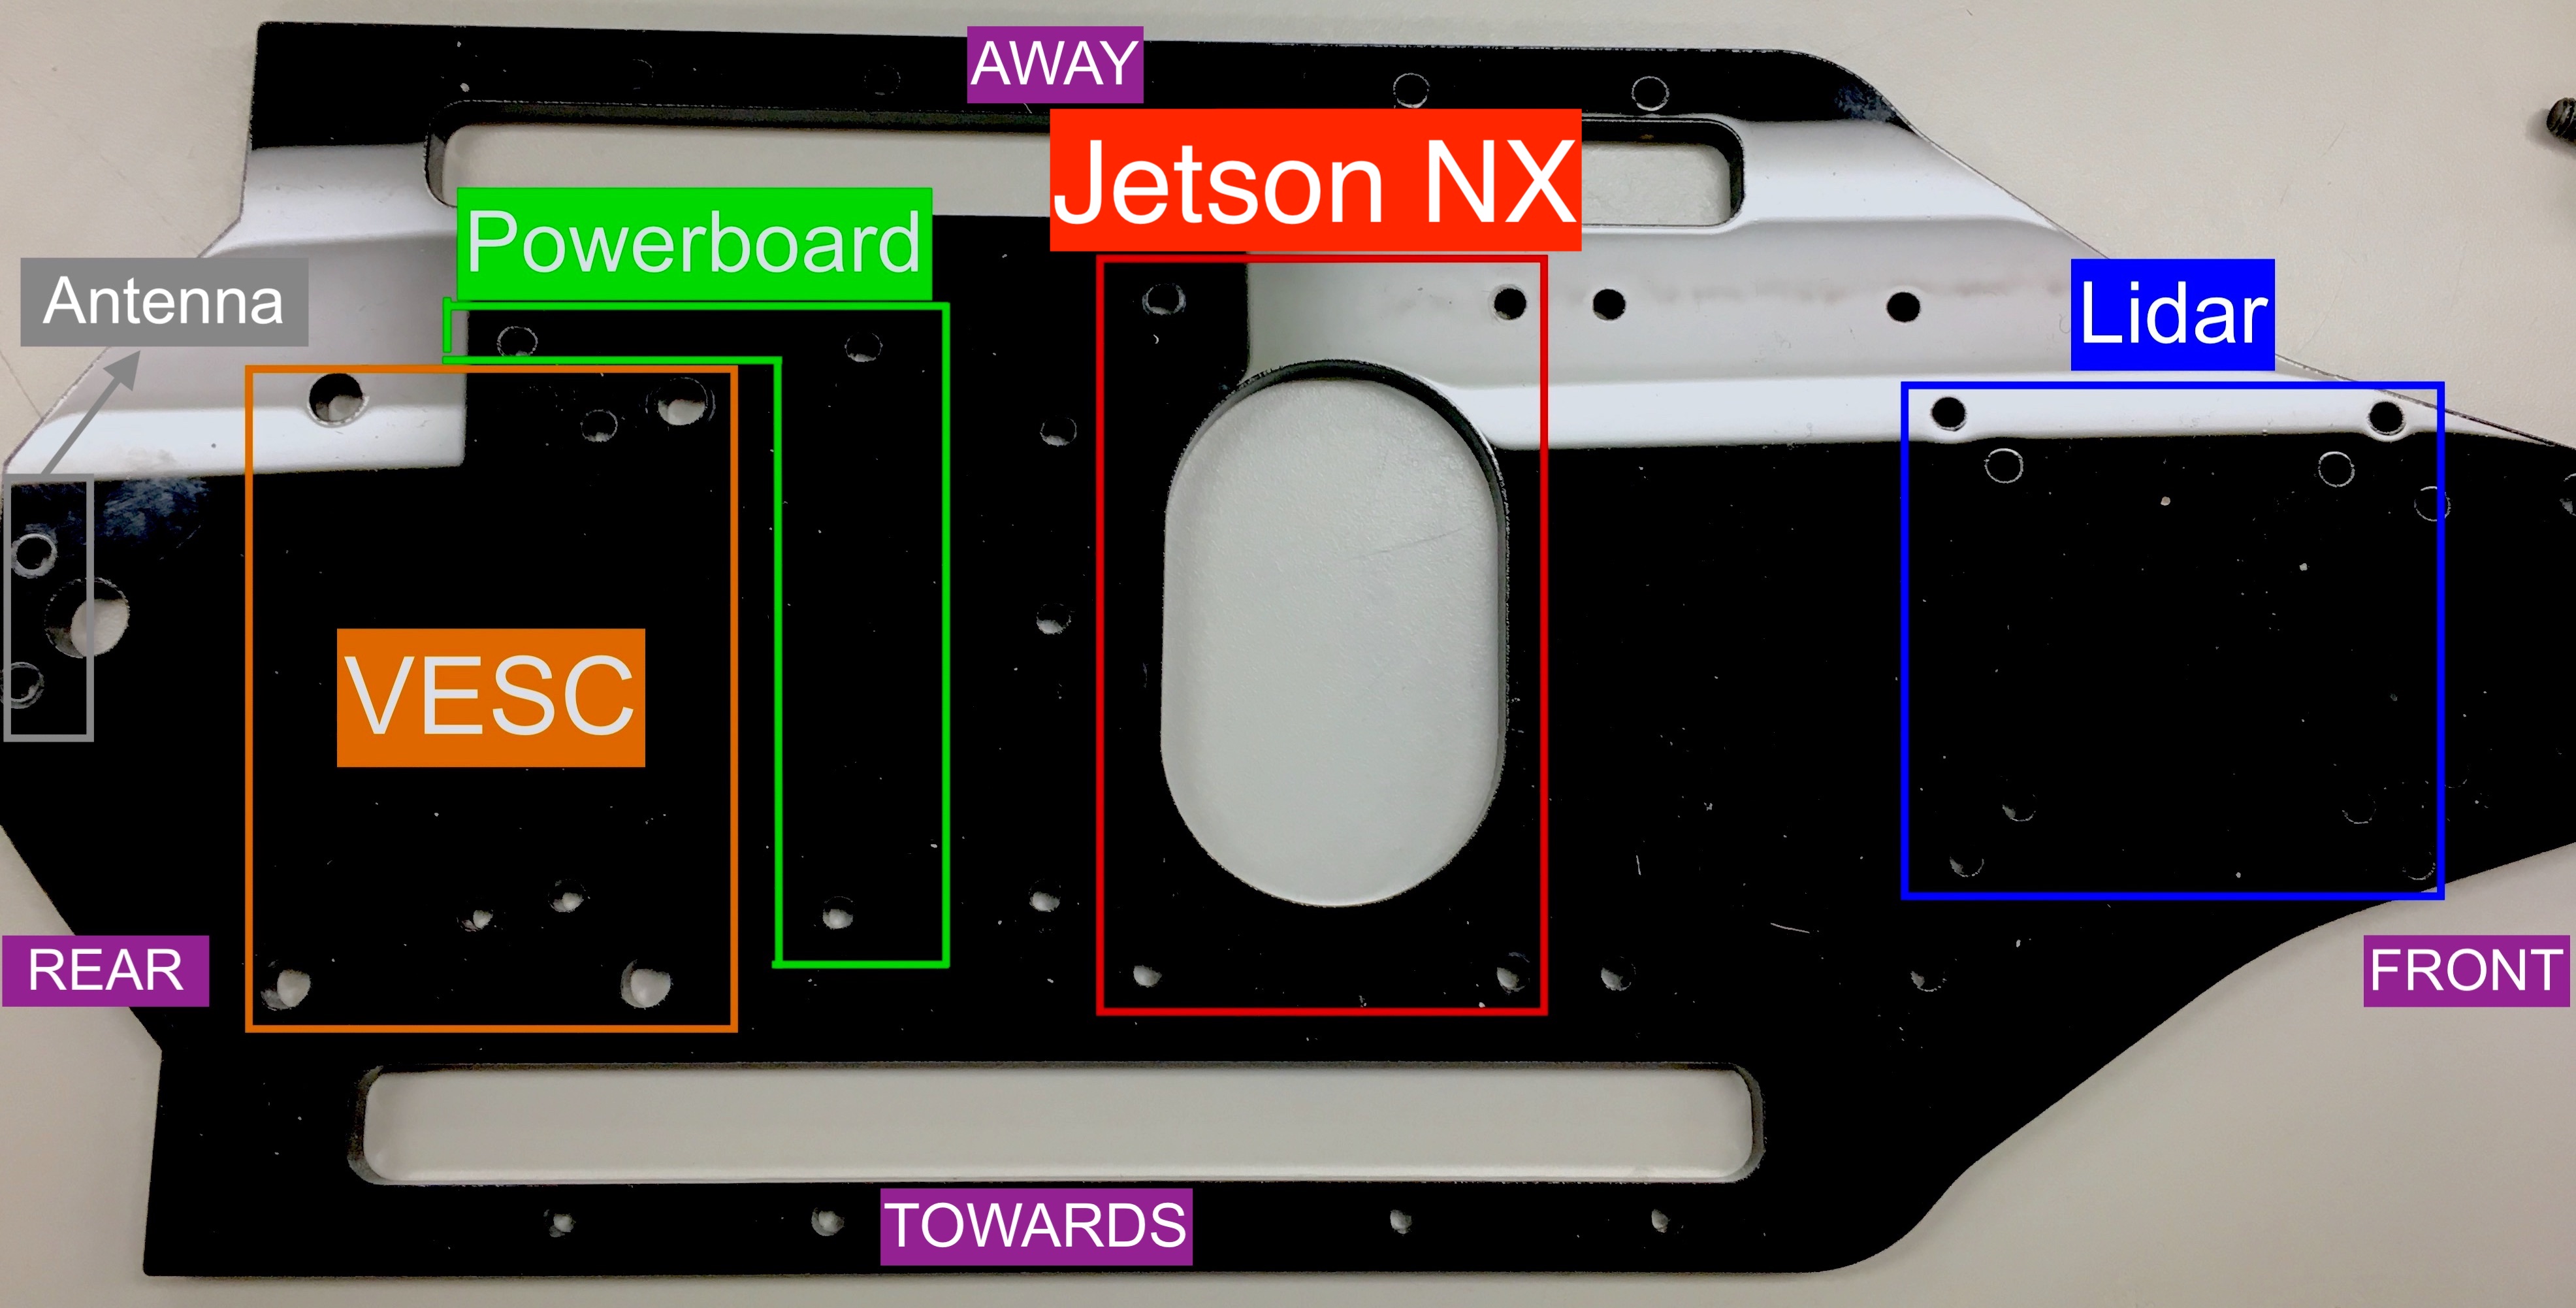
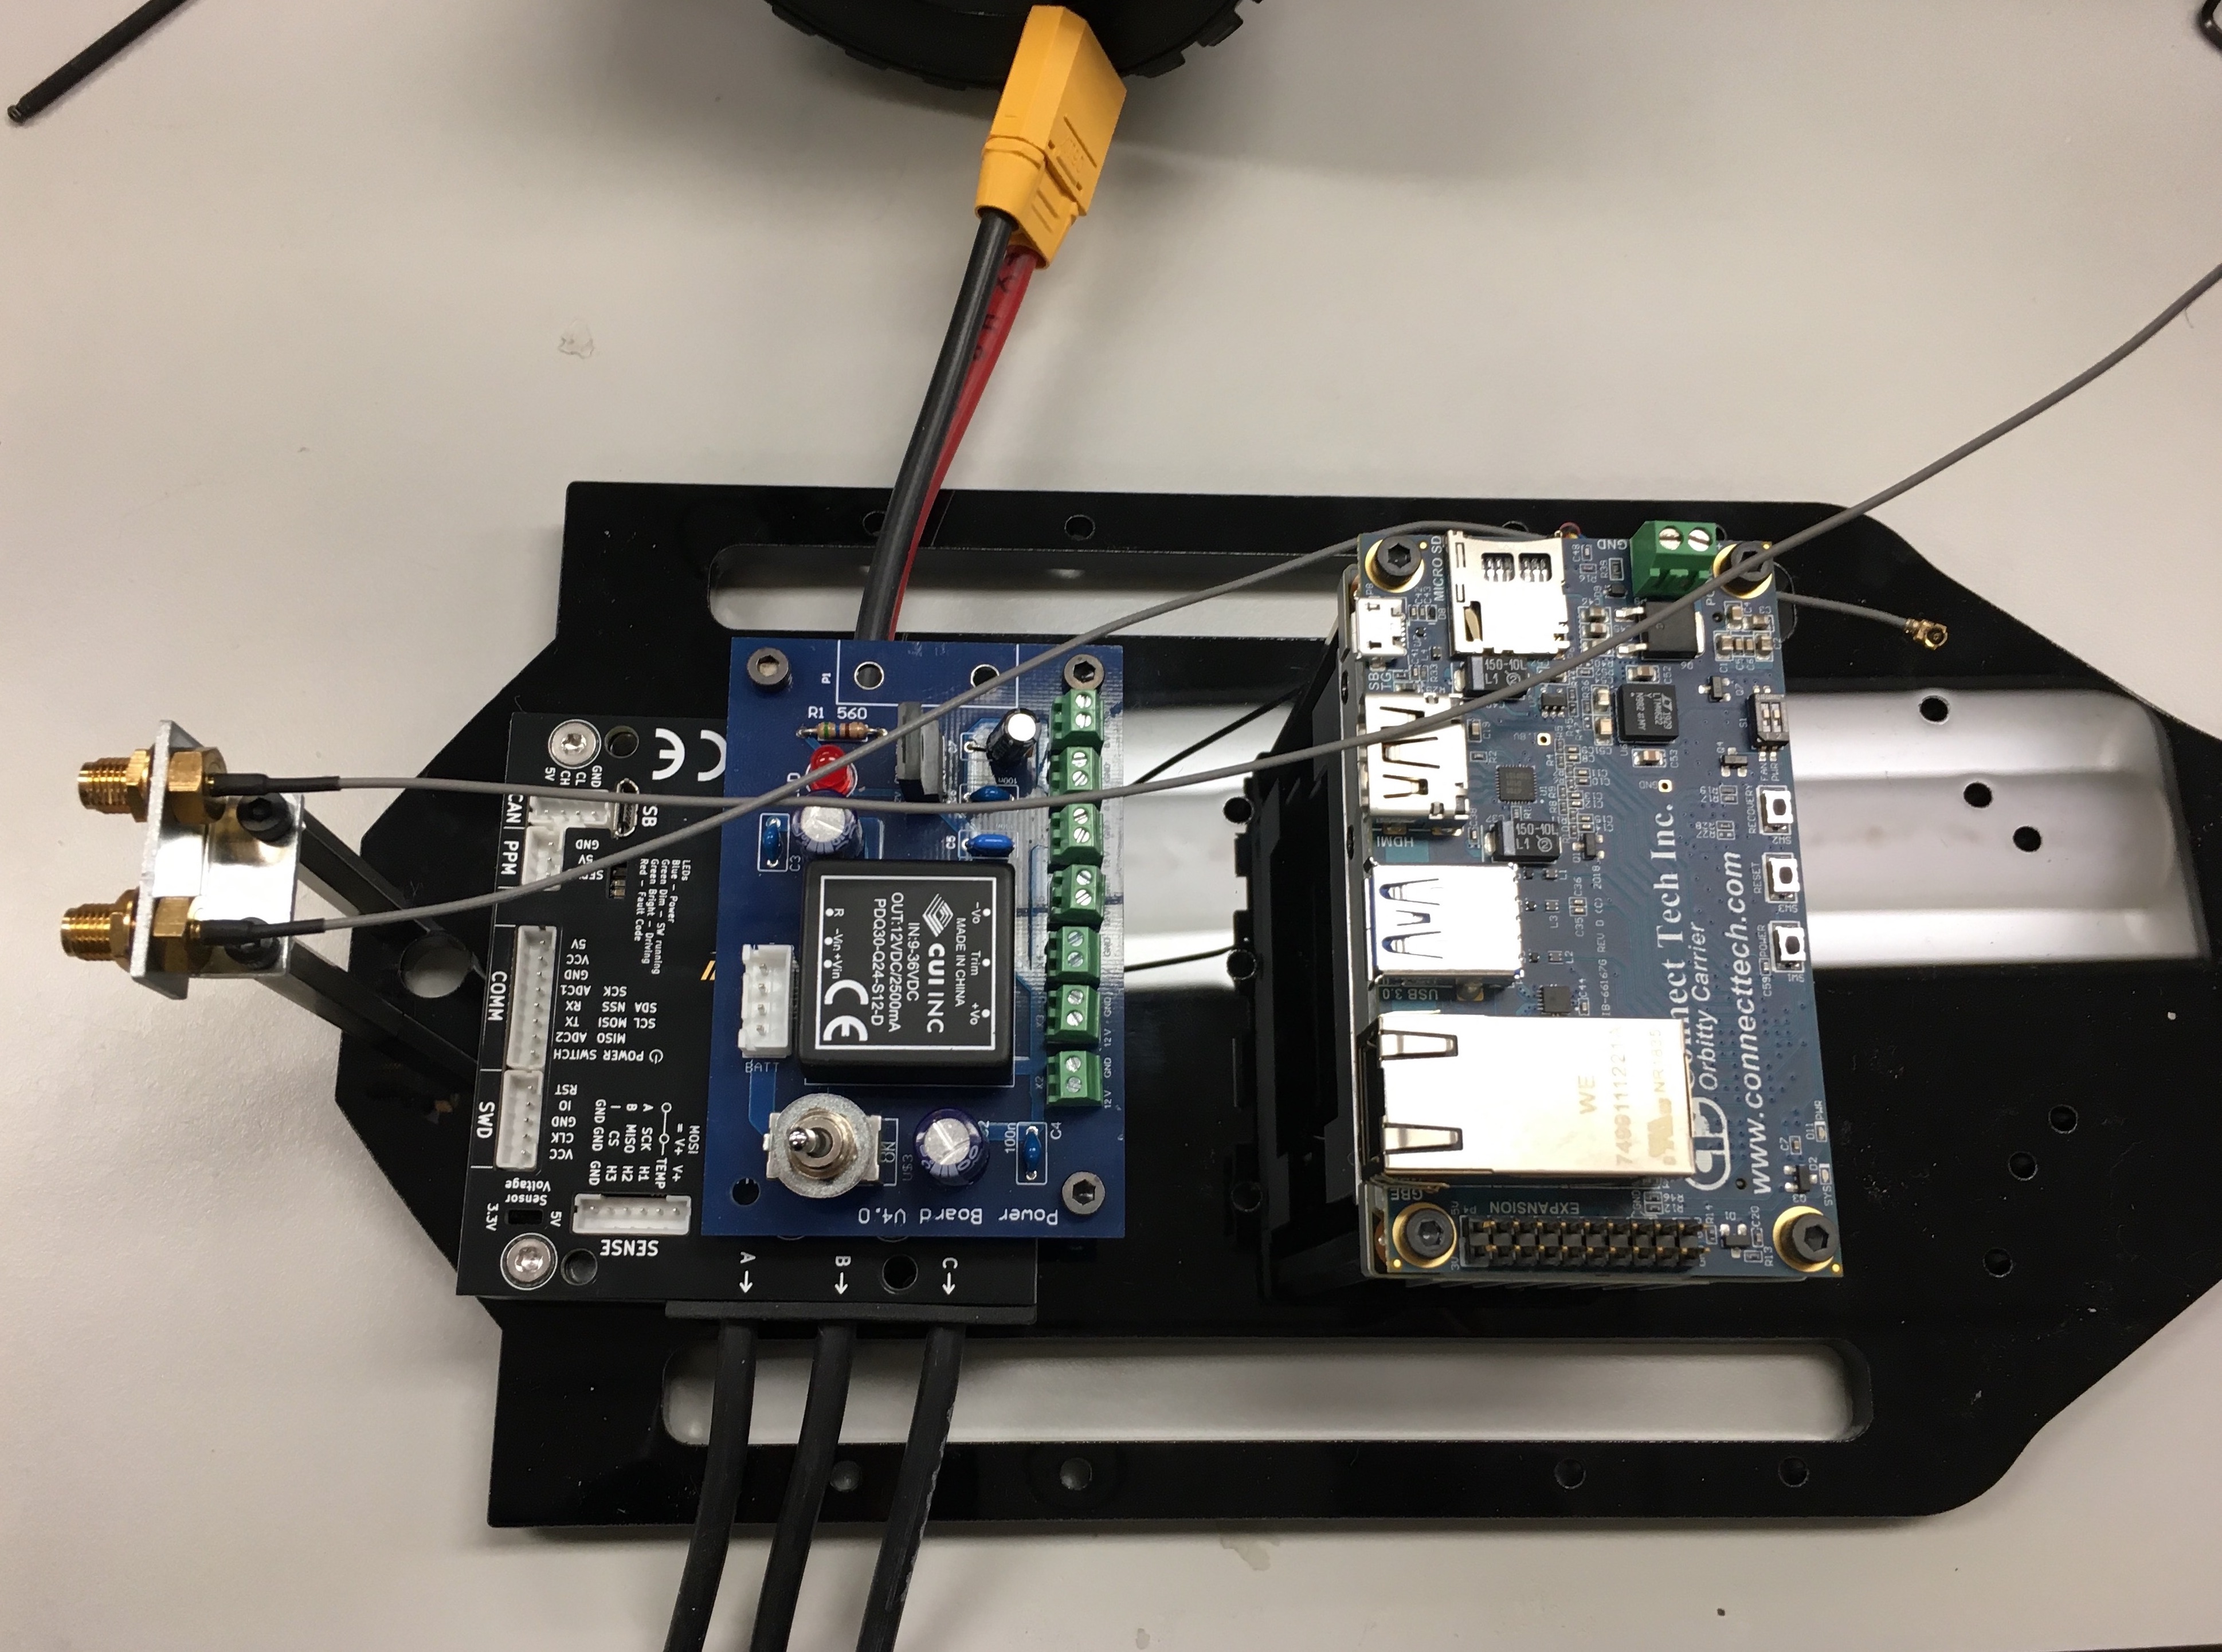
The following image shows the five components that we will be mounting on the Platform Deck.
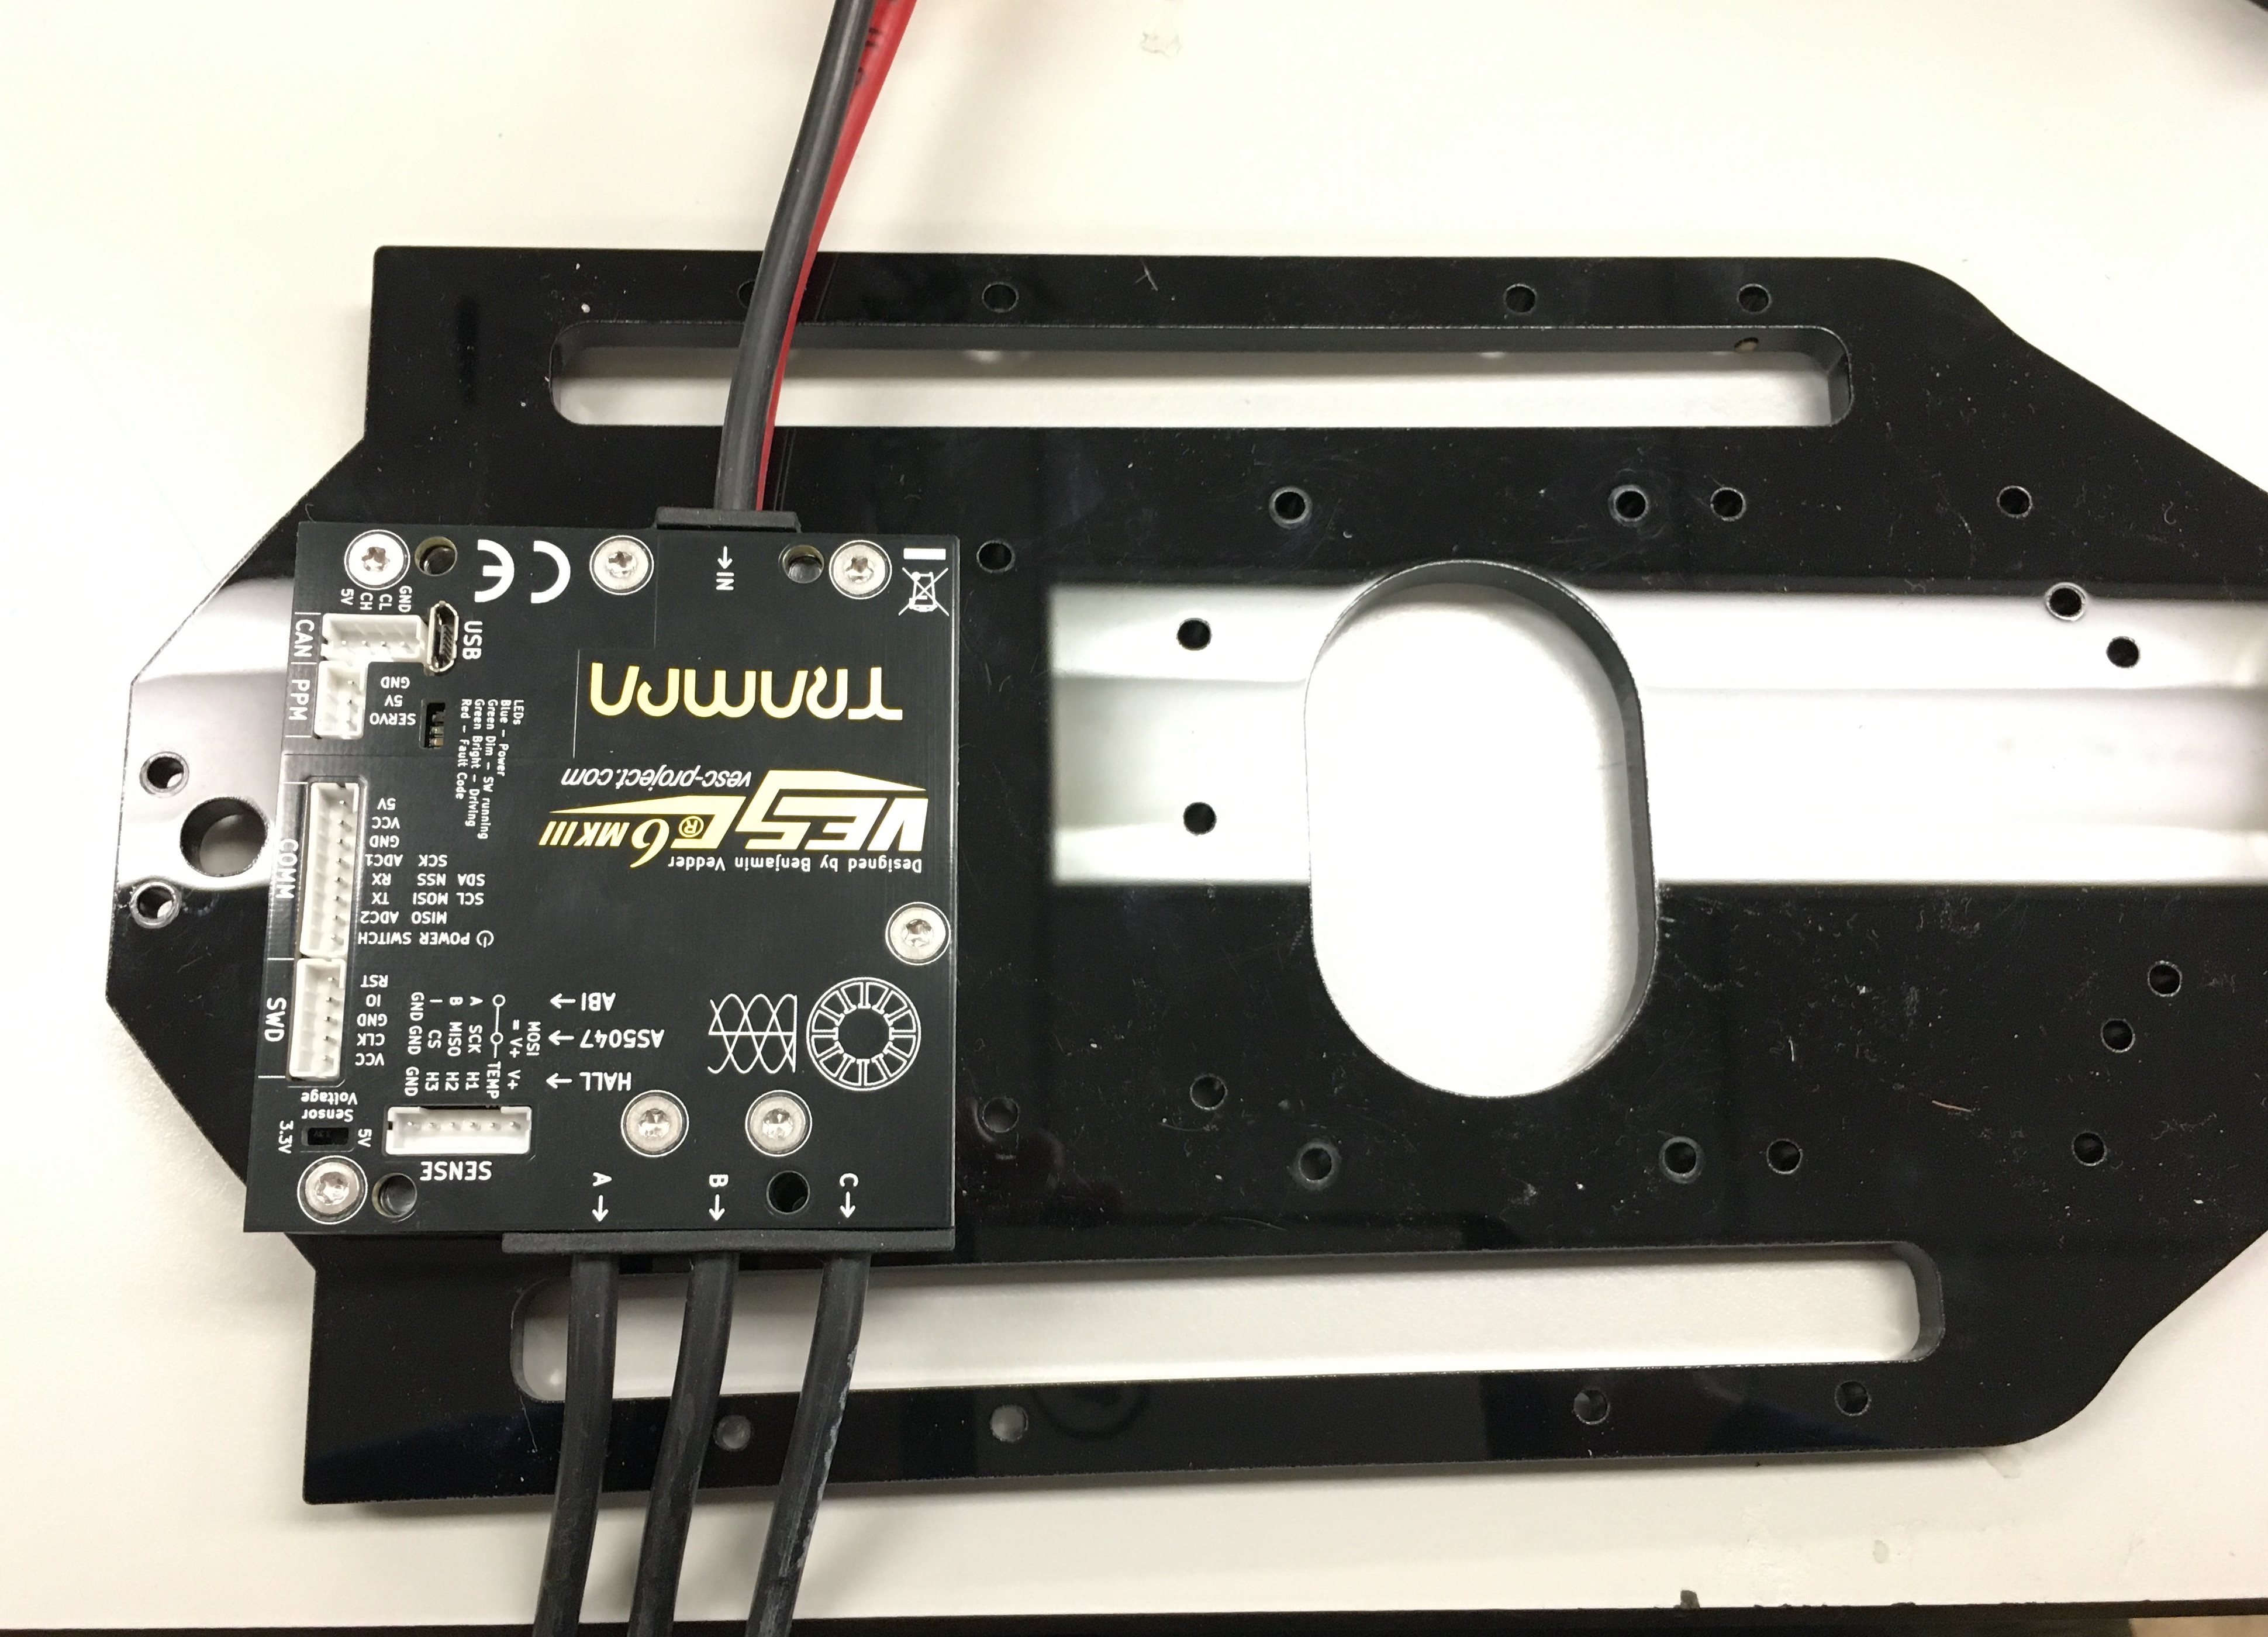
Place the VESC on the Platform Deck so that the power wires are facing AWAY from you and the three cables labelled A, B, and C are facing TOWARDS you.
VESC placed in correct position on Platform Deck.
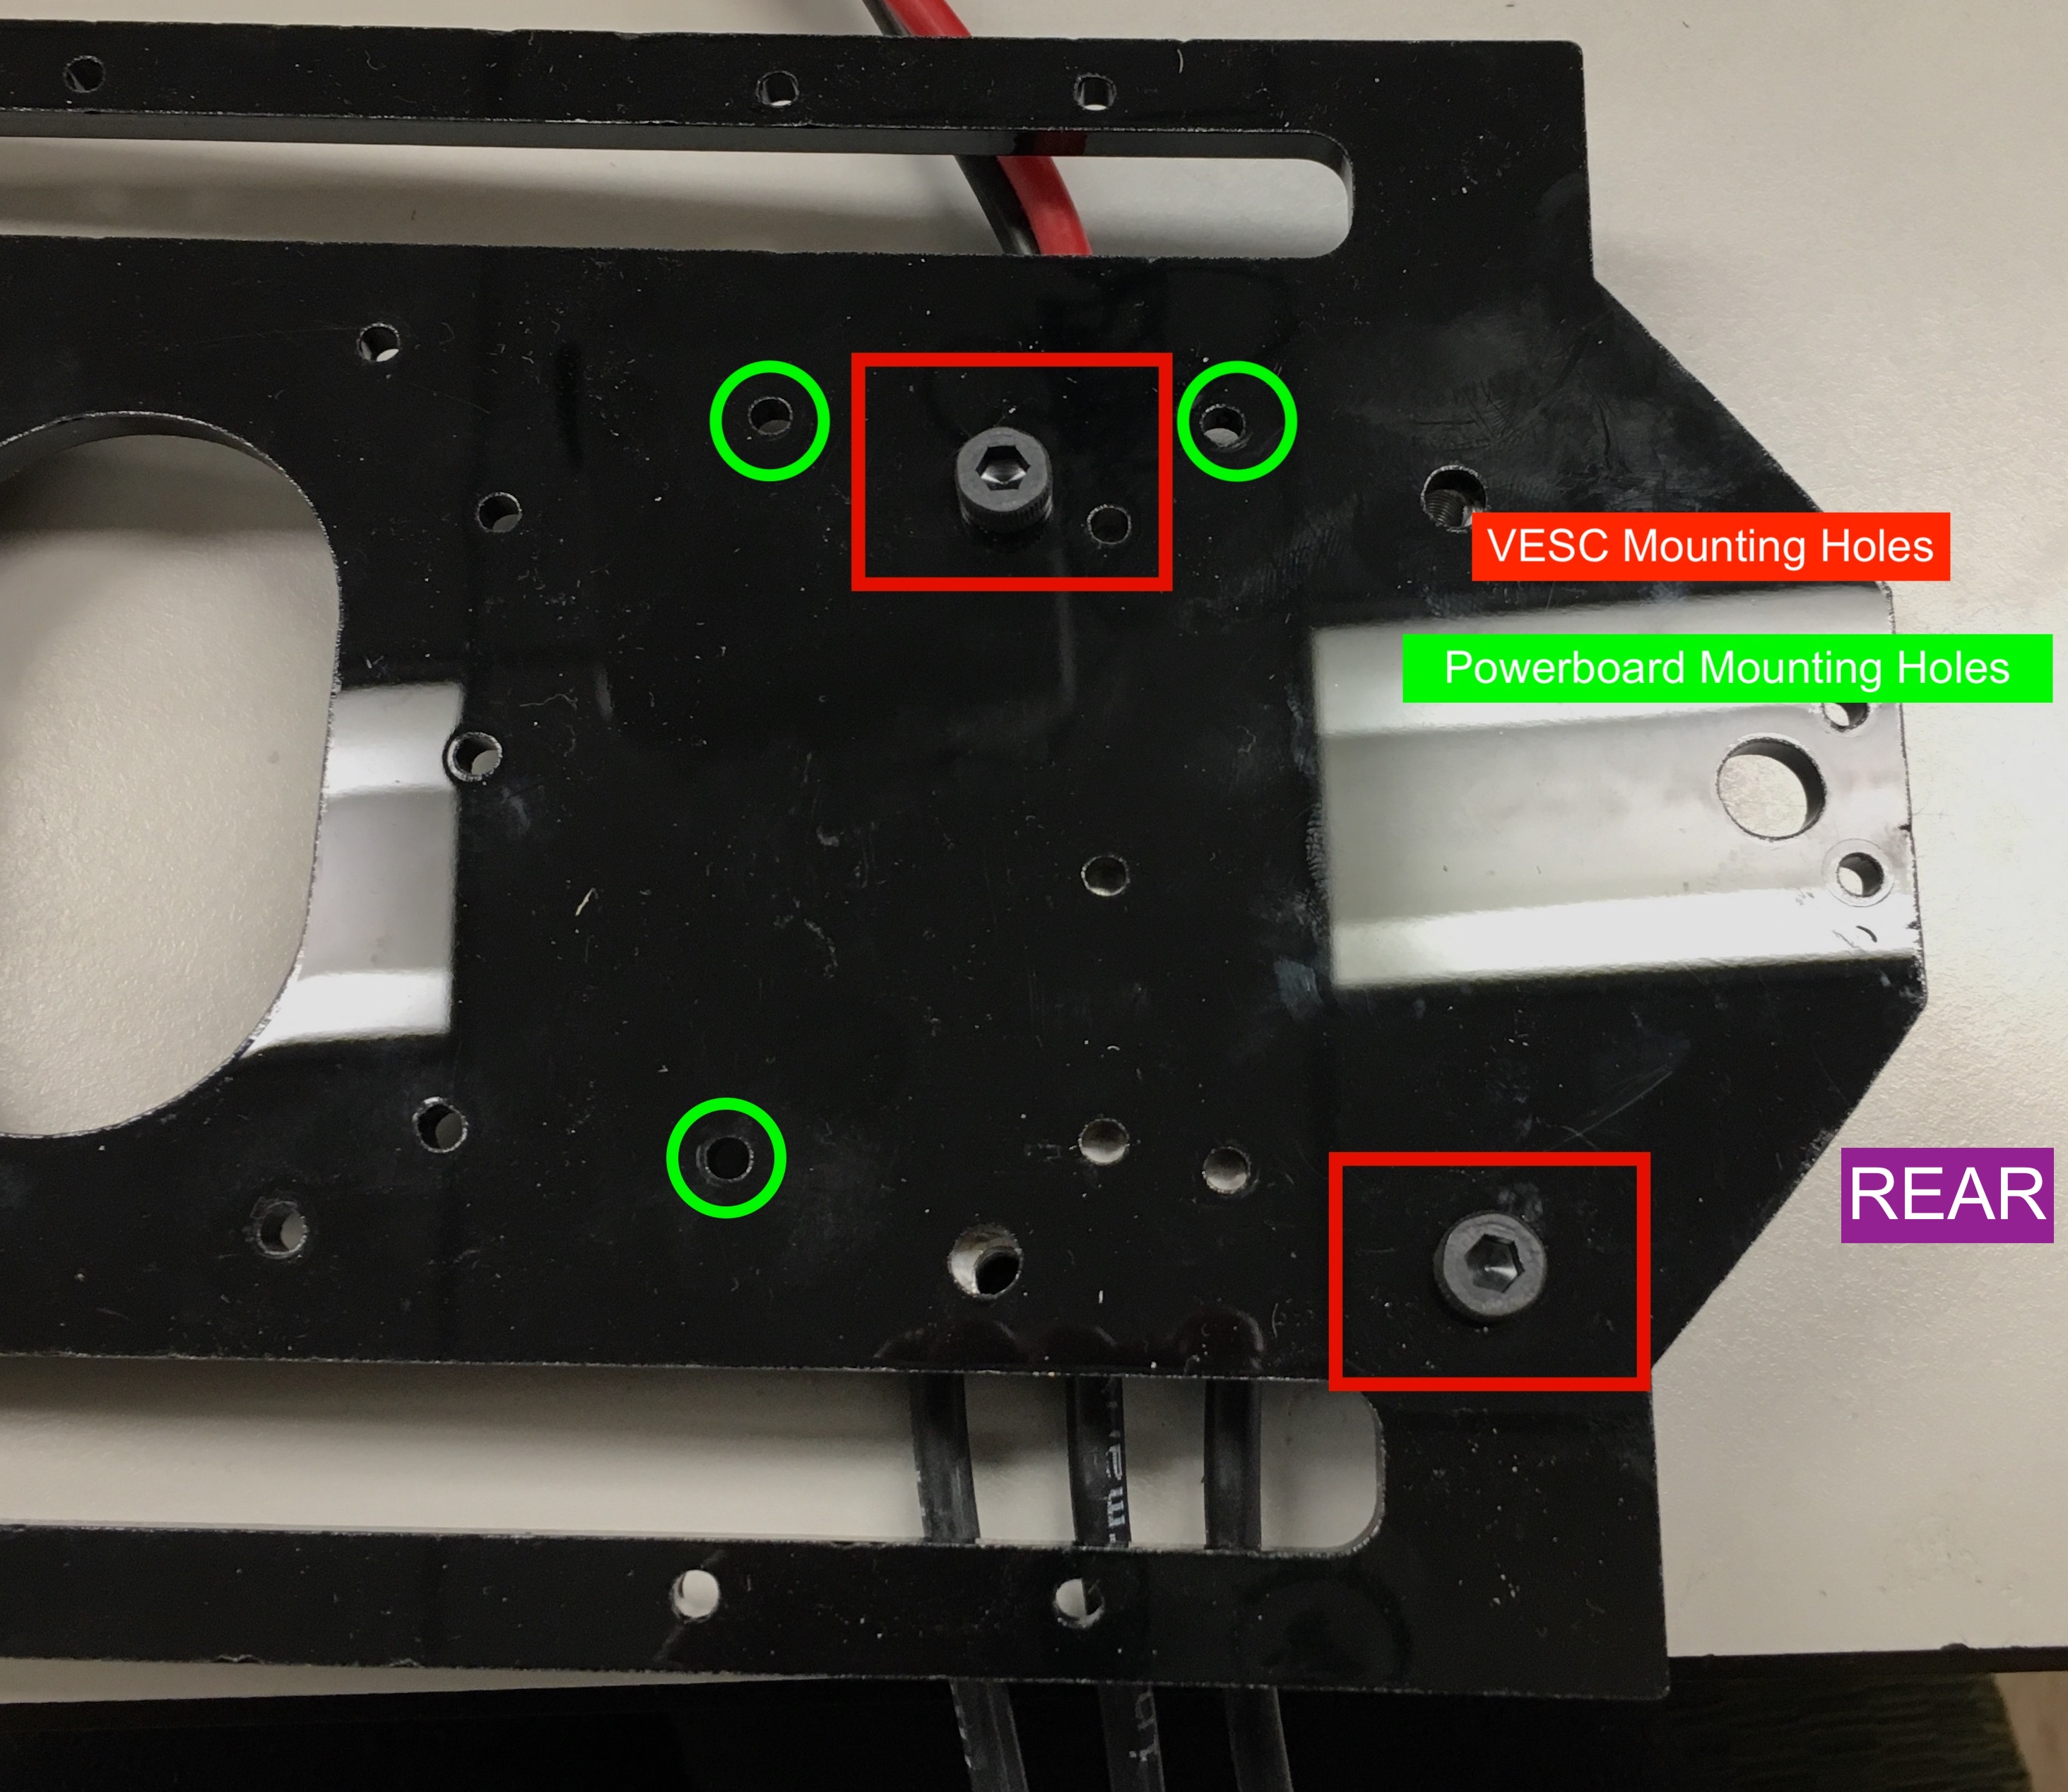
Flip the Platform Deck and the VESC over and use two M5 screws mounted diagonal from each other to attach the VESC to the Platform Deck, like shown below.
Mounting holes for Powerboard and VESC. Note that this is view of the bottom of the Platform Deck.
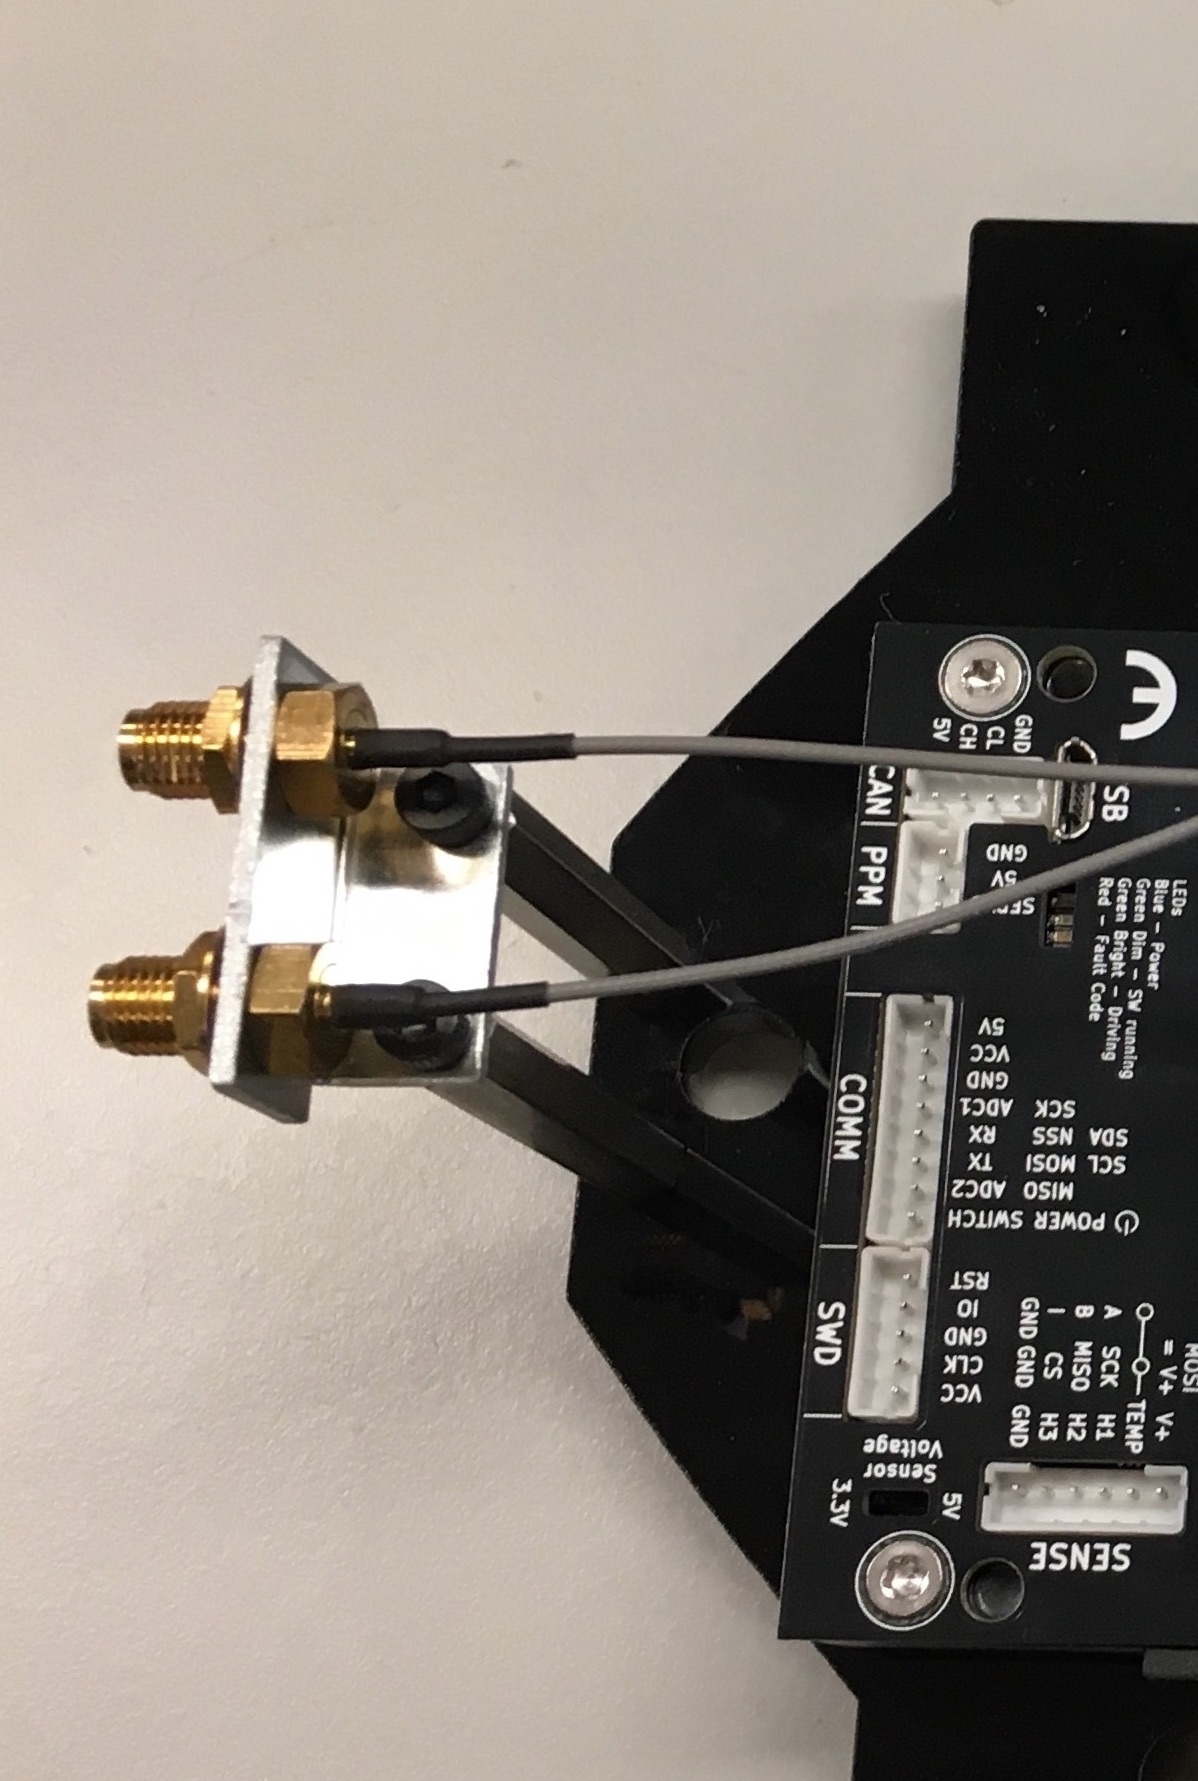
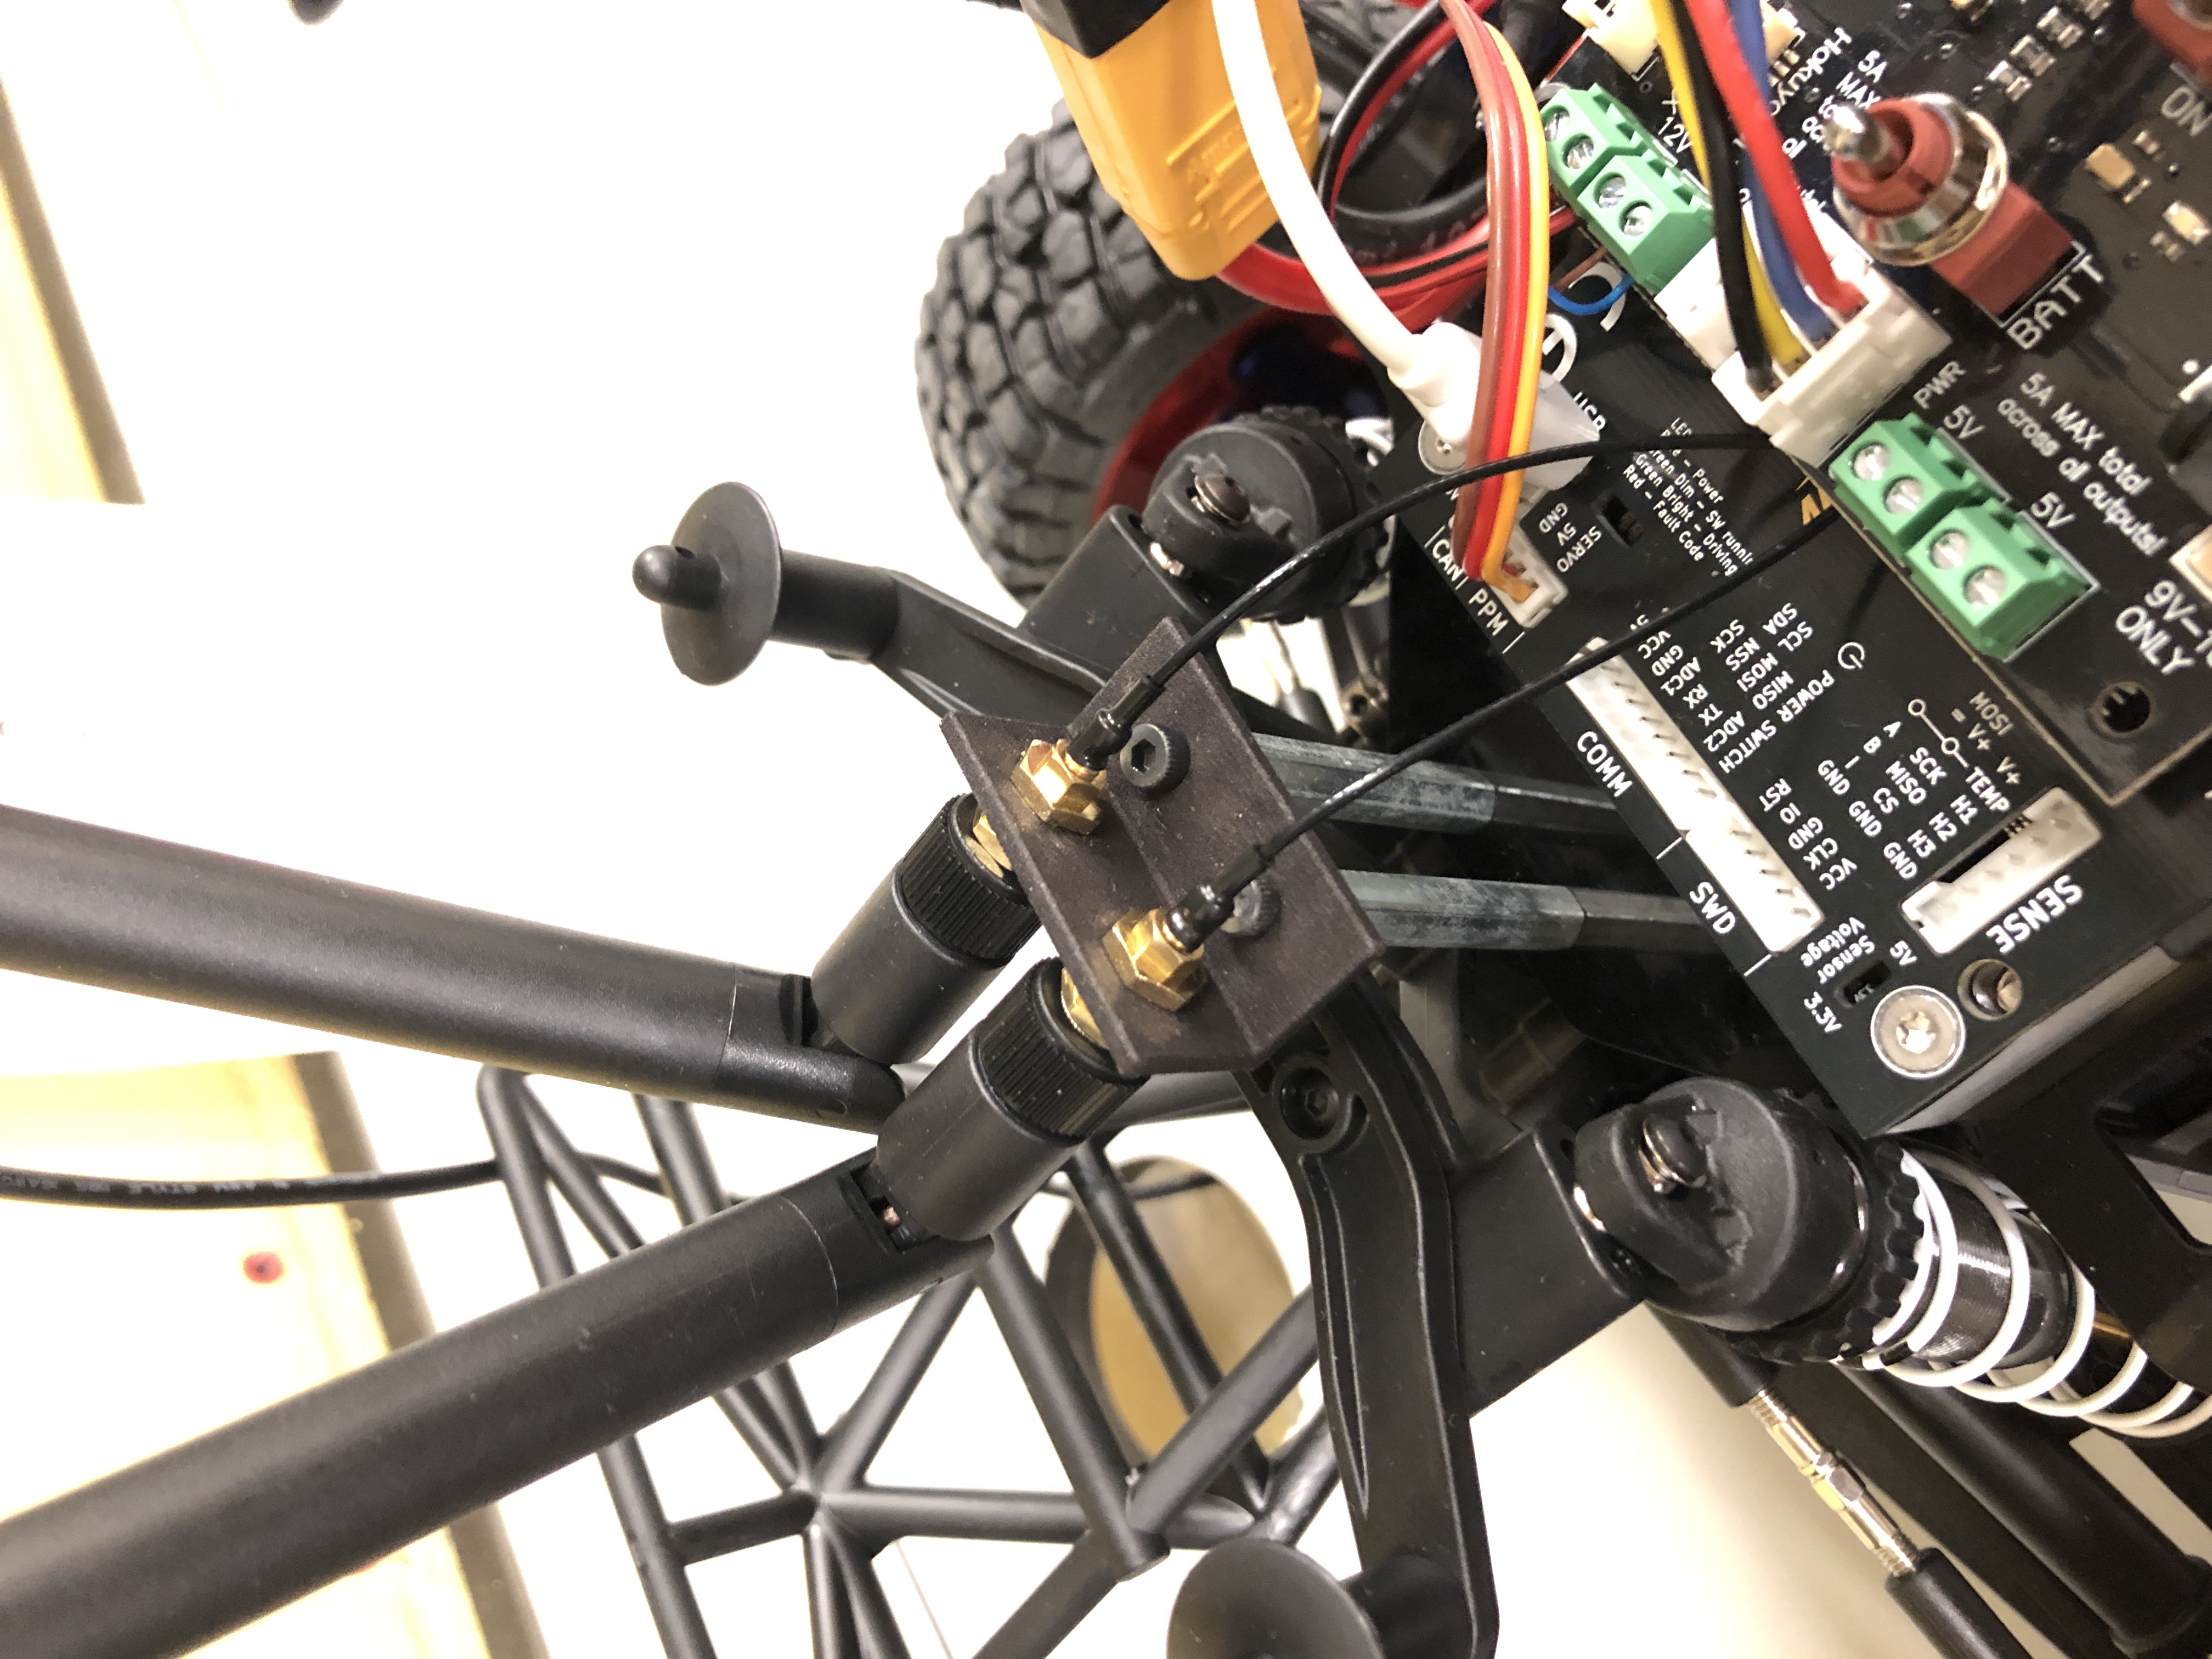
After the VESC we mount the antenna standoffs+cables to the rear of the VESC. The reason for that is that we want to lay the antenna cables beneath the powerboard and connect it afterwards directly to the NVIDIA Jetson NX before mounting it. Use the M3 screw to mount the antenna standoffs+cable.
Now its time to mount the NVIDIA Jetson NX. Before we mount the Jetson please connect the antenna cables first. Flip the Jetson around and clip both antenna cables to the antenna connectors on the Jetson.
Afterwards we need to install the M3 standoffs for the Jetson on the Platform deck. Screw the standoffs to the platform deck to the specific NVIDA Jetson NX mount holes. Thread the M3 screw from underneath the Platform Deck up and secure with a 25mm standoff.
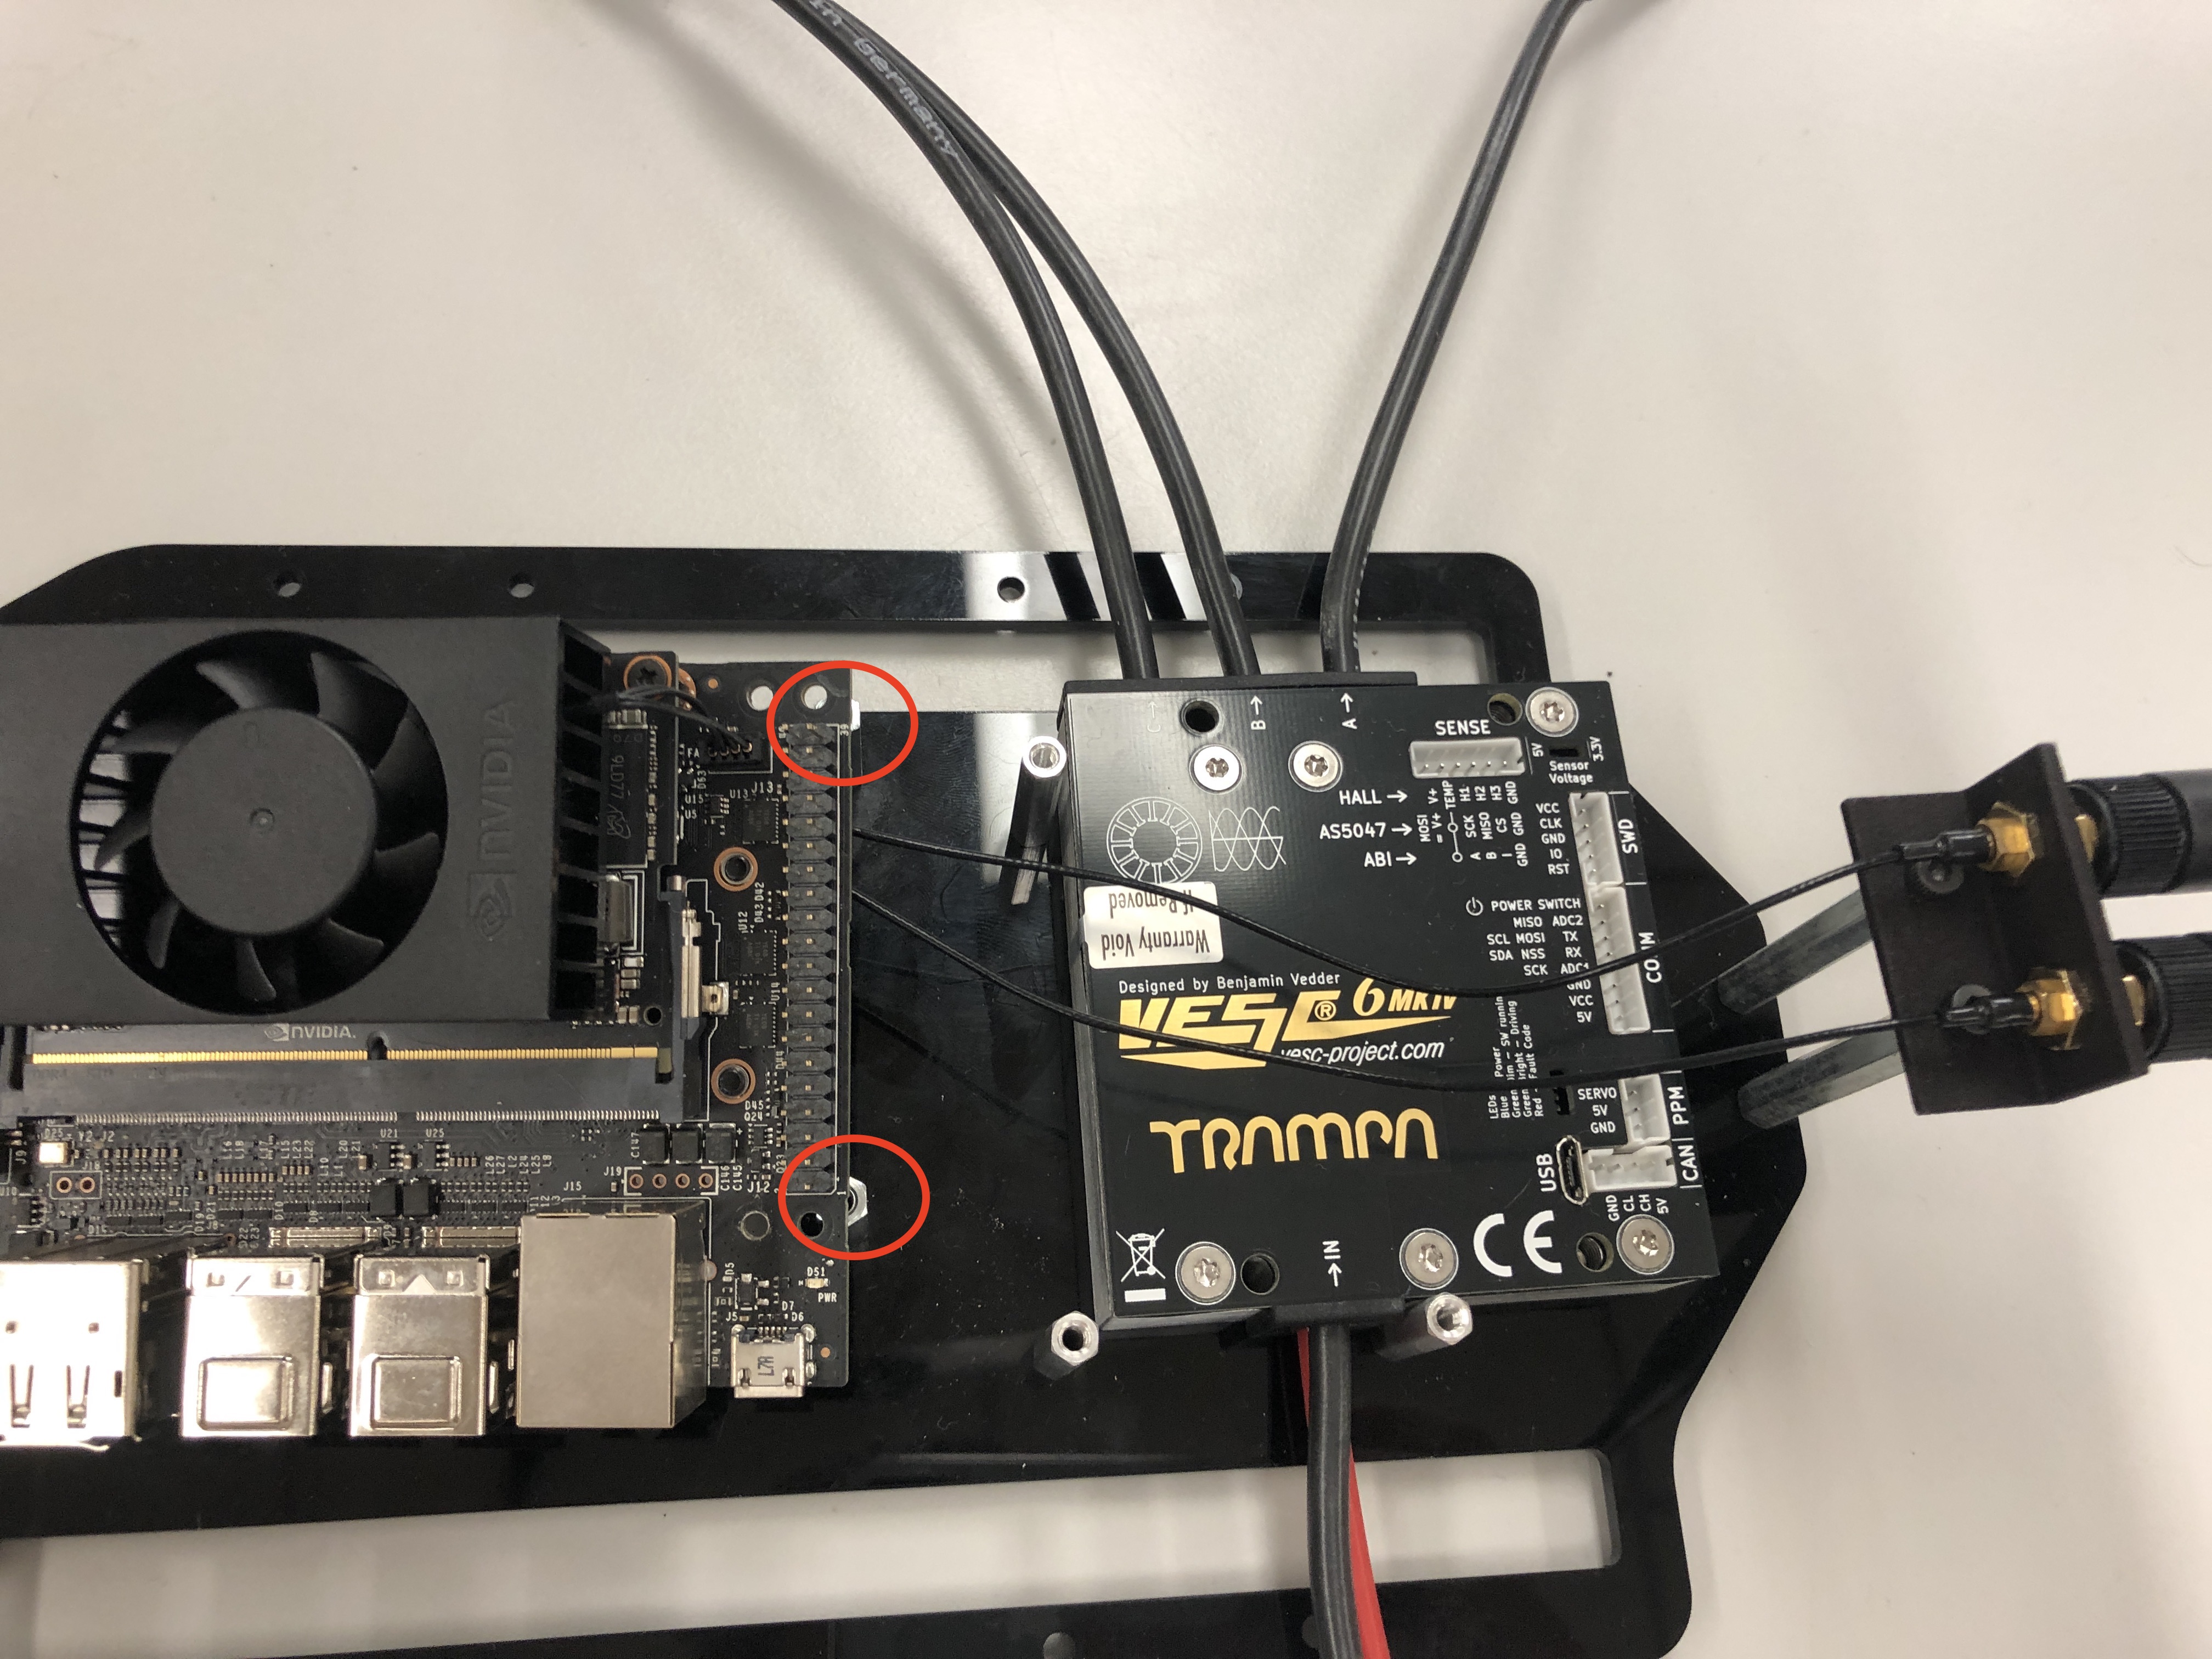
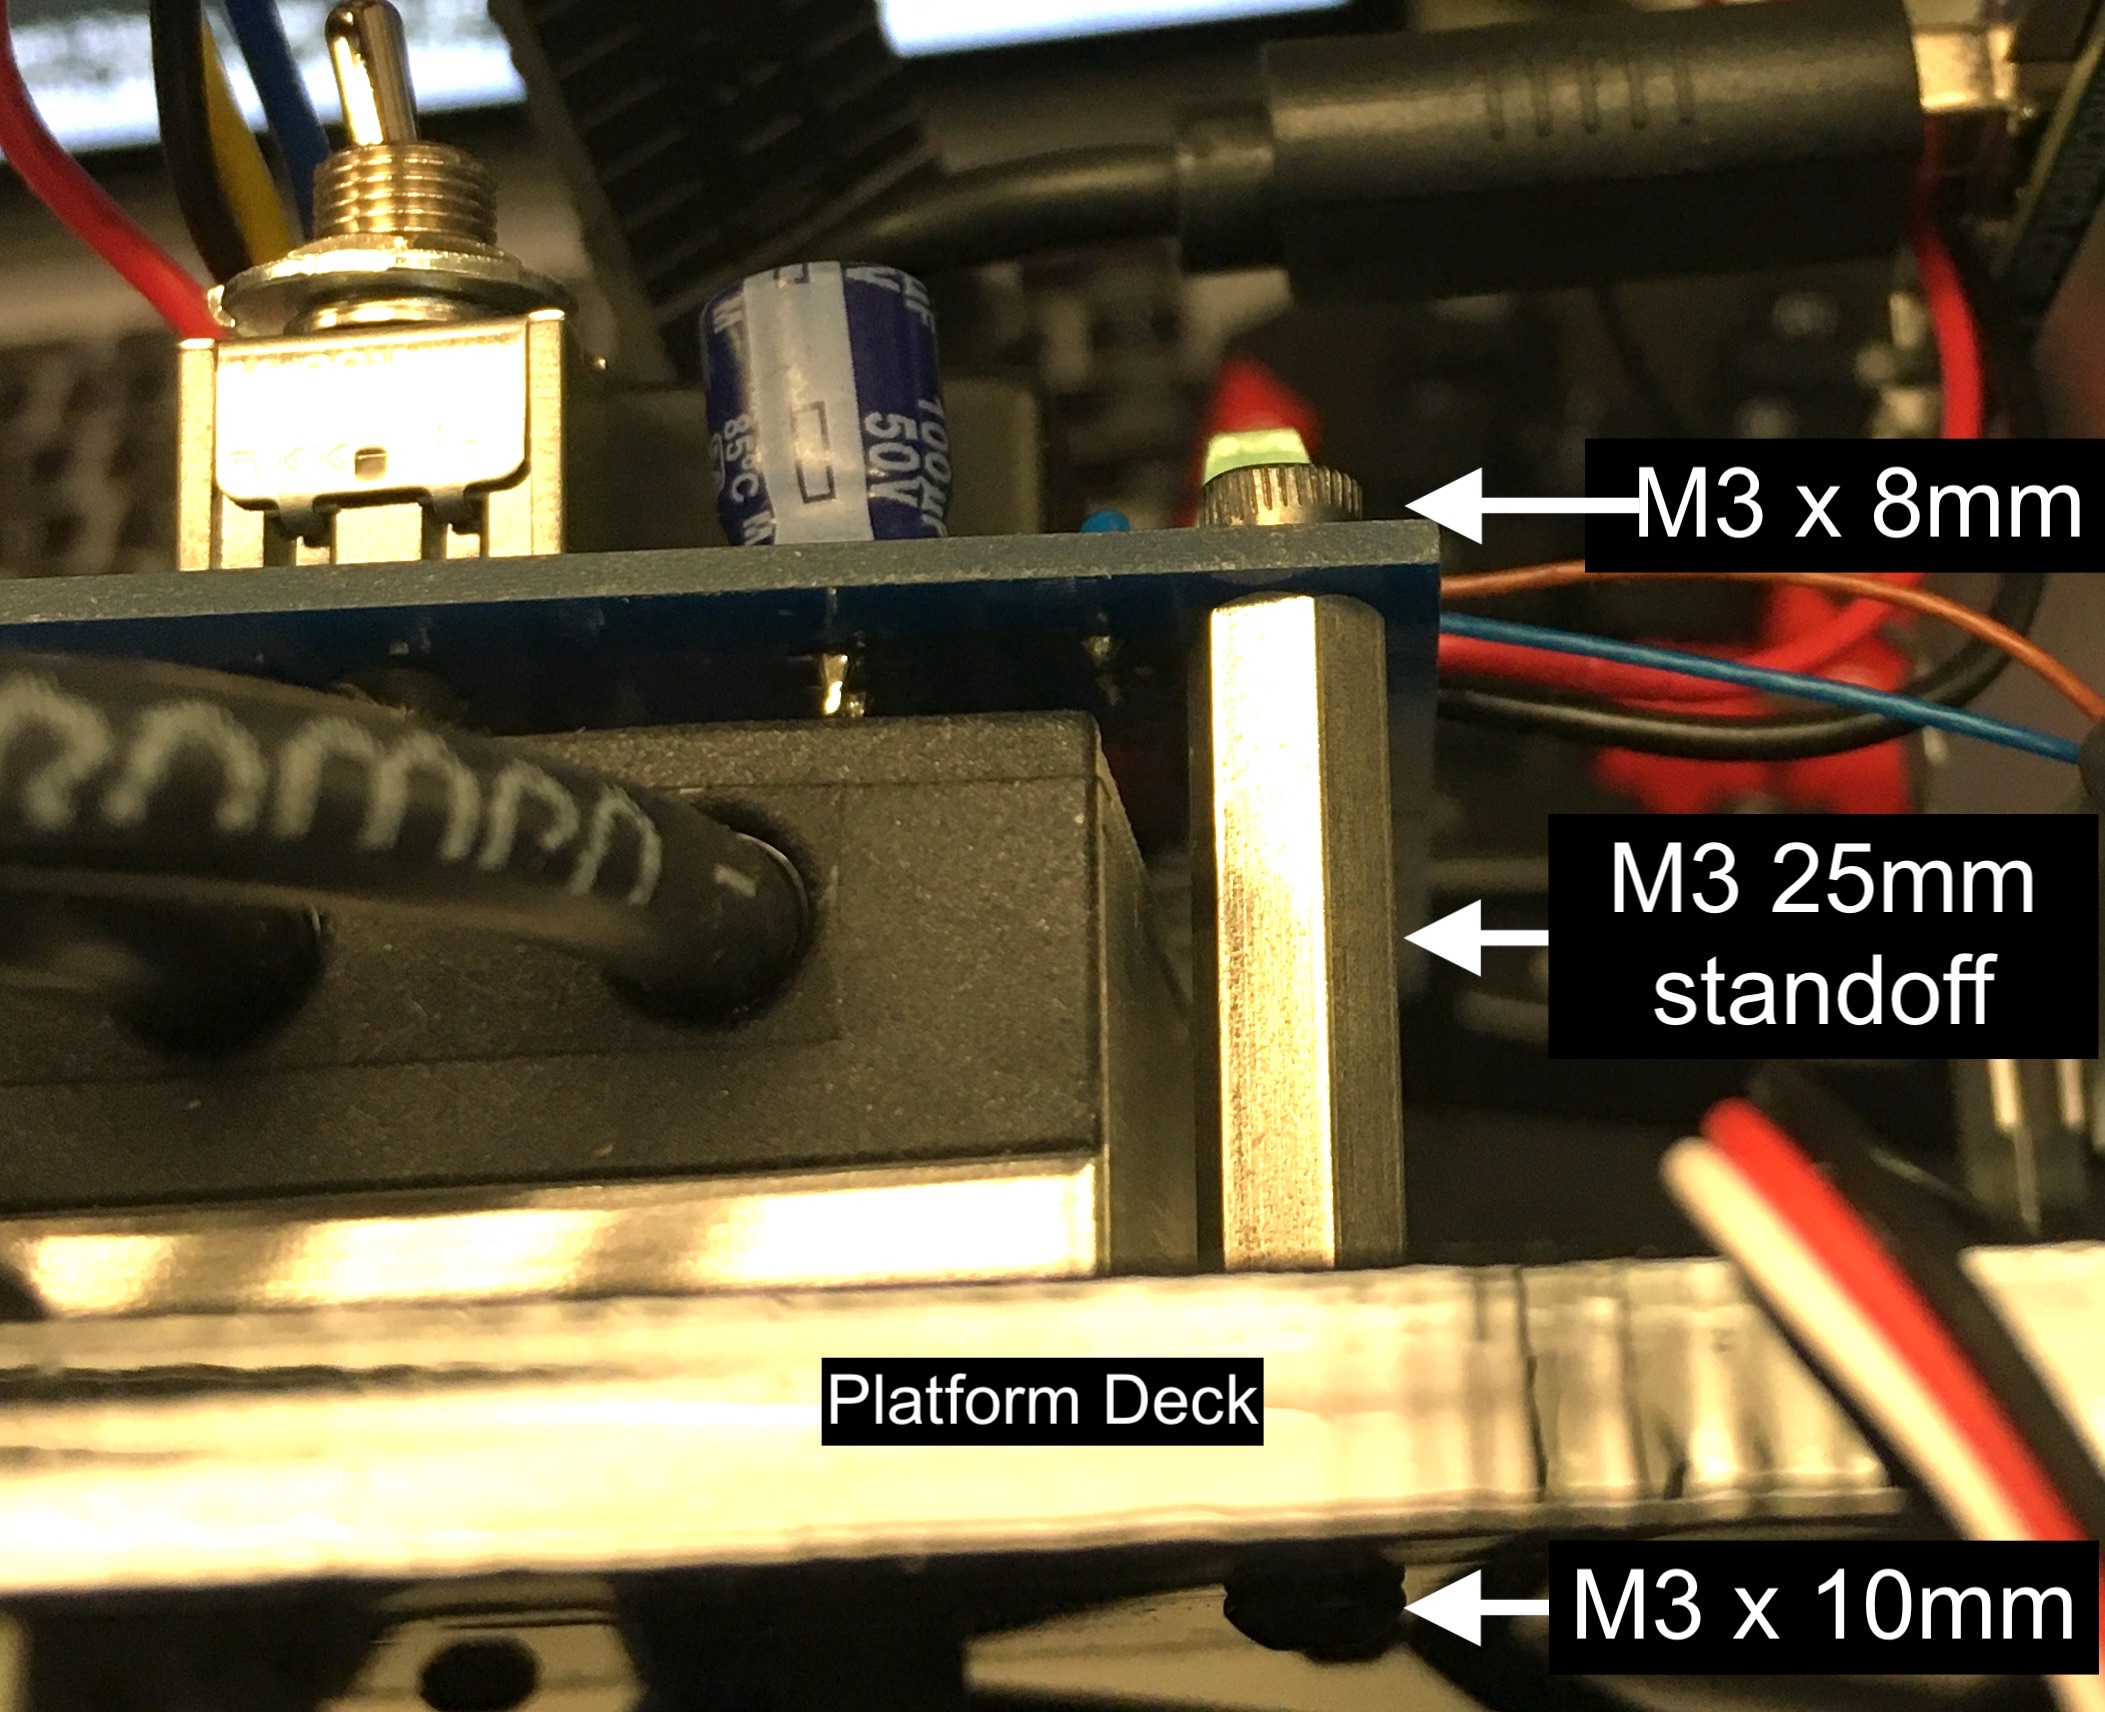
Now you can place the Jetson NX on the mounted standoffs. Use the 4 main holes on top of the Jetson to mount the Jetson to the platform deck with M3 screws. Then, Secure the Powerboard to the 25mm standoff with a M3 x 8mm screw.
The image above shows the three holes used to mount the Powerboard. Only three of the Powerboard mounting holes are used. Flip the Platform Deck with the VESC attached to it back over so the VESC is facing up. Attach the Powerboard to the Platform deck by using the M3 screws that were removed from the chassis in the Lower Level Chassis section. Thread the M3 screw from underneath the Platform Deck up and secure with a 25mm standoff. Then, Secure the Powerboard to the 25mm standoff with a M3 x 8mm screw.
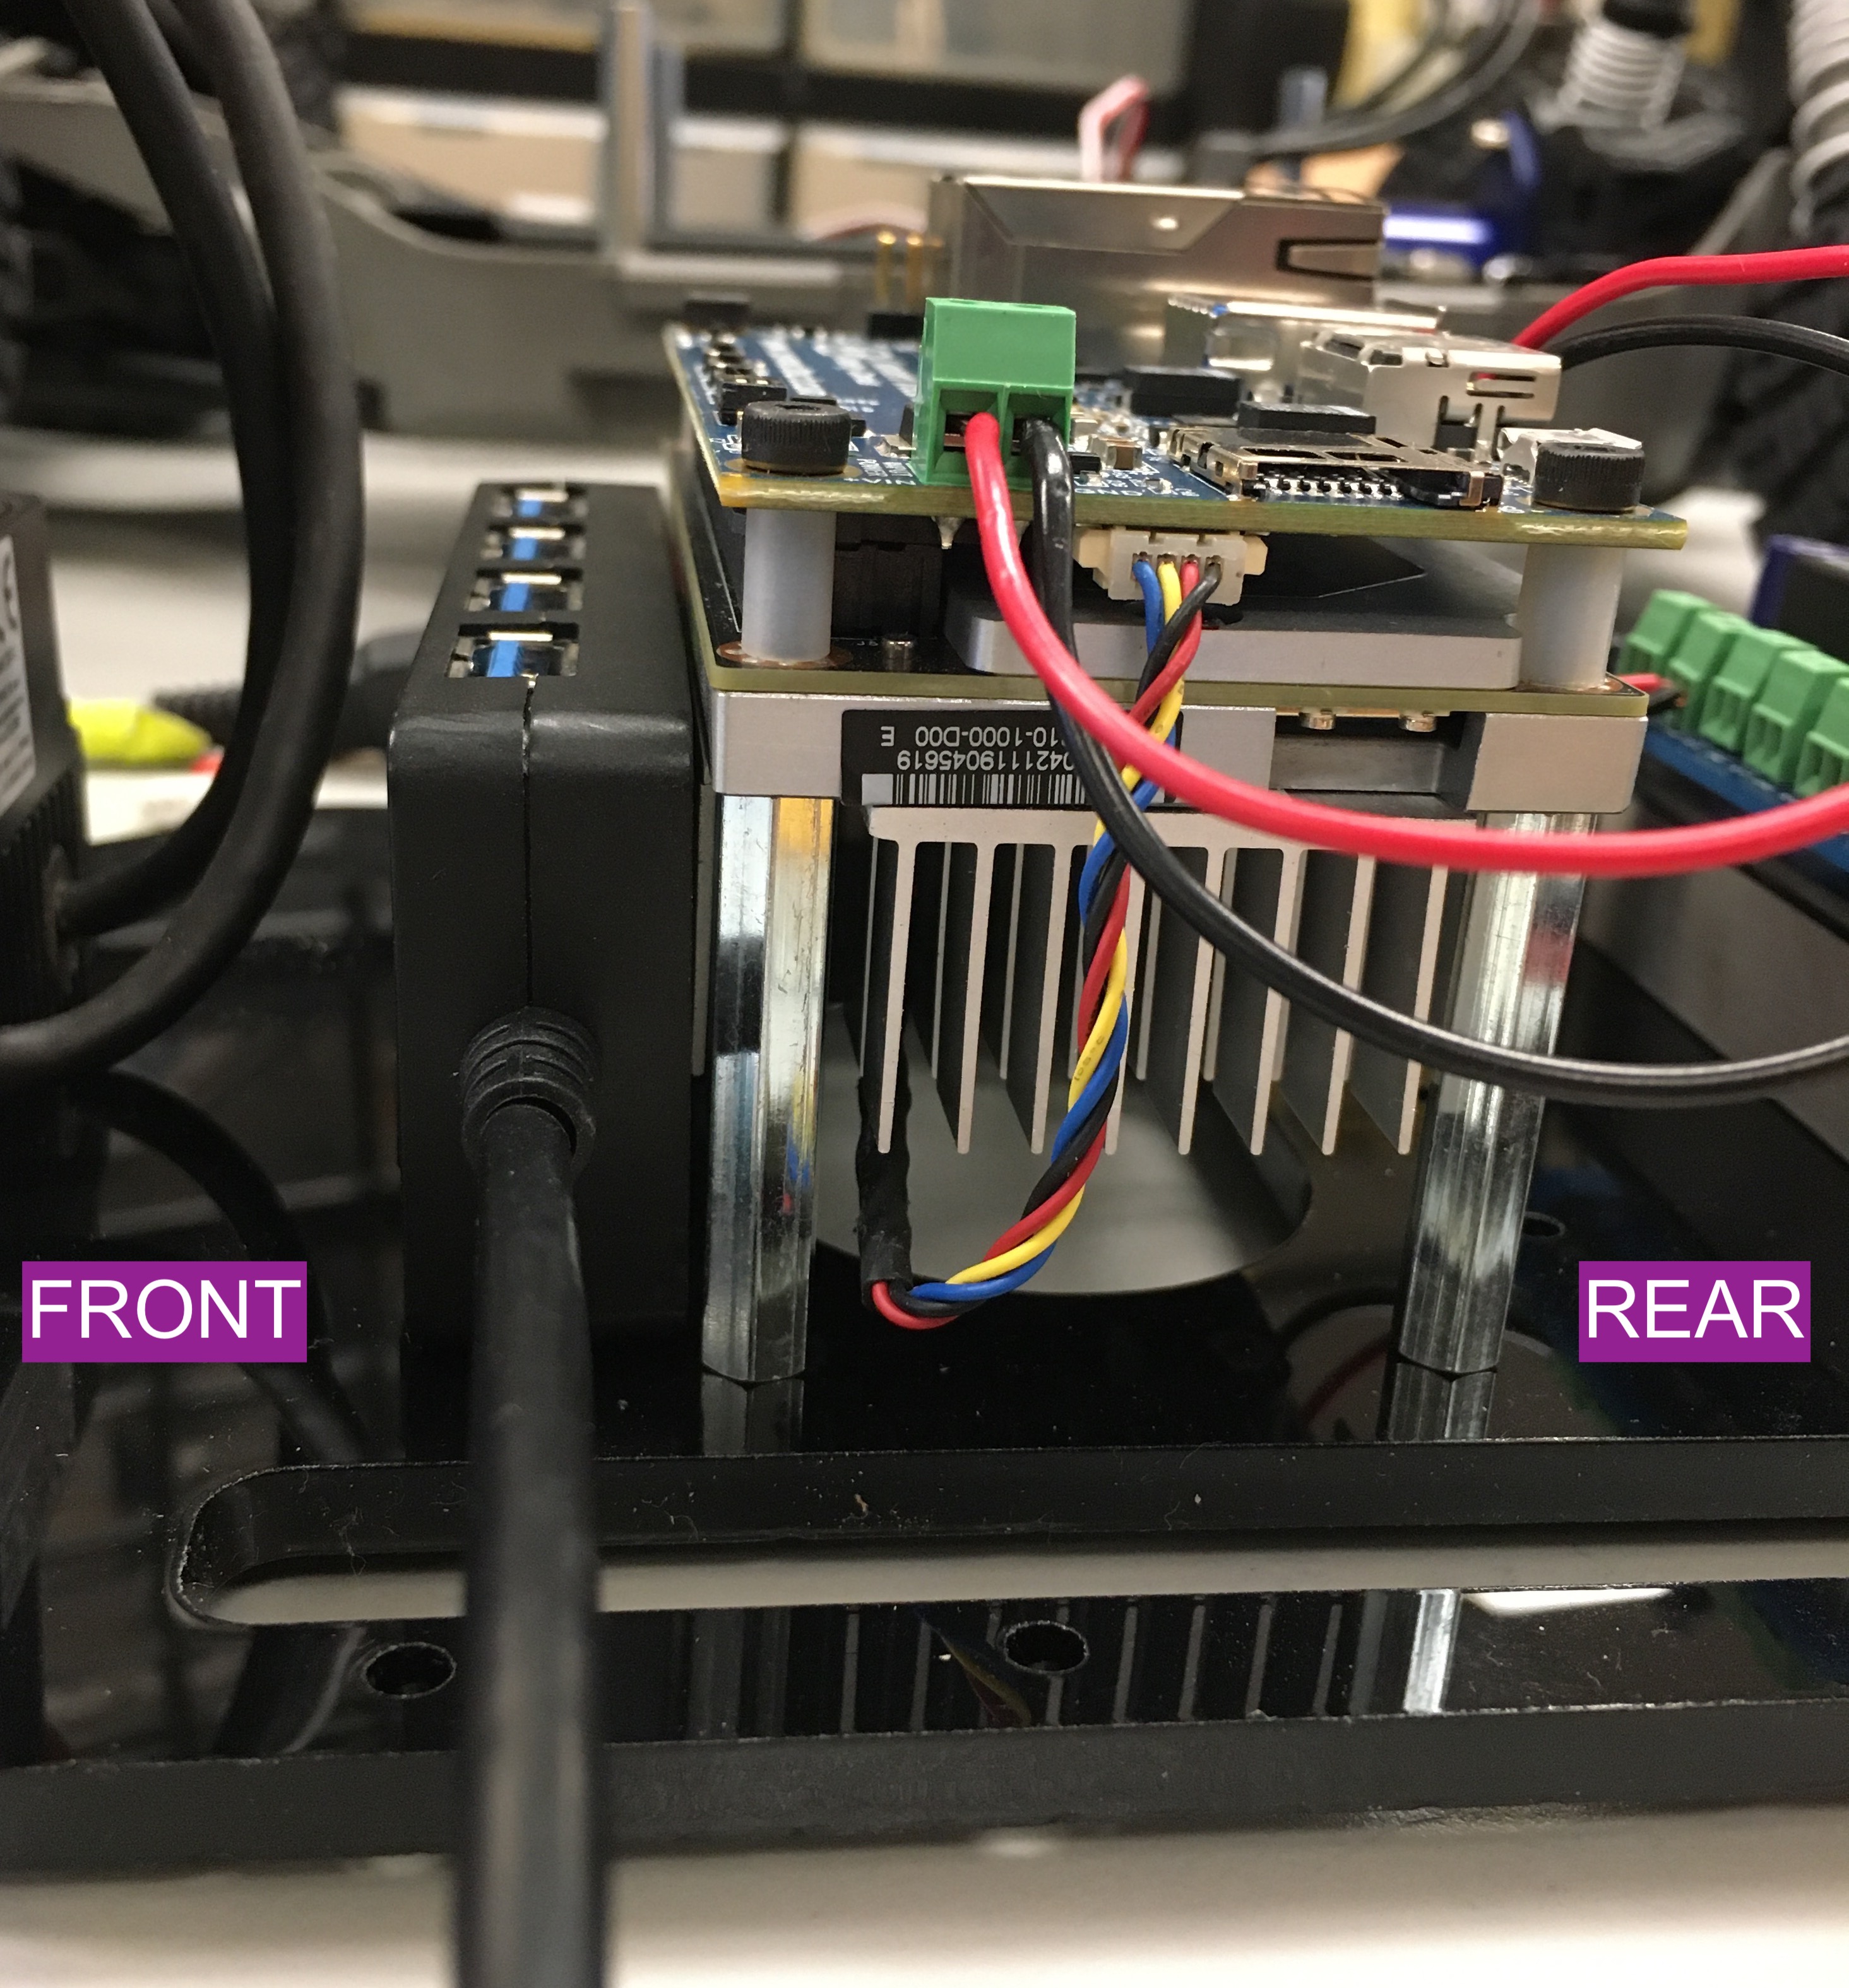
Side view of Powerboard mounted on Platform Deck.
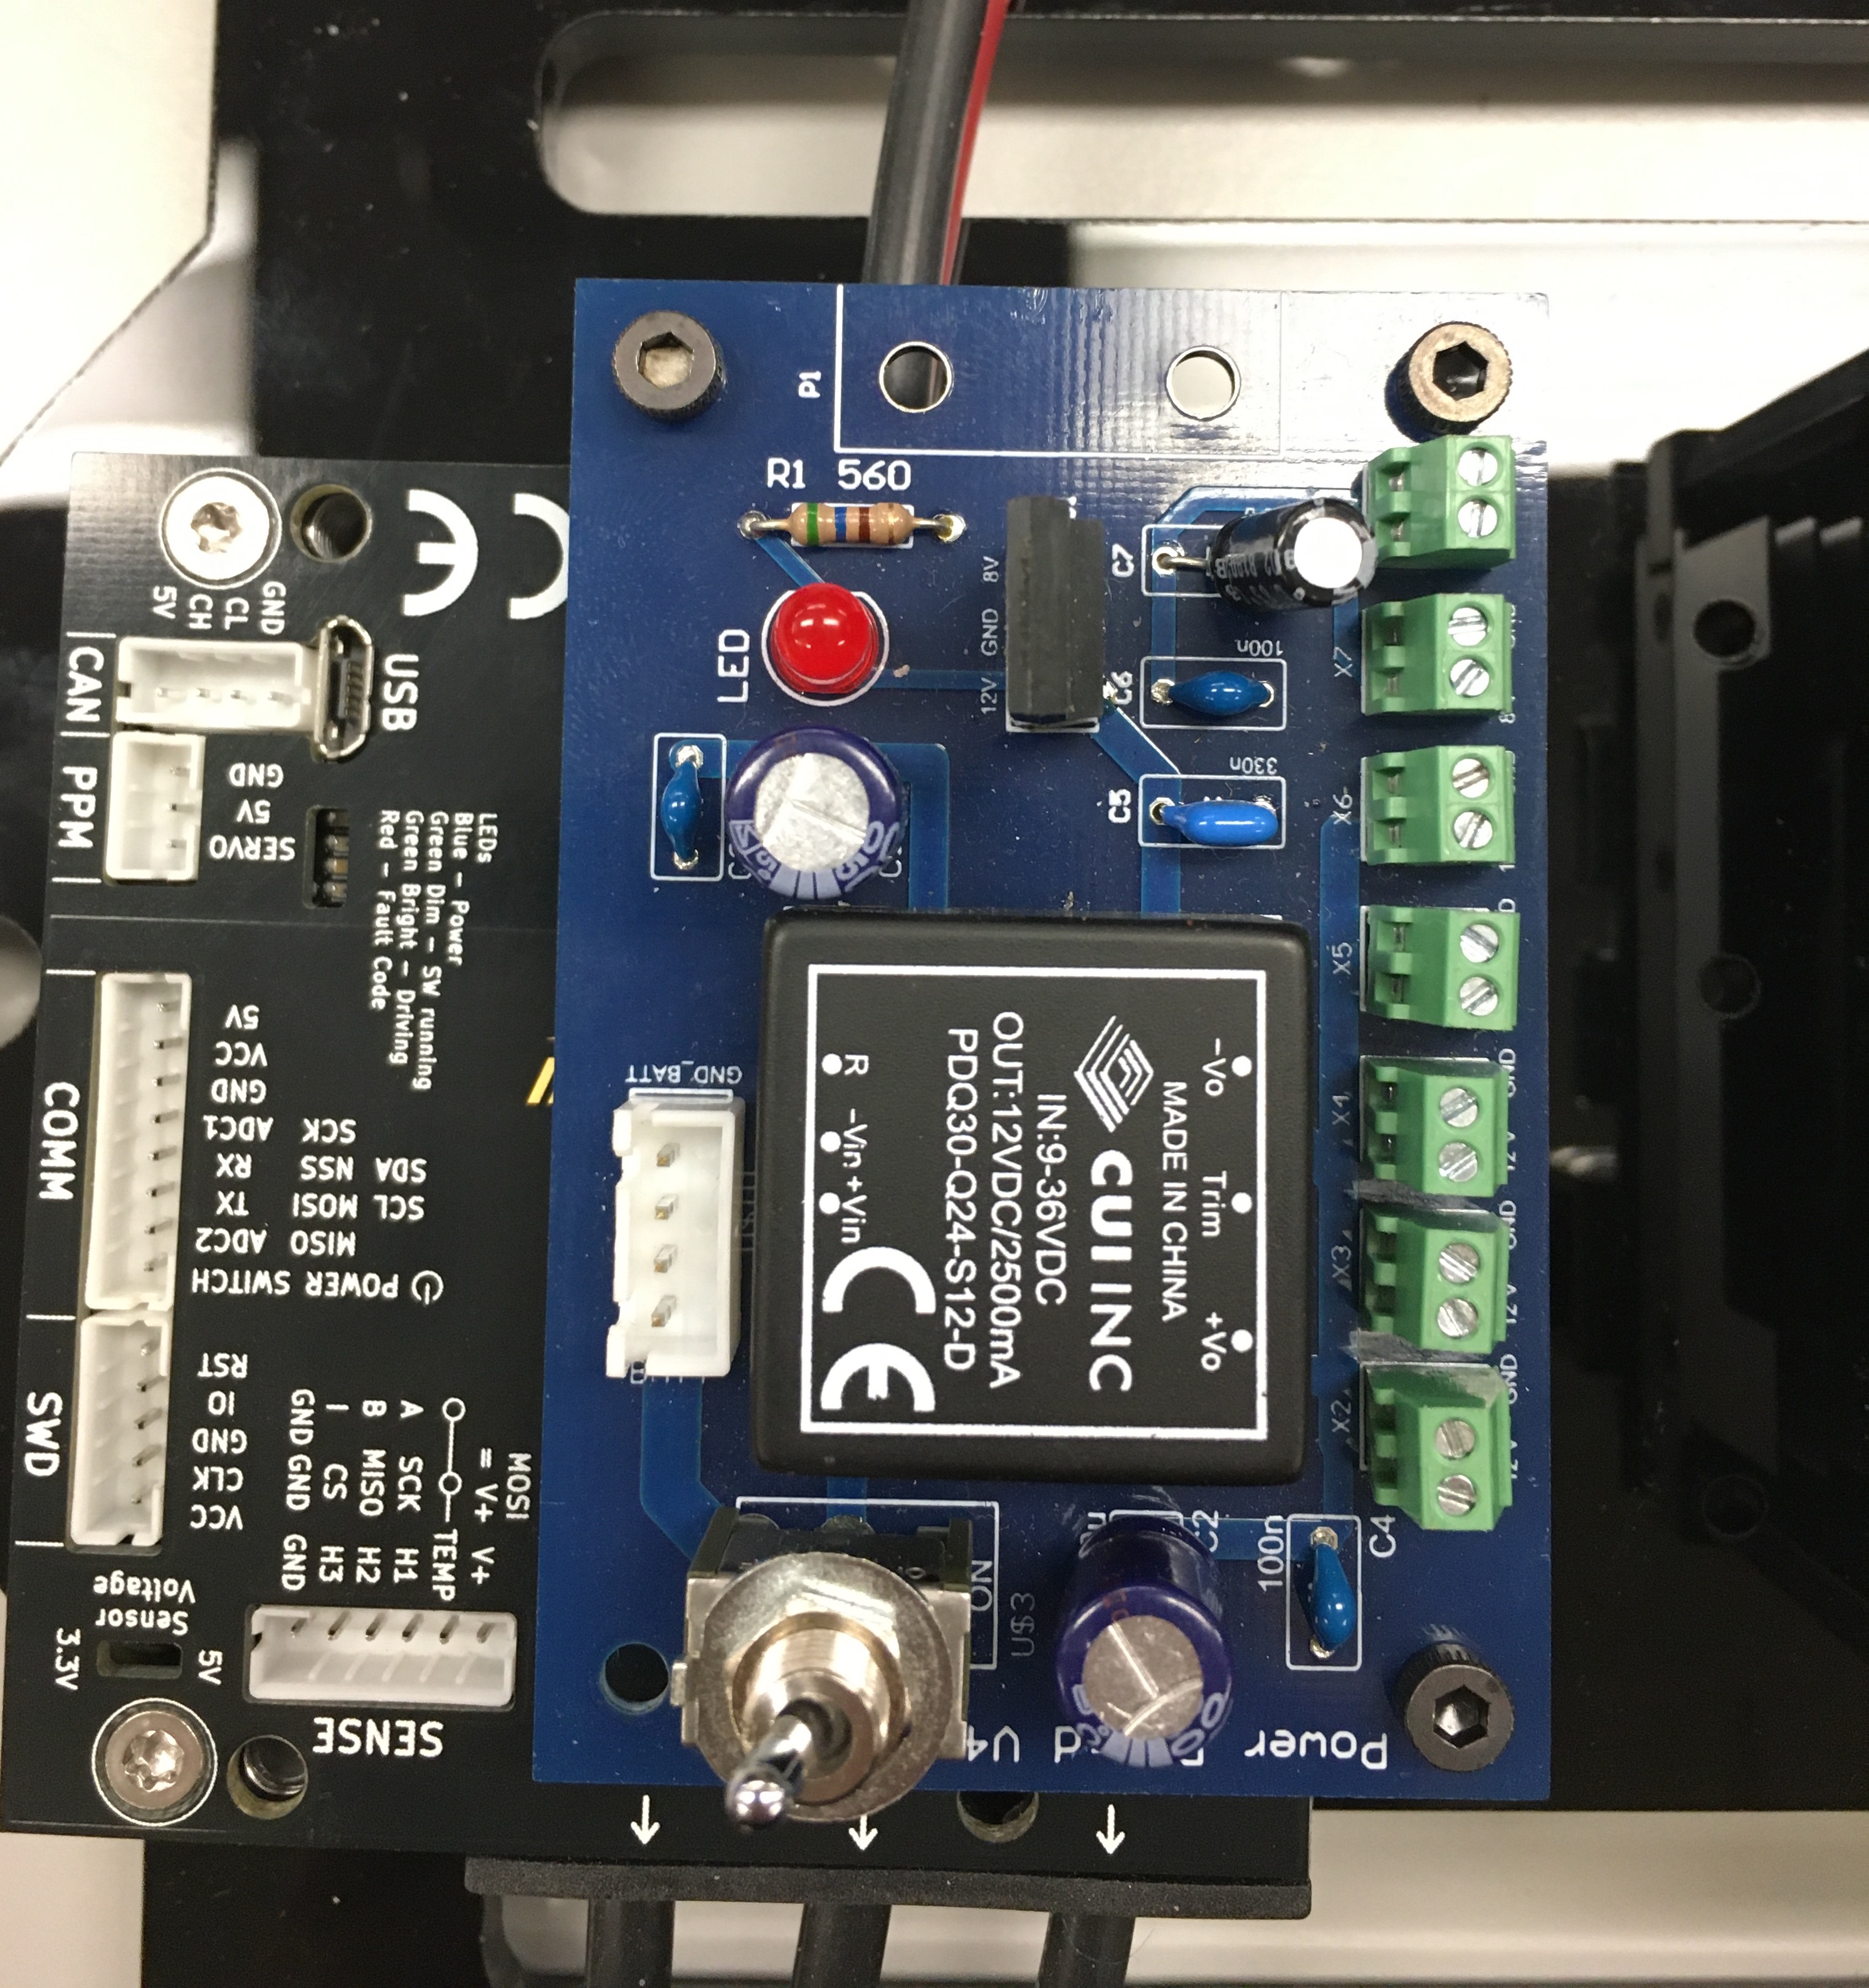
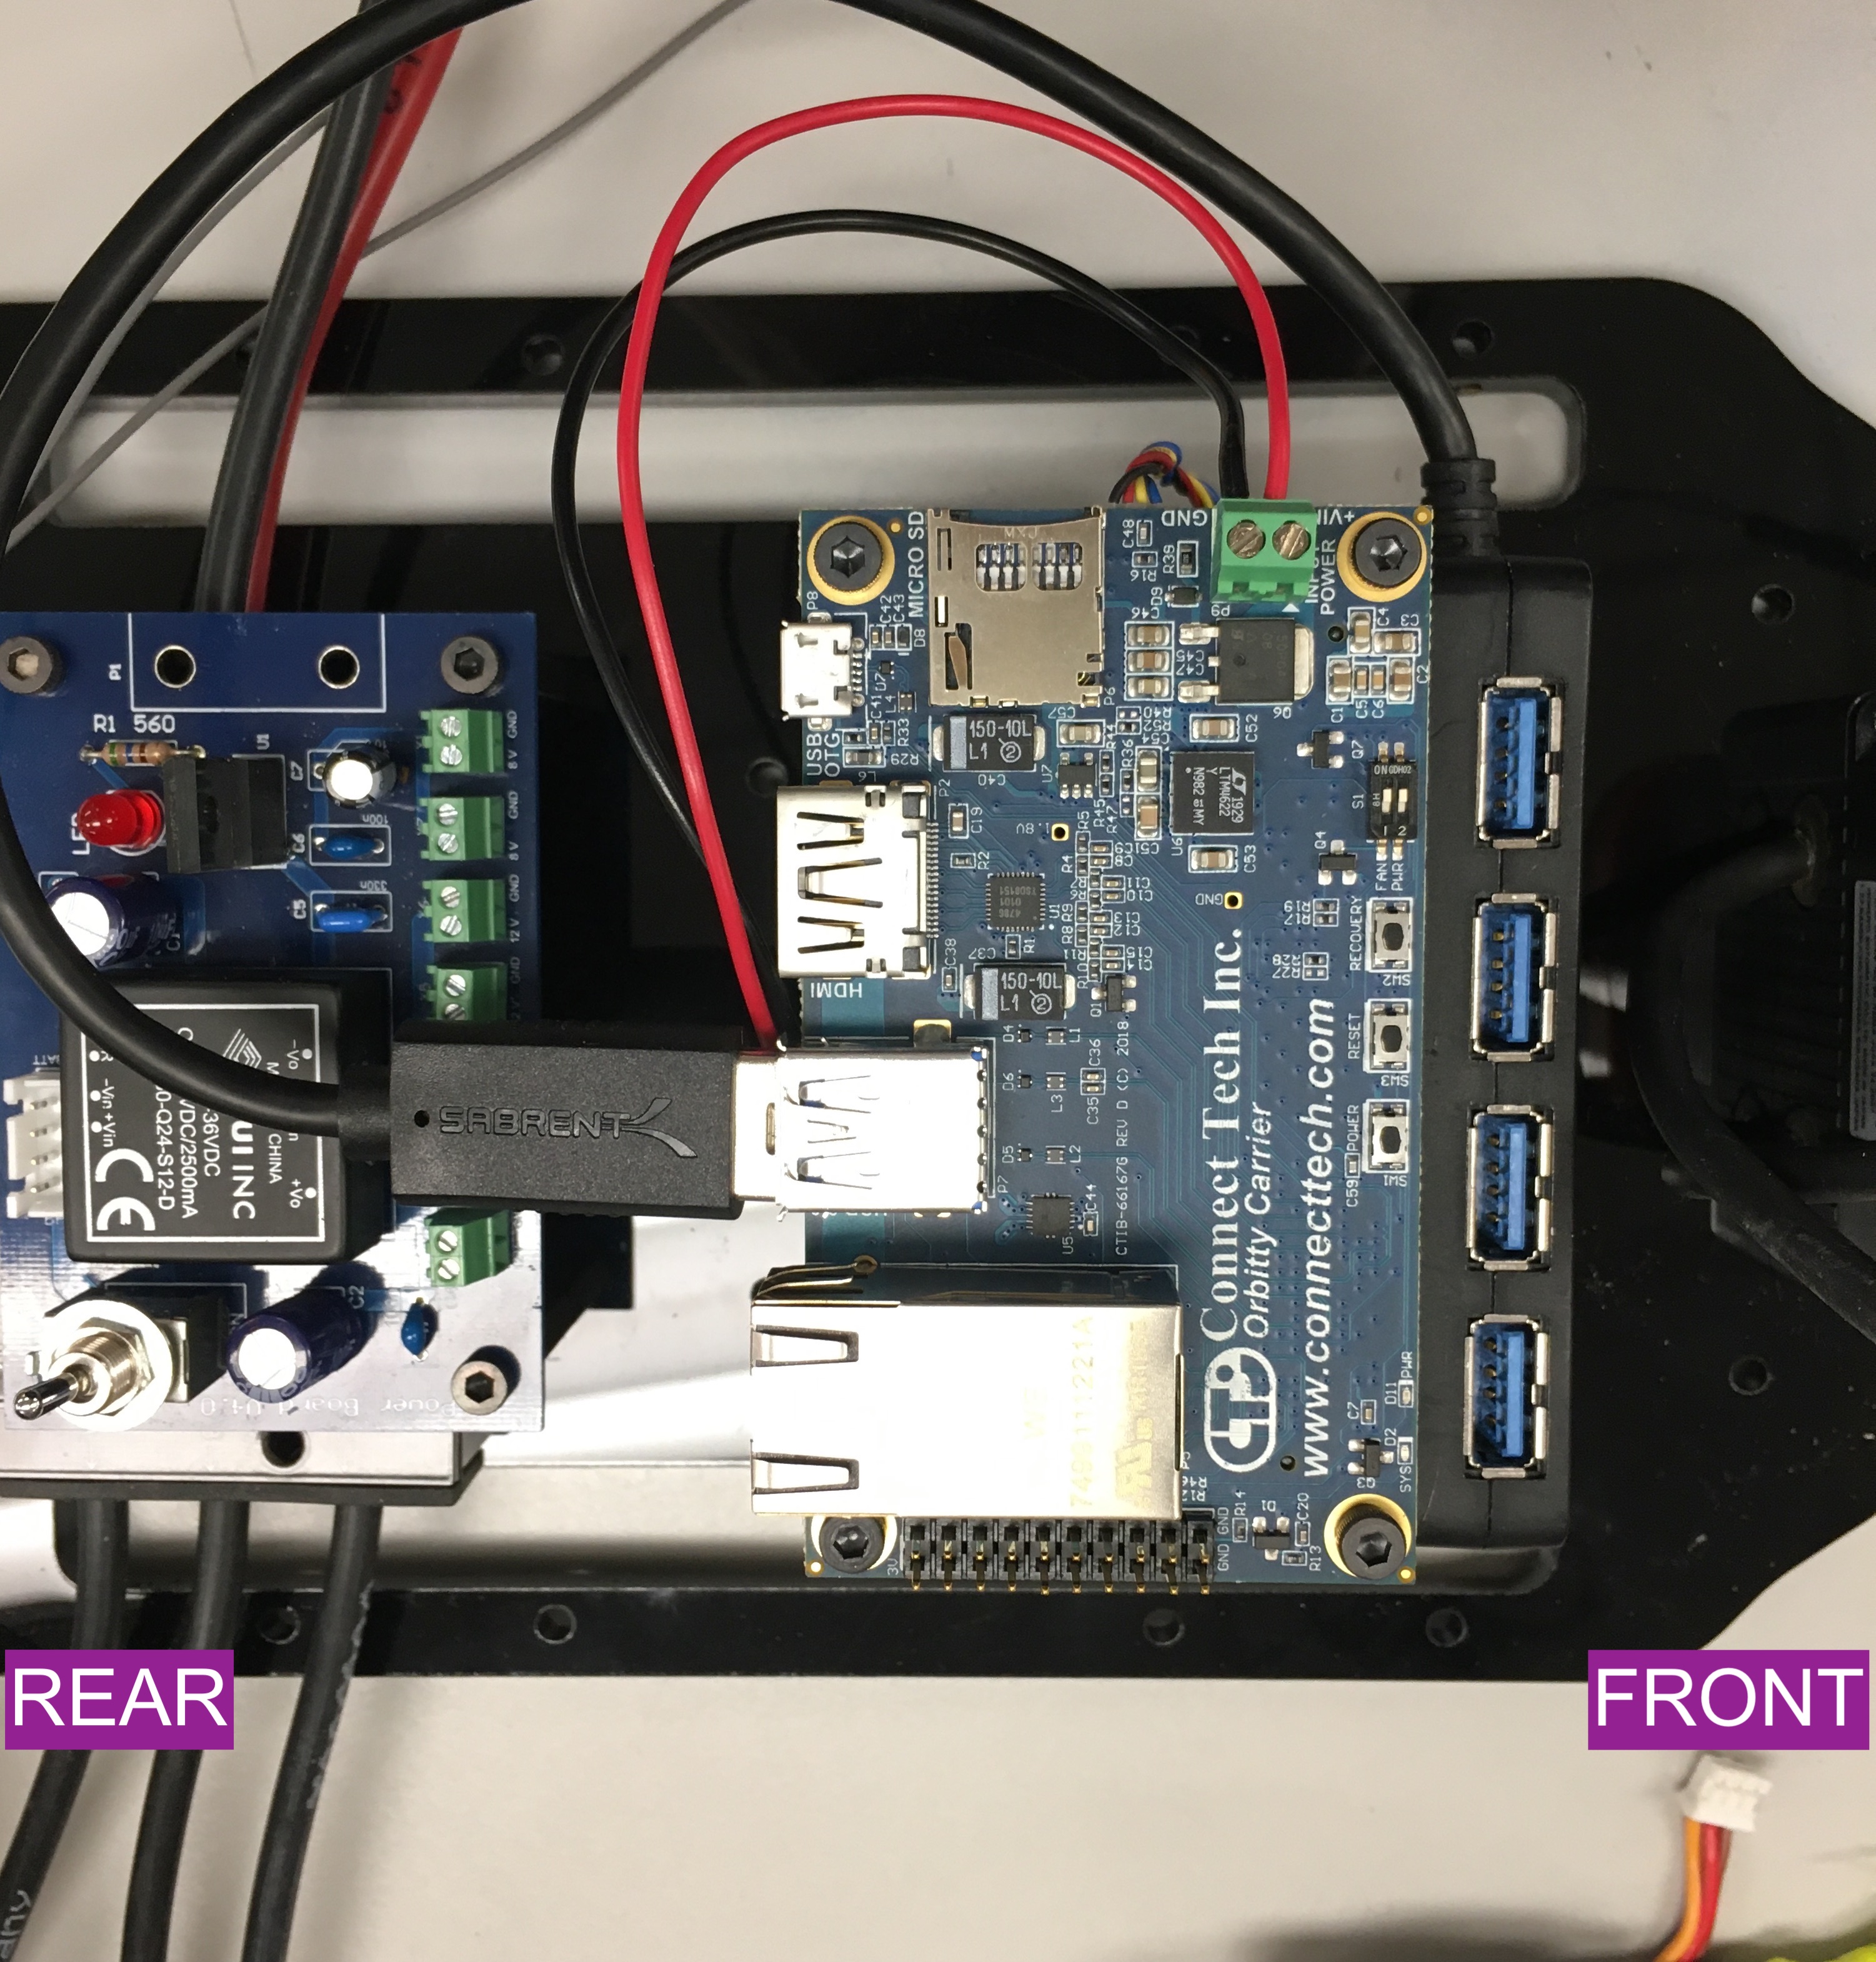
Top view of Powerboard mounted on Platform Deck. The green terminal blocks are facing the FRONT of the car.
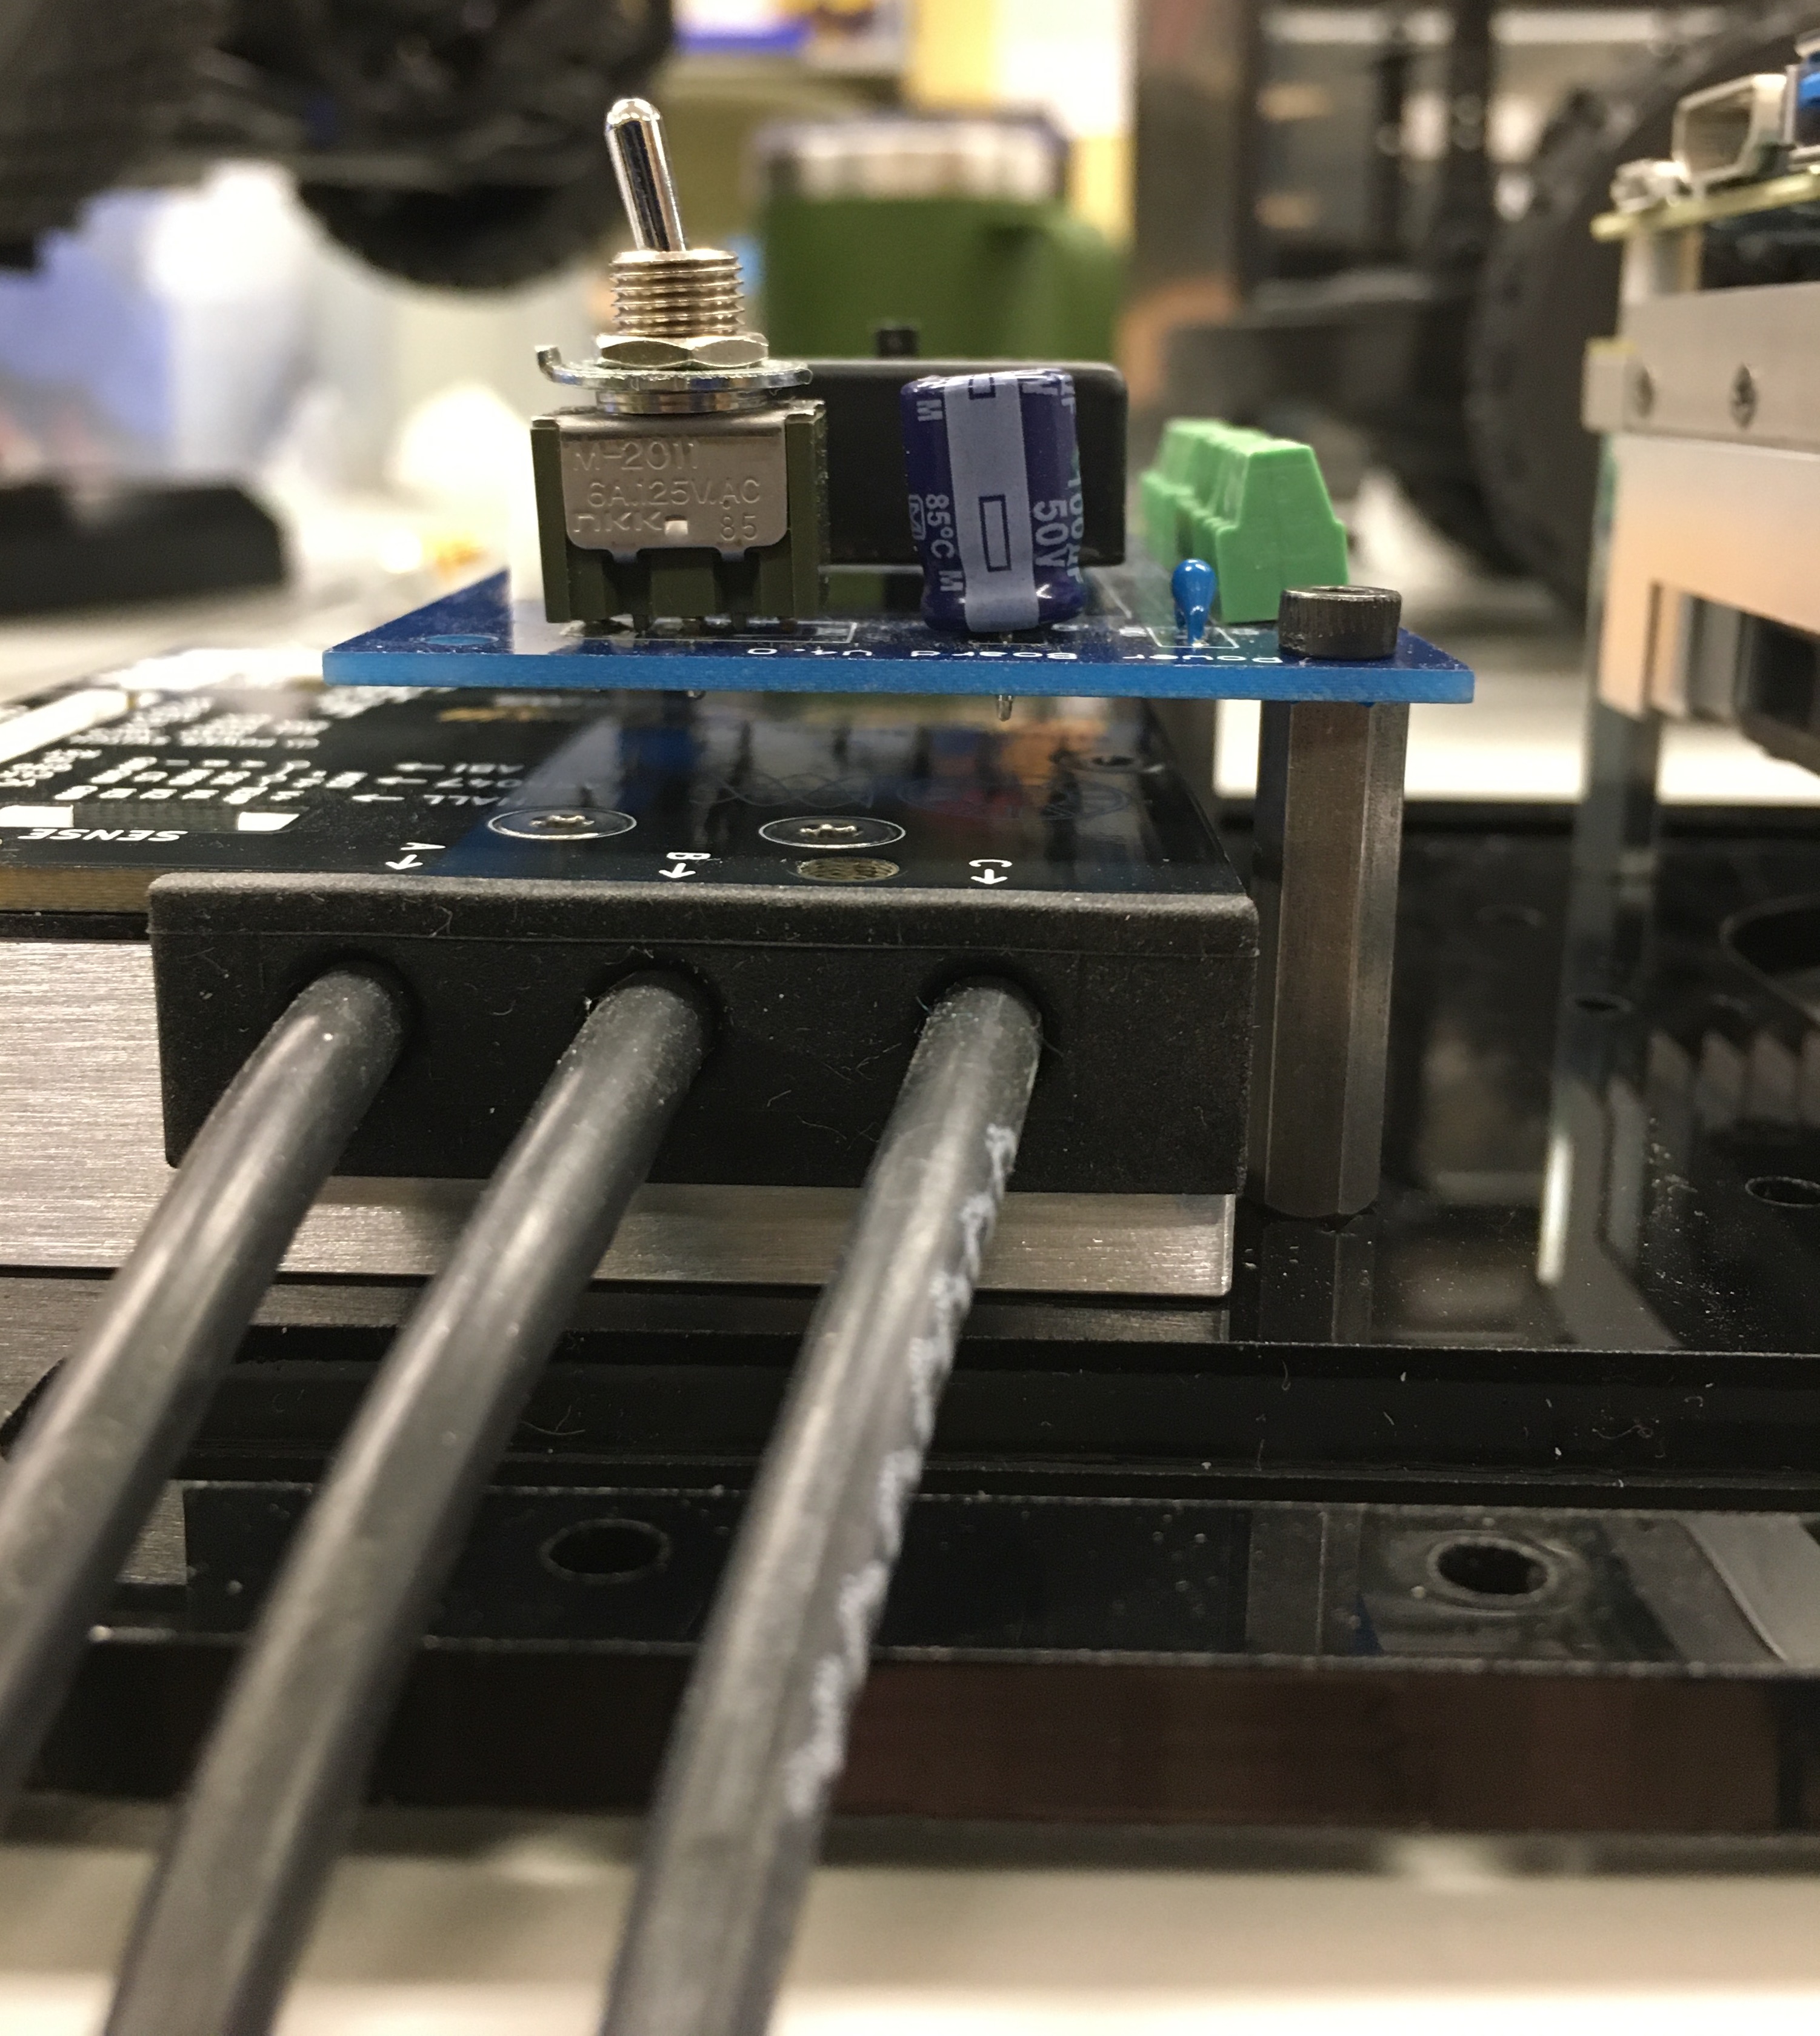
There should be a gap between the Powerboard and the VESC.
Notice there is space between the VESC and the Powerboard.
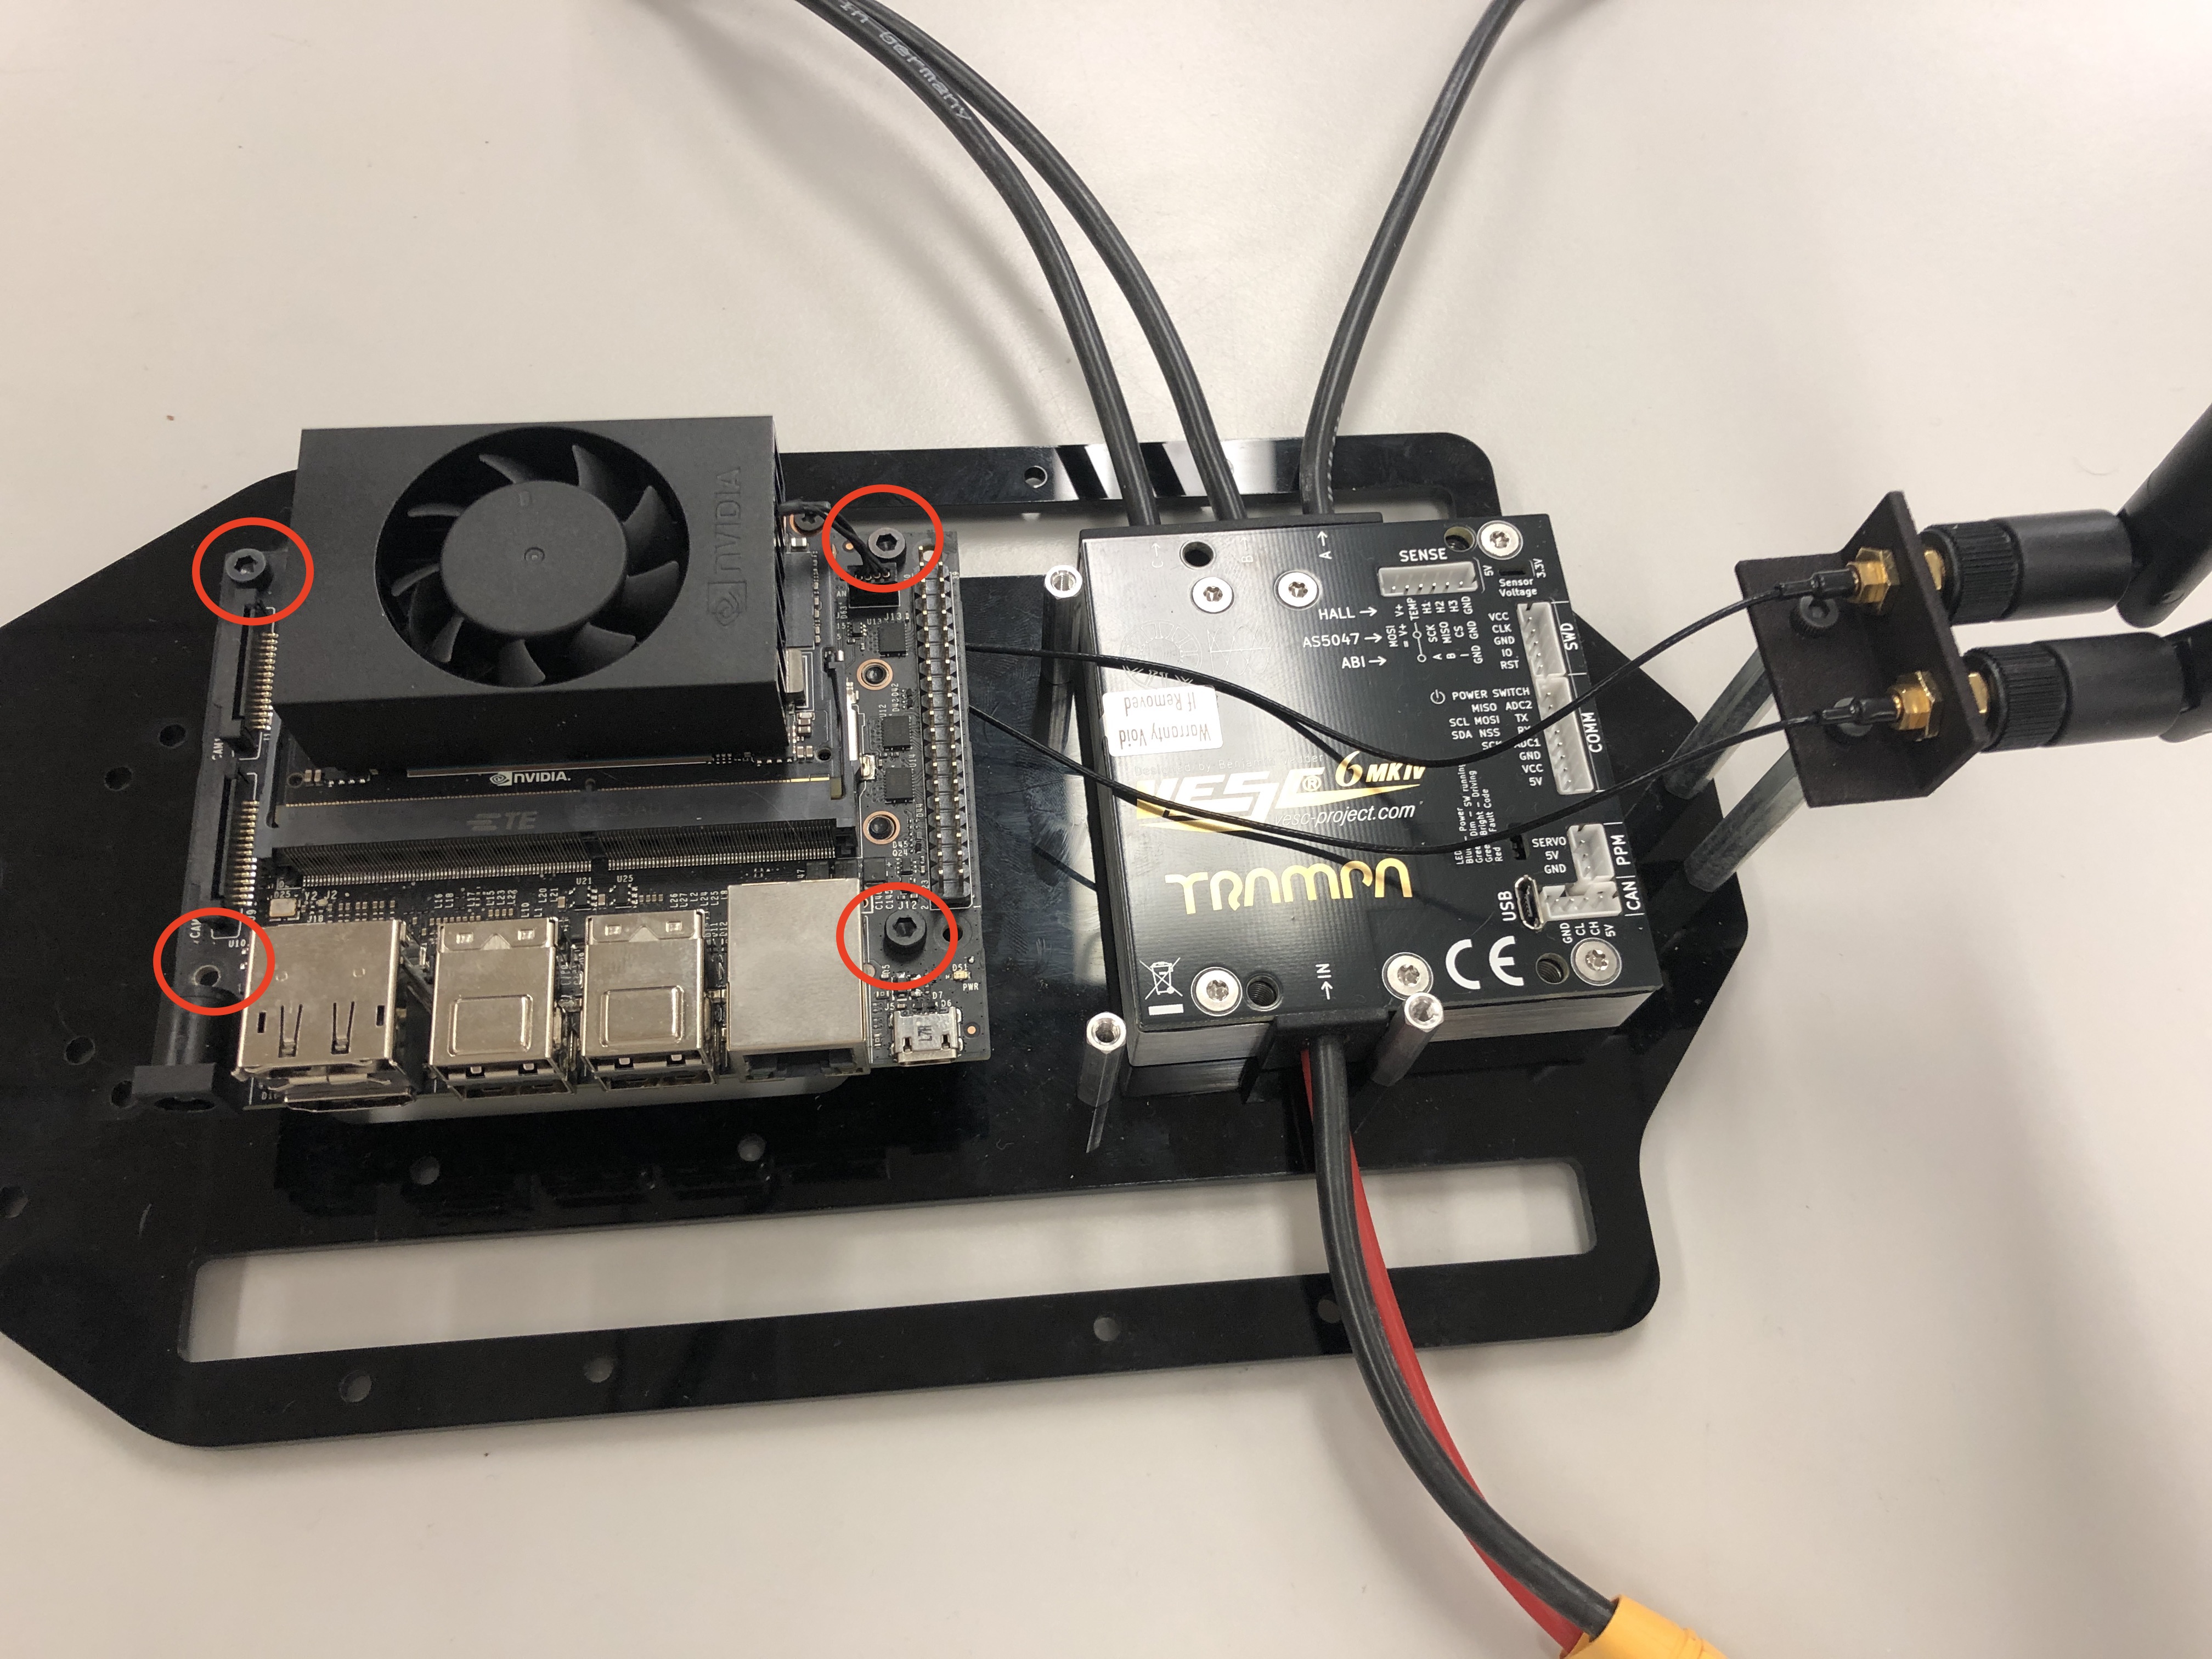
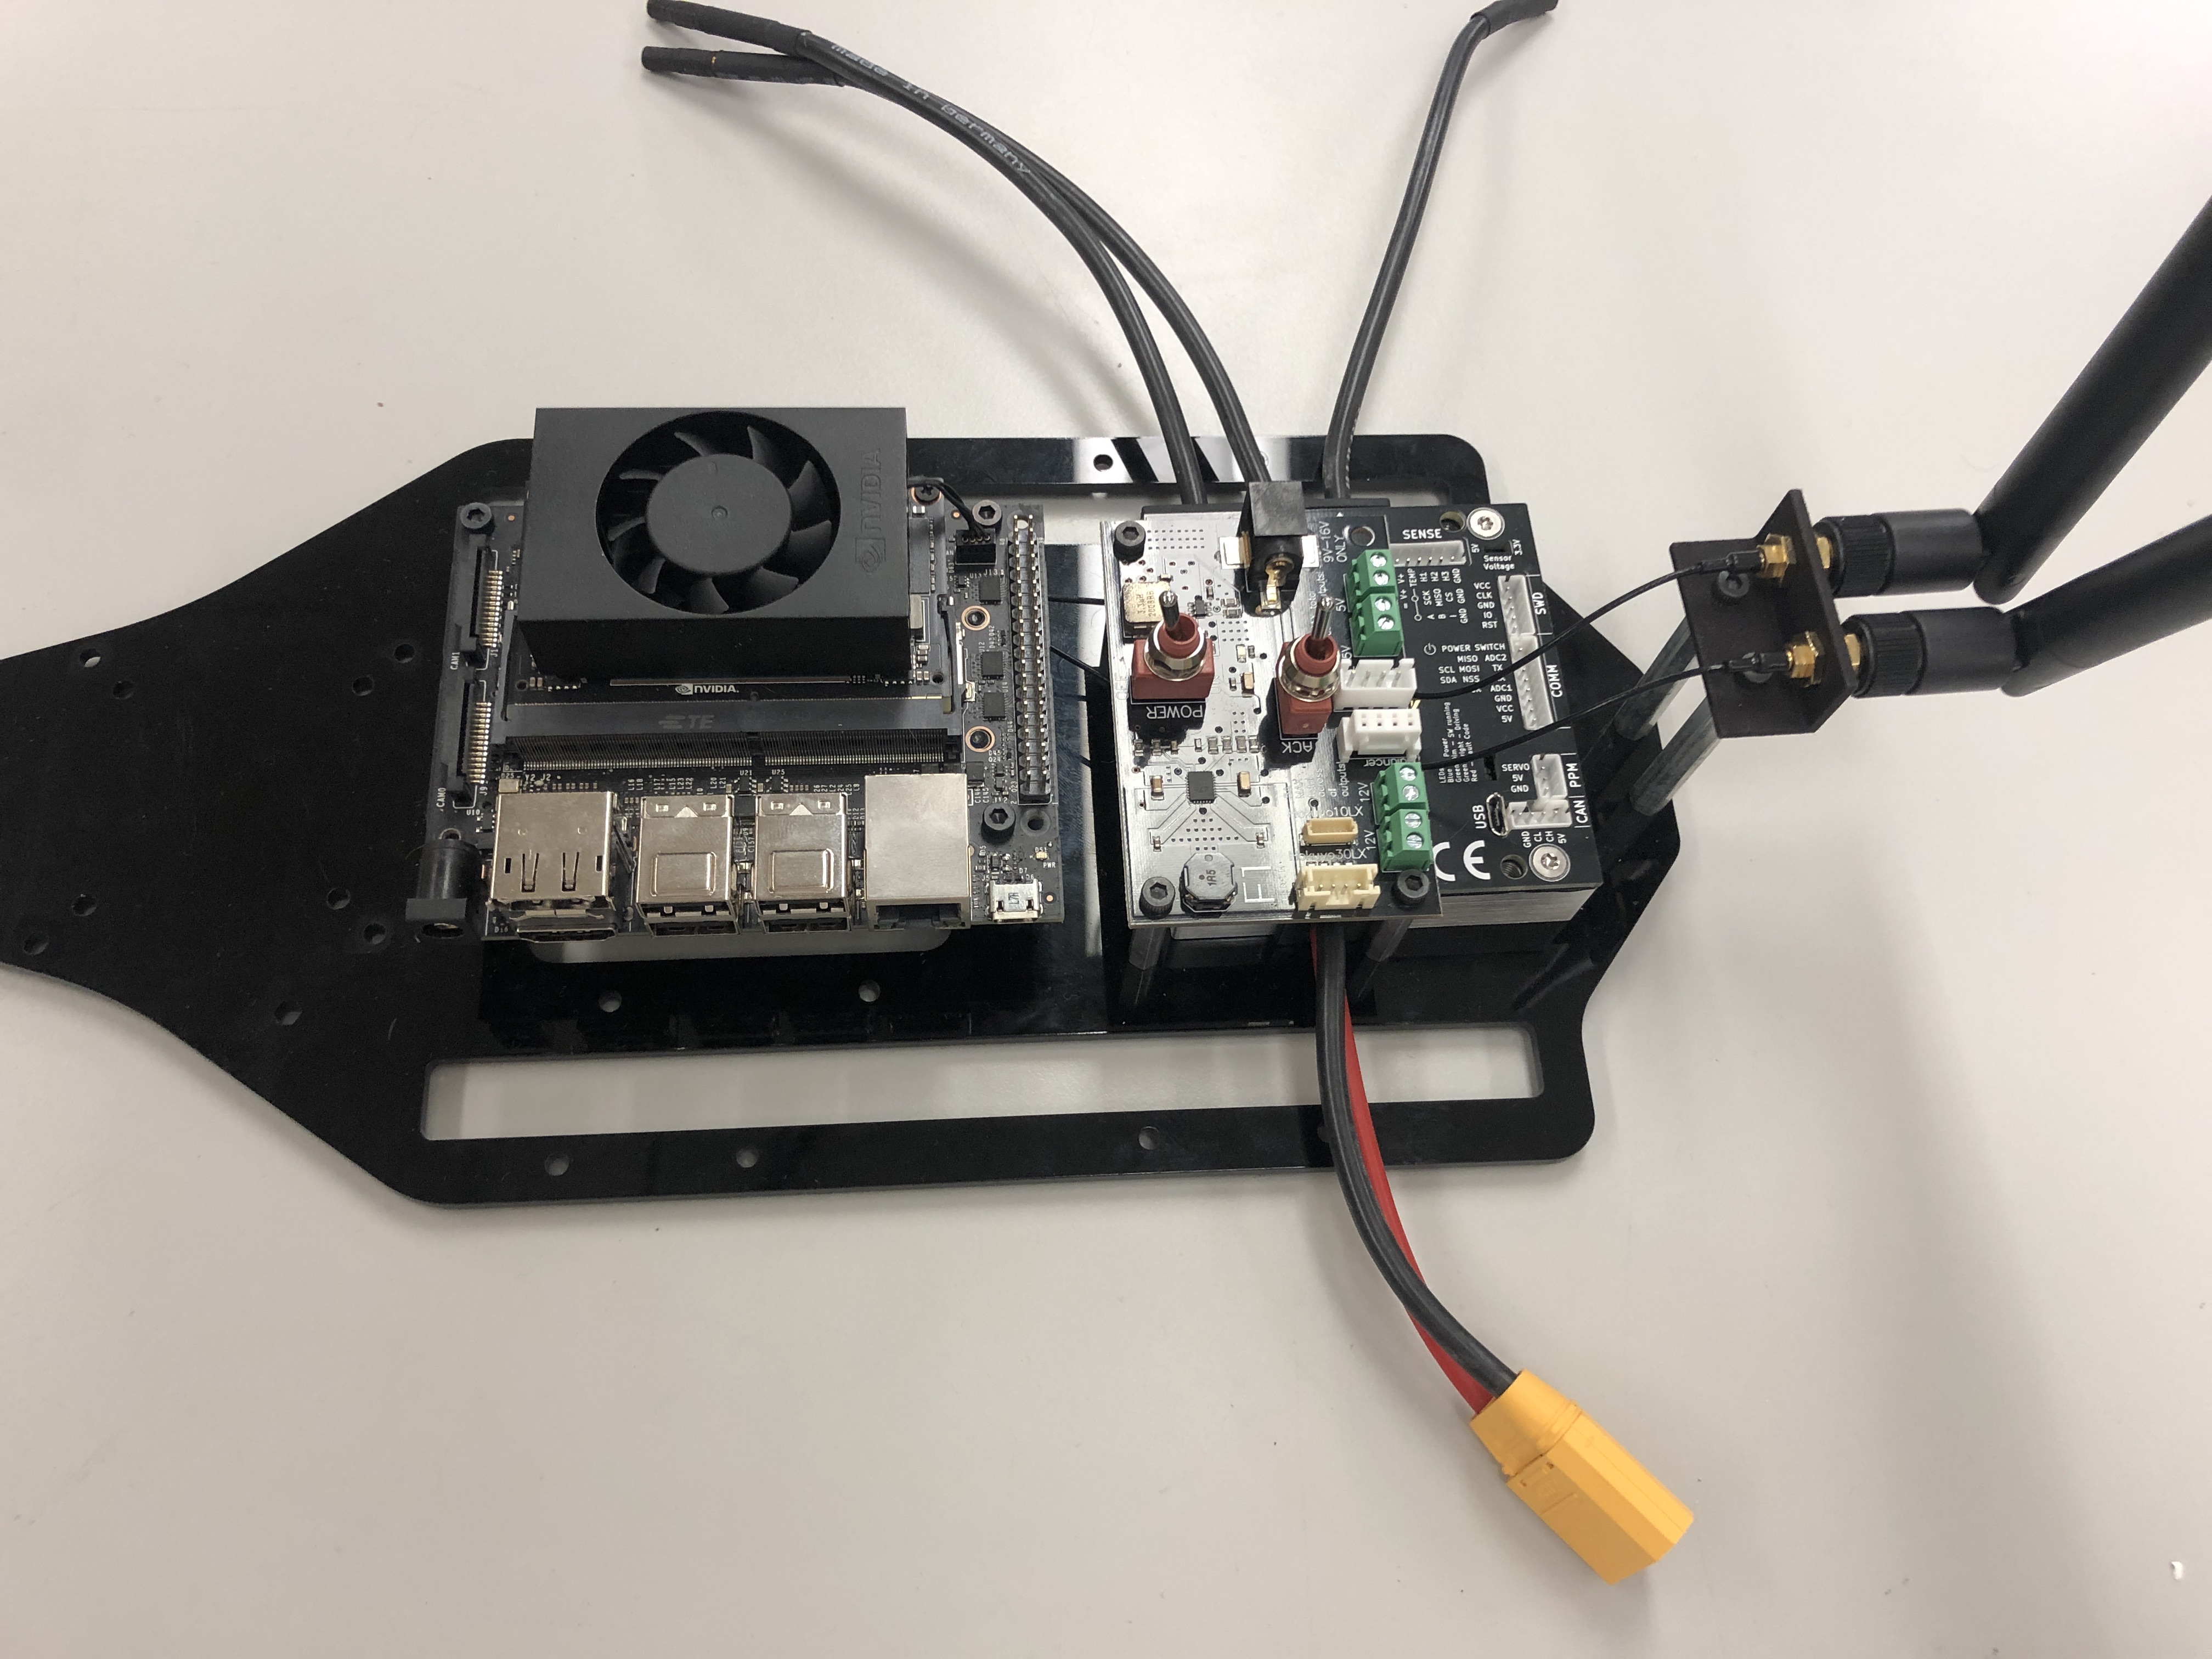
After installing the powerboard your upper level should look like this.
Platform deck with Jetson NX, VESC, Powerboard and antenna.
In this section we are describing how to mount the NVIDIA Jetson TX2 as a main ECU for the F1TENTH vehicle. This setup is deprecated and no longer recommended.
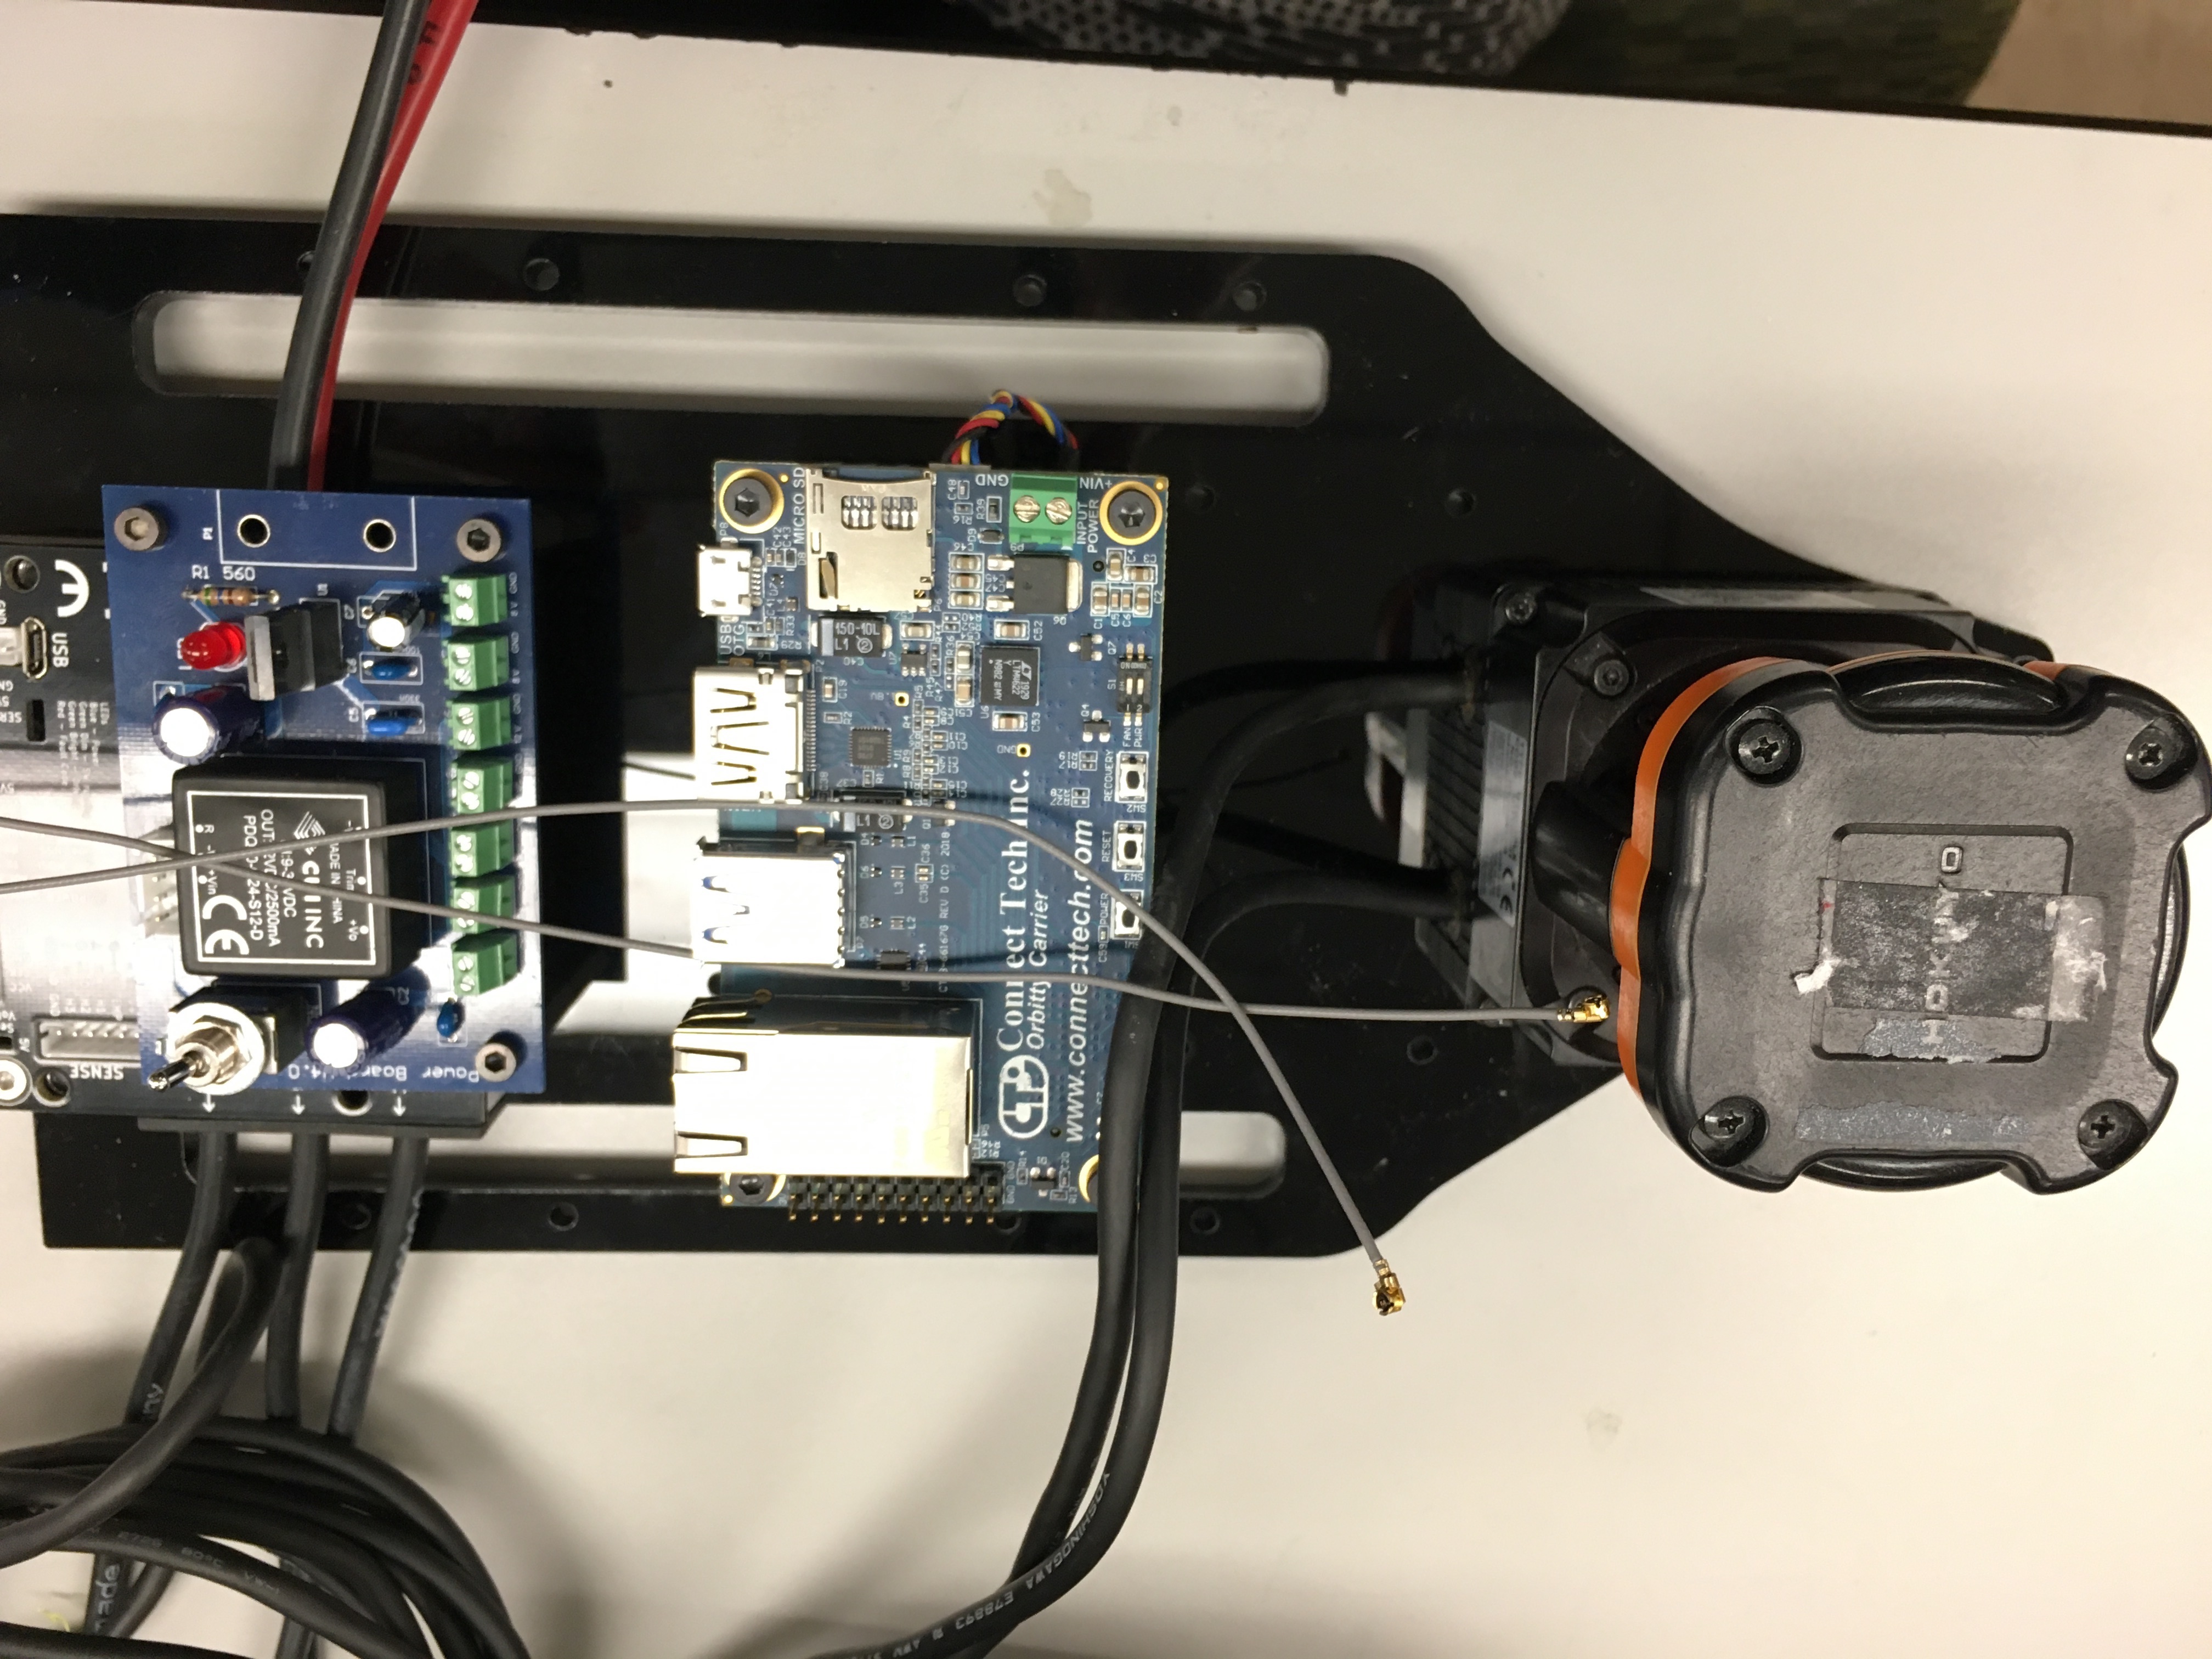
Using four of the M3 screws that held the Nerf Bars to the chassis, attach the TX2 assembly to the Platform Deck. The screws attach from the bottom side of the Platform Deck. The I/O connectors on the TX2 assembly should face towards the rear of the vehicle and the fan should be immediately above the middle opening of the Platform Deck.
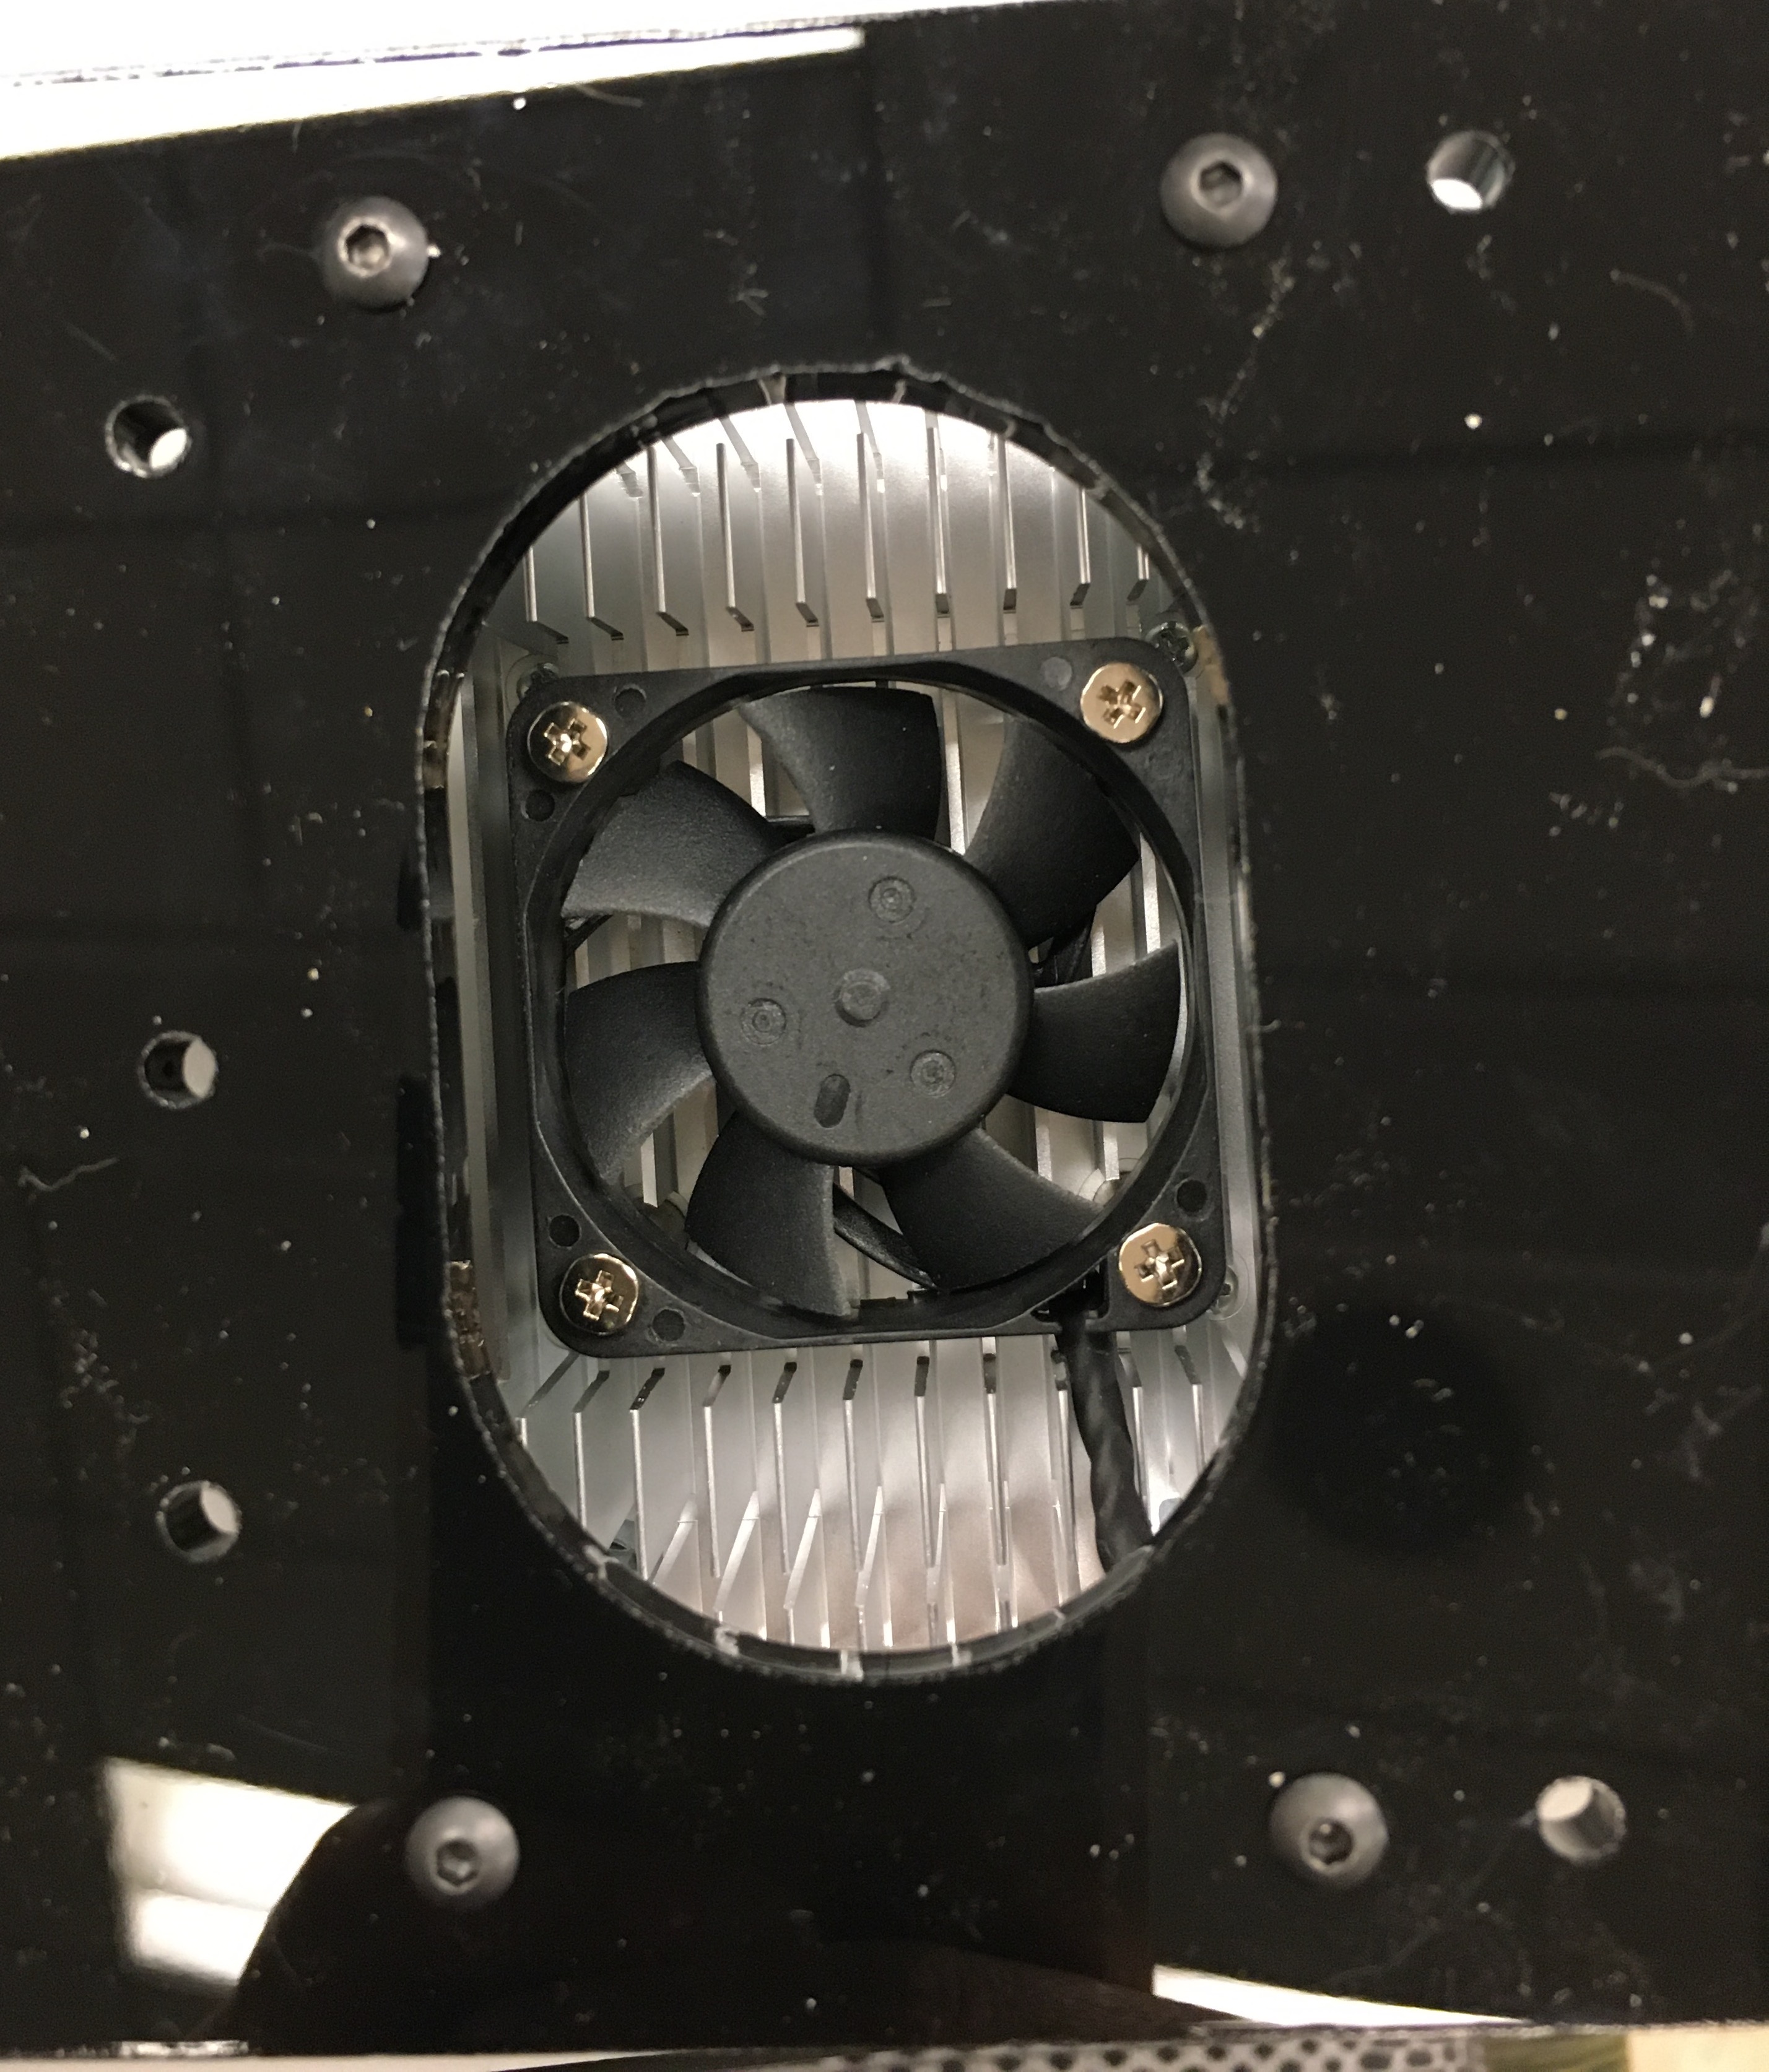
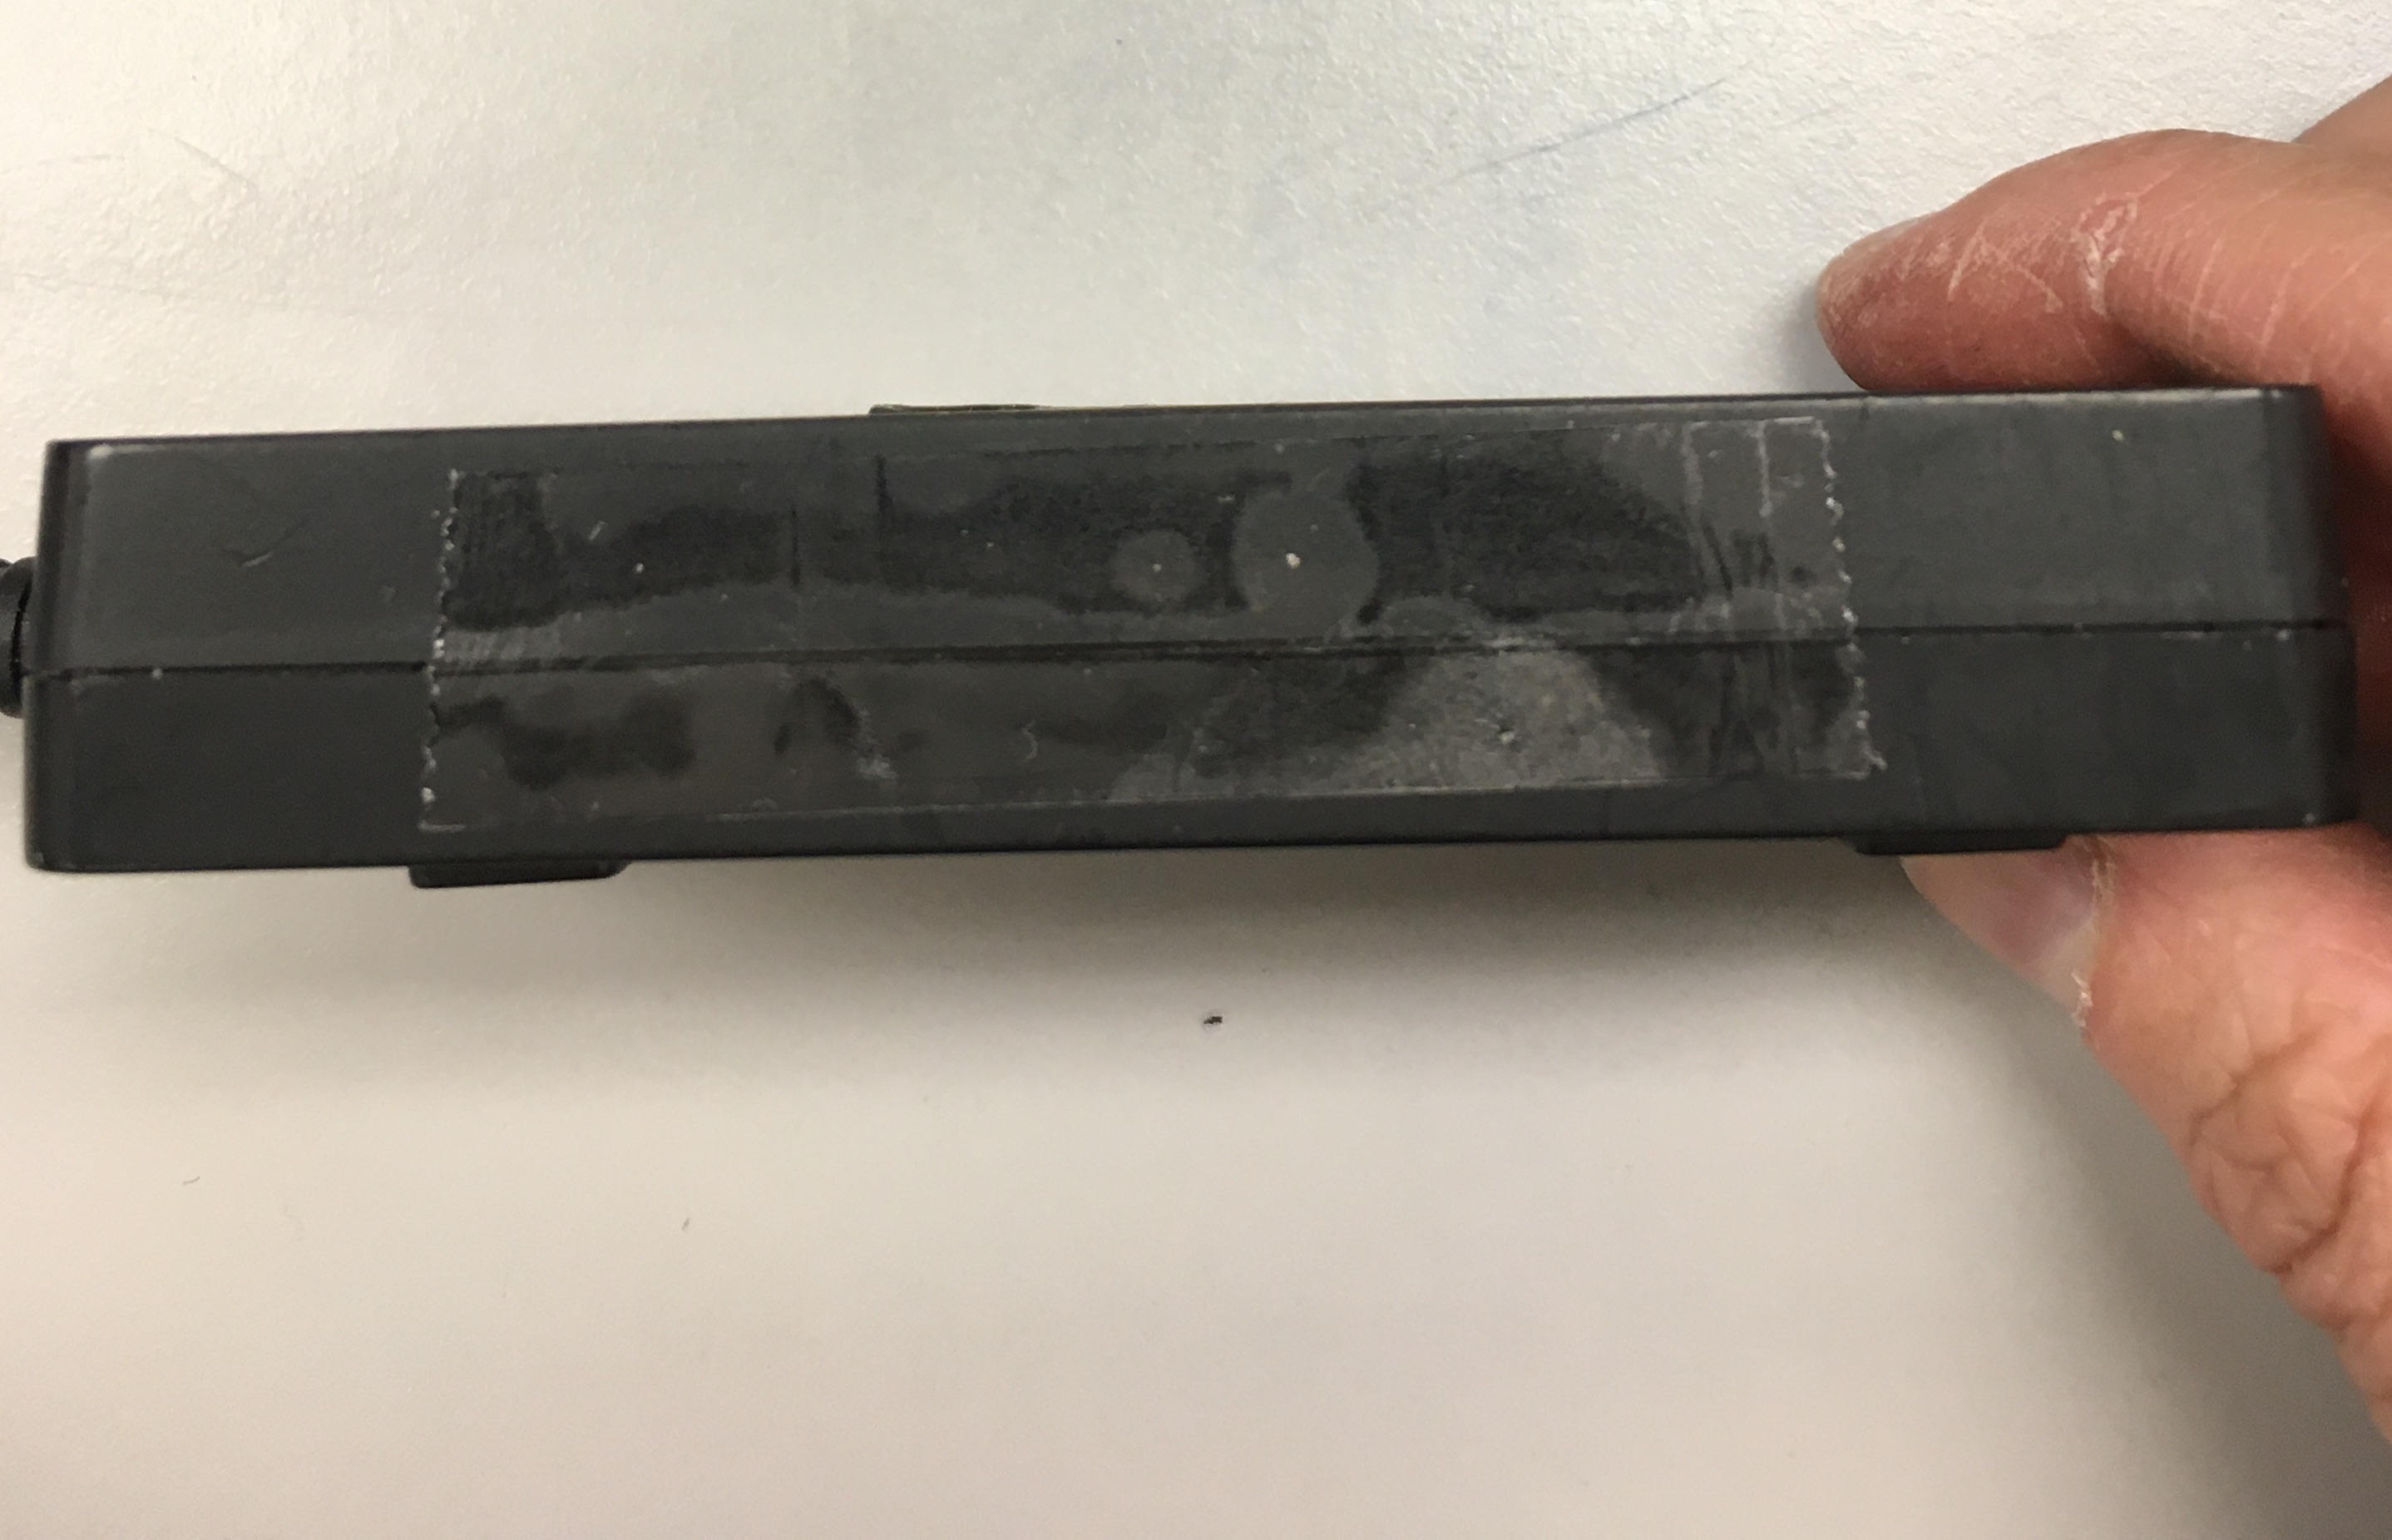
Bottom view of the Platform Deck with the Jetson’s fan peeking through.
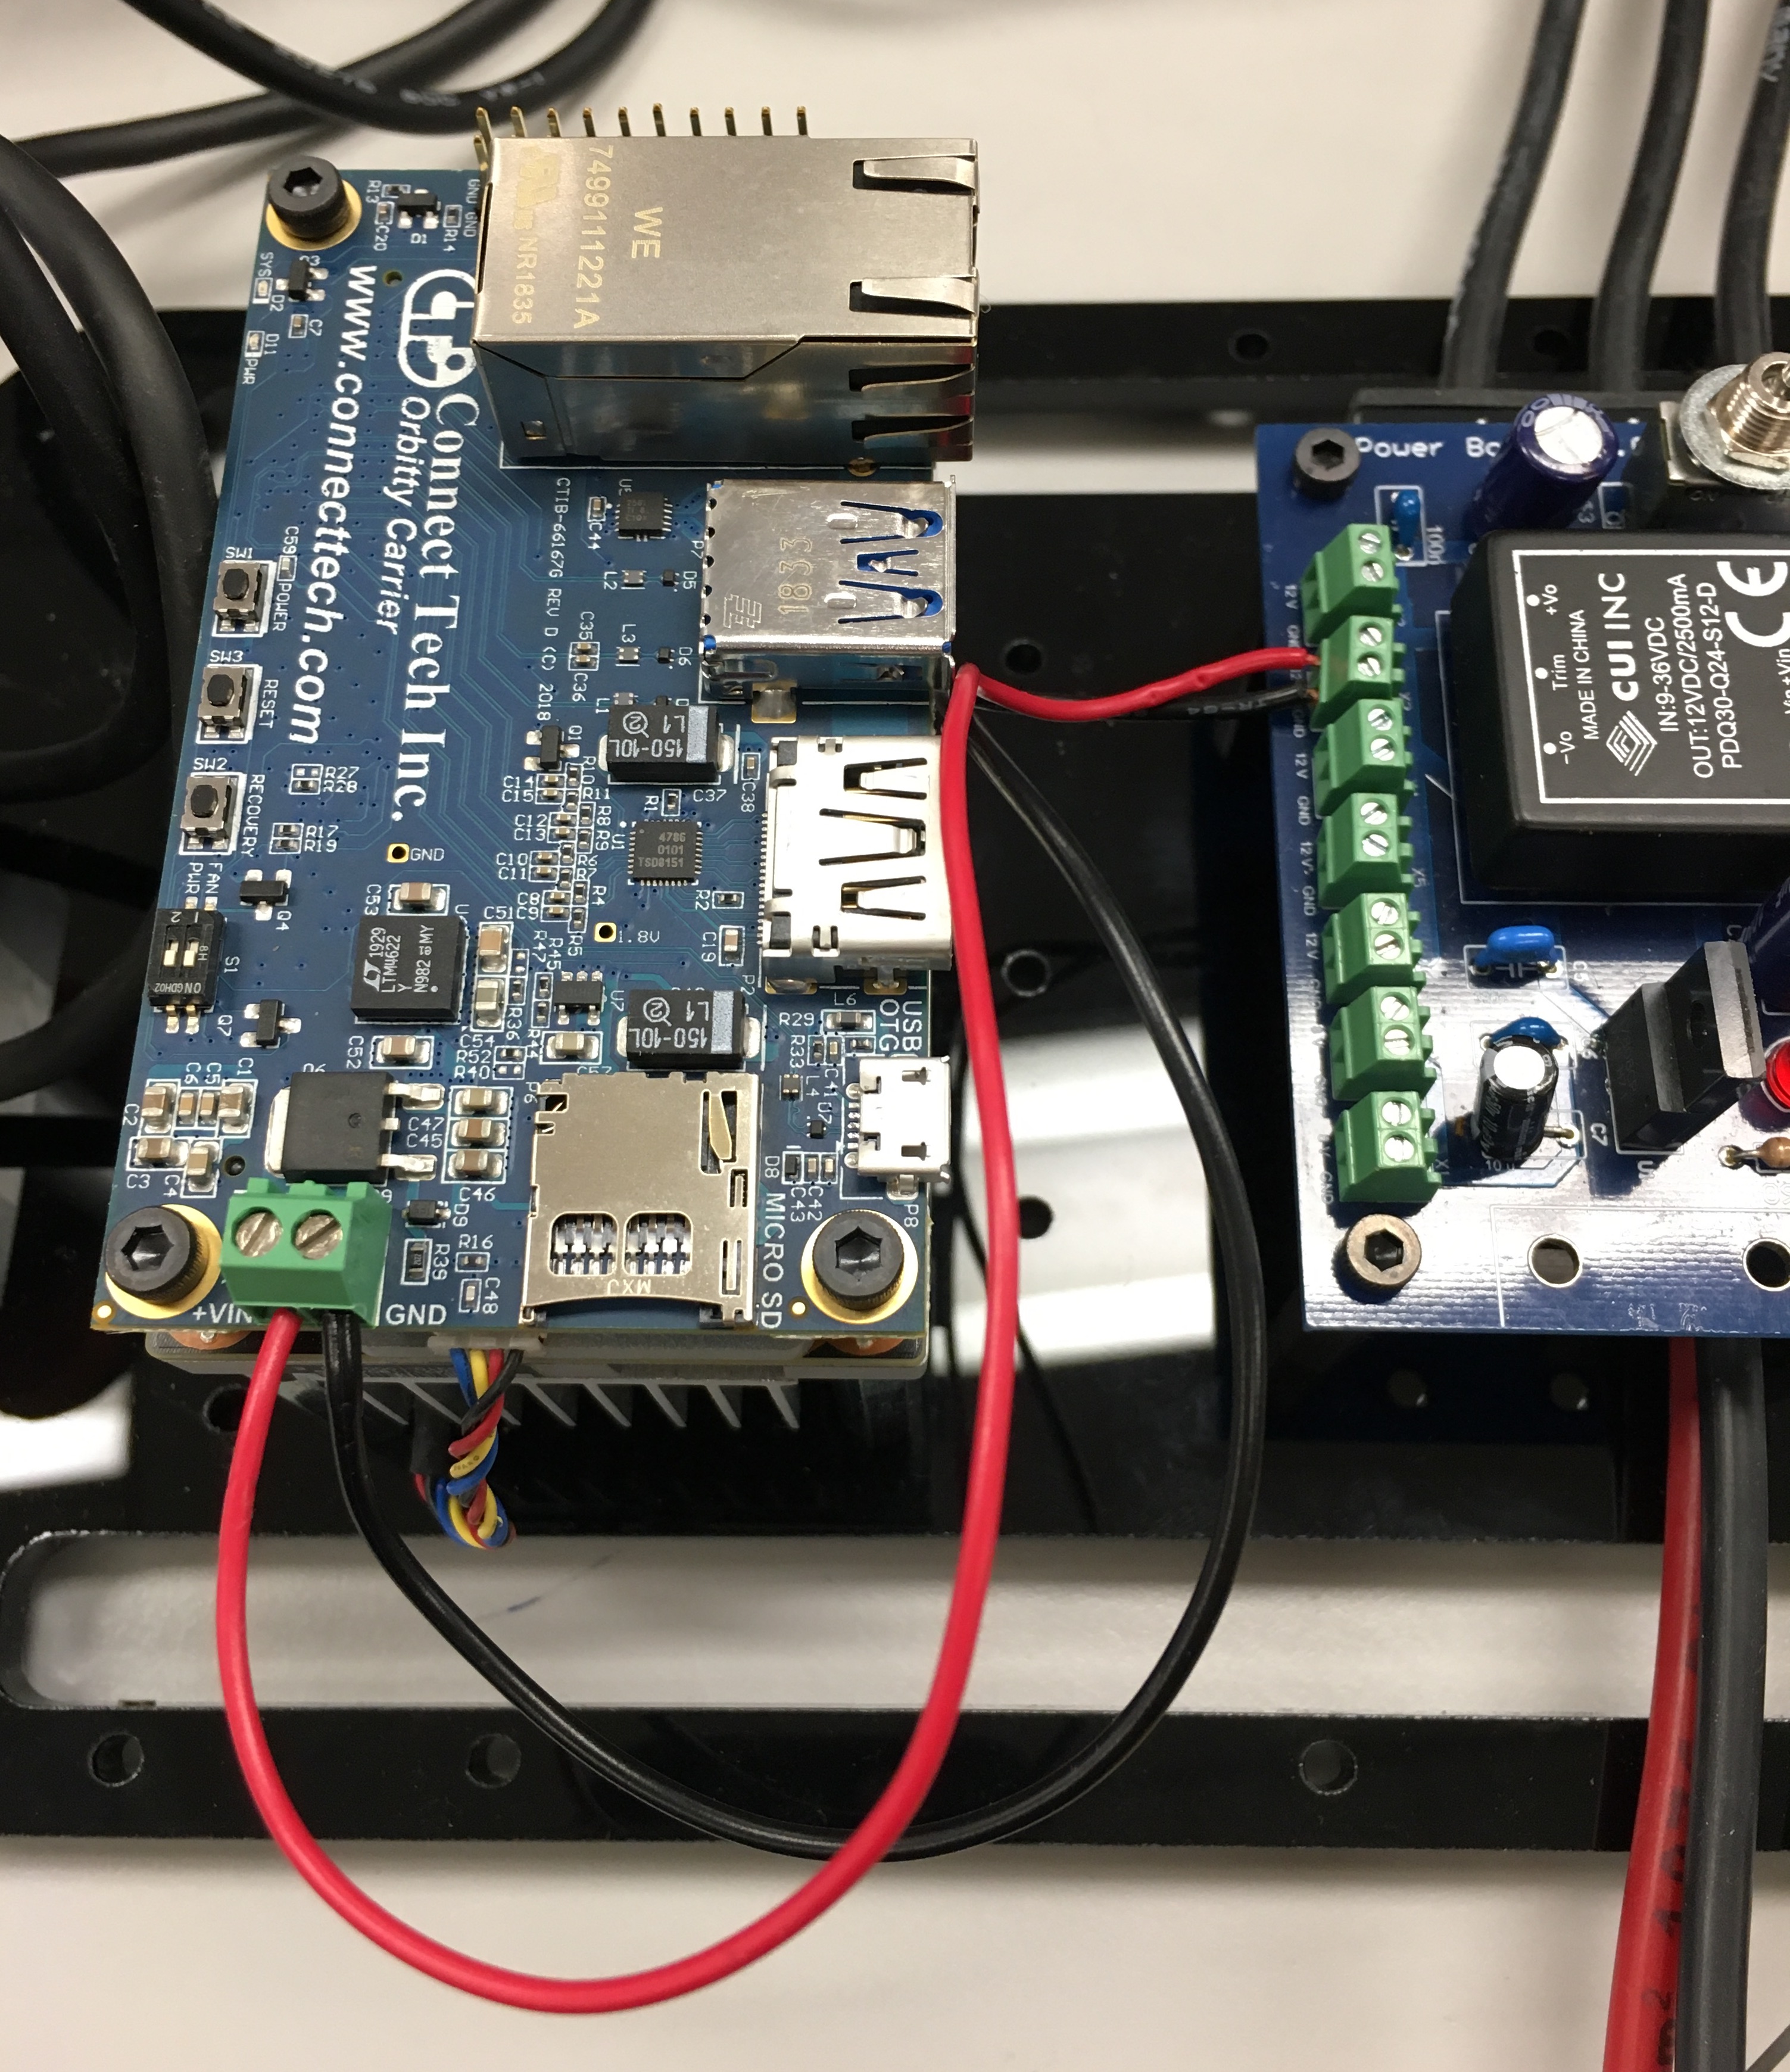
Connect two wires (preferably red and black) from the green terminal on the Orbitty to one 12V terminal on the Powerboard. Make sure that the red wire connects +VIN on the Orbitty to 12V on the Powerboard terminal. The black wire should connect GND on the Orbitty to GND on the Powerboard terminal.
Danger
MAKE SURE THE POLARITY IS CORRECT. +VIN TO 12V. ORBITTY GND TO GND. If you plug this in backwards, fire will happen and global warming will immediately speed up exponentially. And you do not want to be the cause of the death of the dinosaurs part two.