3. Connecting the Pit/Host and the NVIDIA Jetson NX
- Equipment Used:
Pit/Host laptop/computer running Ubuntu 16.04 or 18.04
Fully built F1TENTH vehicle with its NVIDIA Jetson NX connected to a keyboard, mouse, and an external monitor/display via HDMI cable
Wireless router (or wireless hotspot on your phone)
Ethernet cable (needed if Pit/Host laptop does not have WiFi capability)
Approximate Time Investment: 1 hour
Overview
We could log into the Jetson using a monitor, keyboard, and mouse, but what about when we’re driving the car? Fortunately, the Jetson has WiFi capability and can be accessed remotely via an SSH session. Throughout this tutorial, you will be asked to configure the Jetson’s and your laptop’s network settings. Make sure to get these right! Using the wrong IP address may lead to conflicts with another classmate, meaning neither of you will be able to connect.
If the Pit/Host computer has WiFi capability, then there are 2 options:
Option 1: Both connect to a wireless router which reserves a static IP address for Jetson
Option 2: Set up NVIDIA Jetson NX as wireless host spot and host computer connects to NVIDIA Jetson NX.
If the Pit/Host computer DOES NOT have Wifi capability:
Connect the Pit/Host computer to a WiFi router via an ethernet cable.
Connect the NVIDIA Jetson NX to the same router via Wifi.
To make this section easy to follow, the WiFi network SSID will be called and referred to F1TENTH_WIFI. In your scenario, it may be “AirPennNet”, “eduroam”, “Billys_iPhone” or whatever network you’ve chosen to communicate over.
1. Vehicle Hardware Setup
If you have a NVIDIA Jetson NX, it comes with a network card onboard. Make sure the antennas are connected. The battery should be plugged into the vehicle and the Powerboard should be on.
If you have a Nano/Xavier NX, or a Xavier, you’ll need to install a M.2 network card from Intel to enable wireless networking.
2. Wireless Hot Spot on the NVIDIA Jetson NX
- Equipment Used:
Fully built F1TENTH vehicle
Pit/Host Laptop OR
External monitor/display, HDMI cable, keyboard, mouse
Approximate Time Investment: 30 minutes
As you begin to test on larger tracks, you may find a need to have a direct connection to your car, so as to not have to rely on the car being within a certain distance of your router. The solution here is to set up wireless hot spot on the NVIDIA Jetson NX.
Connect to the NVIDIA Jetson NX via SSH on the Pit laptop or via a monitor, keyboard, and mouse.
On the NVIDIA Jetson NX, go to System Settings > Network.
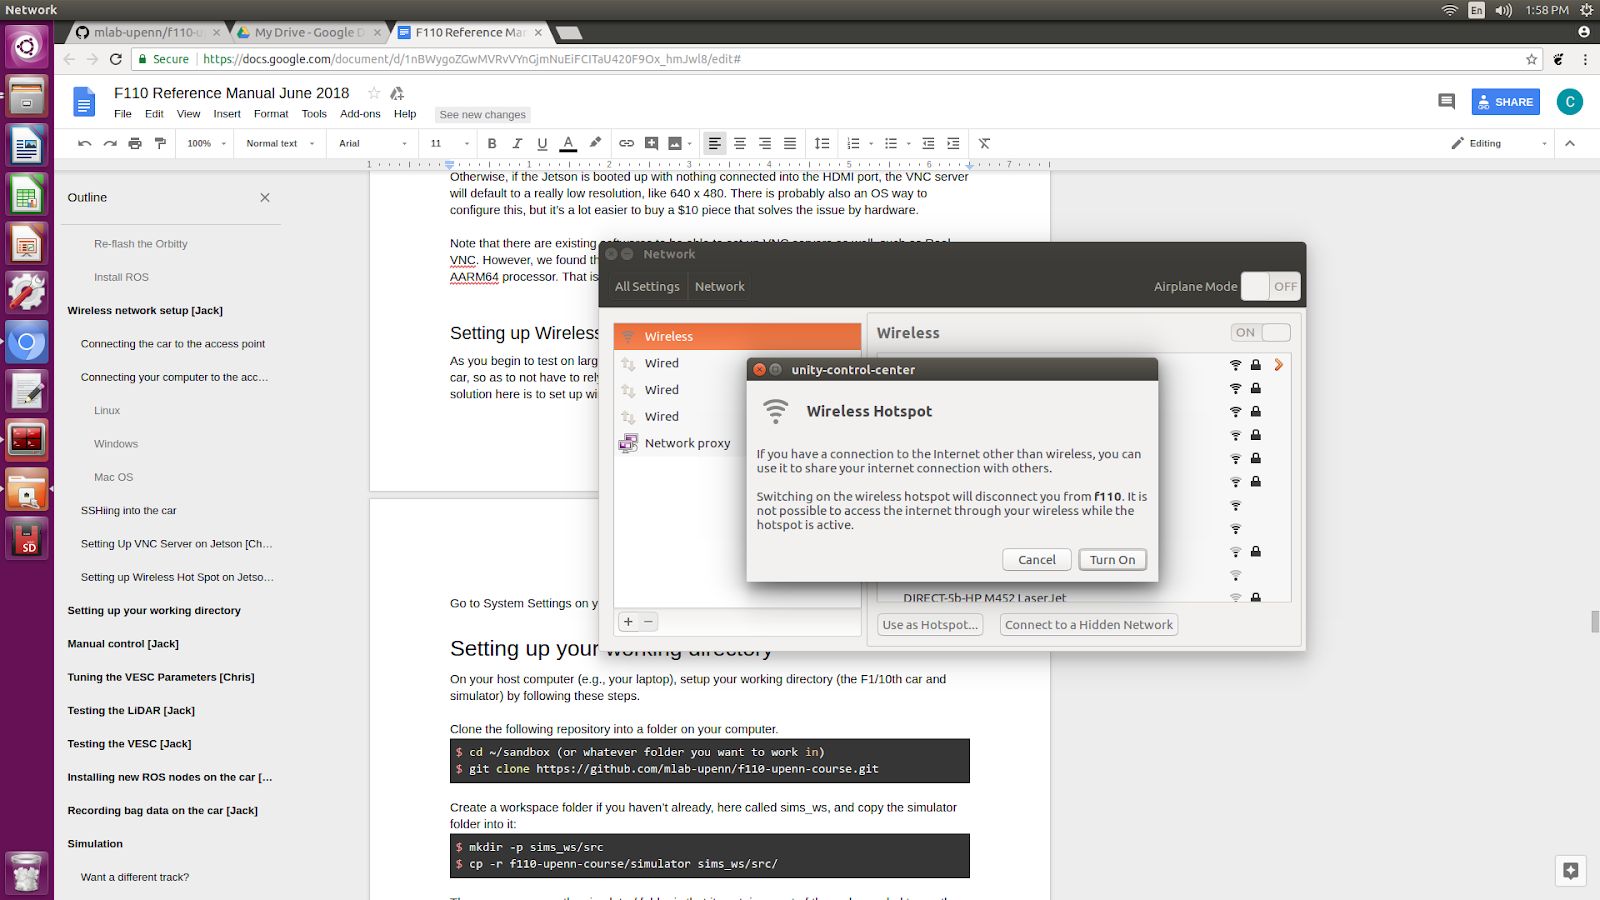
On the bottom center of the pop-up window for the network, click on “Use as Hotspot…” You will no longer have internet connection because your wireless antennas will now be used as a hot spot rather than to connect to the previous Wi-Fi connection that you were on.
Note that if you plan on using the wireless hotspot feature often, you will want it to boot up on startup. To do this, open up Network Connections, under Wi-Fi select Hotspot and Edit.
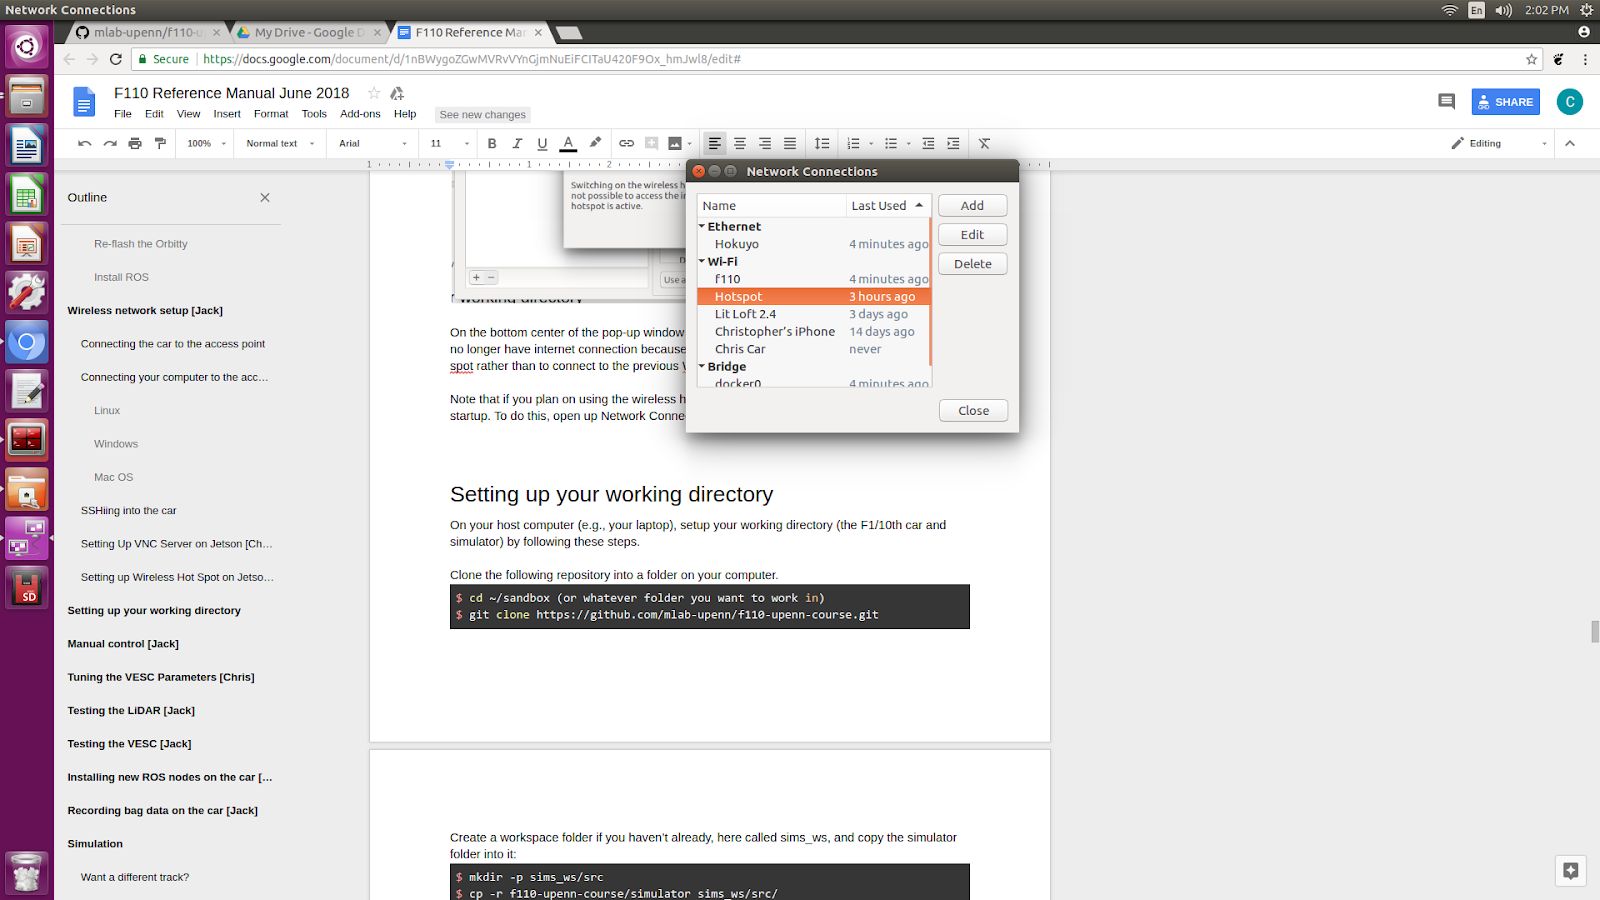
Under General click on “Automatically connect to this network when available”.
On your phone, tablet, or laptop you can now connect directly to this Hotspot, and ssh into it. The default IP address for Hotspot on the Jetson is 10.42.0.1.
3. Connecting the NVIDIA Jetson NX to WiFi
Connect the NVIDIA Jetson NX to F1TENTH_WIFI by clicking on wireless icon on top-right corner of Ubuntu Desktop and selecting F1TENTH_WIFI. This is done on the NVIDIA Jetson NX with the monitor, keyboard, and mouse connected to it and not the Pit/Host laptop. It might take a while for the NVIDIA Jetson NX to discover the wireless network.
After you’re connected to the wireless network, open a terminal and type:
$ ifconfig
You should see something similar to this:
$ eth0: flags=4099<UP,BROADCAST,MULTICAST>  mtu 1500
$         ether 00:04:4b:cb:d9:52  txqueuelen 1000  (Ethernet)
$         RX packets 0  bytes 0 (0.0 B)
$         RX errors 0  dropped 0  overruns 0  frame 0
$         TX packets 0  bytes 0 (0.0 B)
$         TX errors 0  dropped 0 overruns 0  carrier 0  collisions 0
$         device interrupt 40
$
$ lo: flags=73<UP,LOOPBACK,RUNNING>  mtu 65536
$         inet 127.0.0.1  netmask 255.0.0.0
$         inet6 ::1  prefixlen 128  scopeid 0x10<host>
$         loop  txqueuelen 1  (Local Loopback)
$         RX packets 1047  bytes 82631 (82.6 KB)
$         RX errors 0  dropped 0  overruns 0  frame 0
$         TX packets 1047  bytes 82631 (82.6 KB)
$         TX errors 0  dropped 0 overruns 0  carrier 0  collisions 0
$
$ rndis0: flags=4099<UP,BROADCAST,MULTICAST>  mtu 1500
$         ether ea:a2:37:fd:d0:e1  txqueuelen 1000  (Ethernet)
$         RX packets 0  bytes 0 (0.0 B)
$         RX errors 0  dropped 0  overruns 0  frame 0
$         TX packets 0  bytes 0 (0.0 B)
$         TX errors 0  dropped 0 overruns 0  carrier 0  collisions 0
$
$ usb0: flags=4099<UP,BROADCAST,MULTICAST>  mtu 1500
$         ether ea:a2:37:fd:d0:e3  txqueuelen 1000  (Ethernet)
$         RX packets 0  bytes 0 (0.0 B)
$         RX errors 0  dropped 0  overruns 0  frame 0
$         TX packets 0  bytes 0 (0.0 B)
$         TX errors 0  dropped 0 overruns 0  carrier 0  collisions 0
$
$ wlan0: flags=4099<UP,BROADCAST,MULTICAST>  mtu 1500
$         inet 195.0.0.5  netmask 255.255.255.0  broadcast 195.0.0.255
$         inet6 fe80::4df8:b83b:9390:319d  prefixlen 64  scopeid 0x20<link>
$         ether 0c:dd:24:99:e6:52  txqueuelen 1000  (Ethernet)
$         RX packets 12511  bytes 4918686 (4.9 MB)
$         RX errors 0  dropped 0  overruns 0  frame 0
$         TX packets 1262  bytes 196668 (196.6 KB)
$         TX errors 0  dropped 0 overruns 0  carrier 0  collisions 0
You should be able to find your car’s assigned IP address under wlan0, then after inet. In this example, the IP address is 195.0.0.5.
4. Connecting the Pit/Host Computer to WiFi
Now, on the Pit/Host laptop, connect to the same wireless network, F1TENTH_WIFI and find its IP Address. If your laptop running Linux or macOS, you could use the same ifconfig command in the terminal. On macOS, it may be under en0 or en1. In this example, the IP address of the Pit is 192.168.1.151.
If you’re running Linux on the Pit laptop in a virtual machine (VM), connect the Pit computer to the router. Depending on which VM software you have and the default VM configuration, you may also need to set its network adapter configuration to NAT mode. This ensures your VM will share the wireless connection with your host OS instead of controlling the adapter itself.
5. Connecting to the Pit/Host to the NVIDIA Jetson NX
Now that the car and the laptop are on the same network, you should check that you can ping the laptop from the car and you can ping the car from the laptop.
ping 192.168.1.151 (This is the IP address of the Pit computer.).ping 195.0.0.5 (This is the IP address of the NVIDIA Jetson NX).Remember to replace the IP addresses in the two lines above with your specific addresses.
You can now SSH into your car from your laptop. Use ssh in the terminal if you’re on macOS or Linux, use PuTTY if you’re on Windows.
We recommend using tmux while you’re ssh-ed into the car. You can install tmux via apt-get.
You can now disconnect the HDMI cable, monitor, keyboard, and mouse from the NVIDIA Jetson NX and still be able to control the NVIDIA Jetson NX remotely from the Pit computer!
Congratulations on making it through the System Configuration section! The Advanced Setups is optional and is not needed to finish setting up the vehicle.